 Skip to content

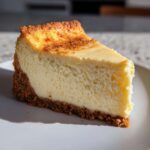
Listen, if you’ve ever stared longingly at a slice of New York Style Cheesecake in a bakery window, wondering how they get that rich, unbelievably creamy texture without any of the dreaded cracking, I have amazing news for you. You can achieve bakery style cheesecake at home, and guess what? You don’t need a scary water bath! Trust me, when I was stuck in that corporate burnout a few years back, the last thing I wanted was complicated baking projects. But the peace I found in mastering this **cheesecake recipe** has completely changed my perspective. This is my ultimate, foolproof roadmap to a truly rich, smooth, melt-in-your-mouth dessert. We’re cutting the worry and keeping all the decadent flavor. If you want to know more about my journey from spreadsheets to saucepans, check out my story over on the About page. Let’s conquer cheesecake together!
- Why This is the Best Cheesecake Recipe for Home Bakers
- Ingredients for This Classic New York Cheesecake Recipe
- How to Prepare the Ultimate Cheesecake Recipe Step-by-Step
- Simple Cheesecake Baking Tips for Guaranteed Success
- Decadent Dessert Ideas: Serving Suggestions for Your Cheesecake Recipe
- Storage and Reheating Instructions for Baked Cheesecake
- Variations on the Classic Cheesecake Recipe
- Frequently Asked Questions About This Cheesecake Recipe
- Nutritional Estimates for This Classic Baked Cheesecake Recipe
- Share Your Bakery Style Cheesecake at Home Results
Why This is the Best Cheesecake Recipe for Home Bakers
If you’re looking for the absolute Best Cheesecake Recipe, you’ve landed in the right spot! My number one goal here is always simple food that tastes incredible, and this recipe delivers that rich and creamy texture you dream about. You get that decadent, Bakery Style Cheesecake at Home without any of the mess.
We are skipping the stressful water bath entirely. That’s right—no more clumsy setups or worrying about leaks! This recipe uses specialized cooling steps that are my ultimate No Crack Cheesecake Secrets. It’s straightforward, I promise.
Achieving Rich and Smooth Cheesecake Texture
The smoothness comes down to two little rules that I stick to religiously. First, your cream cheese and eggs absolutely must be at room temperature. I mean *really* soft. Cold clumps mean lumpy batter, and we are aiming for velvety perfection here! Second, once the eggs go in, you mix on low and stop the second they disappear. Overbeating after the eggs are added is just inviting air bubbles, which equals cracks later on.
The Foolproof No Water Bath Method
This is where we cheat the system! Instead of steaming it in the oven, we use a slow transition back to room temperature. After baking, you just turn the oven off, crack the door open slightly—I usually stick a wooden spoon in there—and just let that cheesecake relax inside for a full hour. This gradual descent prevents that shock to the top layer that causes cracking. It’s the easiest way to guarantee a stunning, crack-free surface!
Ingredients for This Classic New York Cheesecake Recipe
Okay, getting the right ingredients is half the battle won! We need high-quality stuff here because there are so few ingredients in this straightforward dessert—we want that full, decadent flavor. Remember how much I love simple processes? Well, having everything measured out makes the mixing go super smoothly. You’ll notice a couple of items need specific temperatures; don’t skip that prep work!
If you’re ever looking for other buttery crust recipes, I have a fantastic flaky pie crust recipe that uses similar techniques, but for this cheesecake, the graham cracker base is what sets the New York tone.
For the Graham Cracker Crust Recipe
We start simple with the base. You’ll need about 1 1/2 cups of graham cracker crumbs. Don’t use the crumbs stuck at the bottom of the box if they look dusty; use fresh ones if you can! Mix those crumbs with 1/4 cup of granulated sugar. Then, carefully pour in 6 tablespoons of unsalted butter that you’ve melted down already. You just want to mix this until everything looks evenly damp, like wet sand. Then you press it *firmly* into the bottom of your 9-inch springform pan. Make sure it’s packed tight so it doesn’t crumble when you slice it later.
For the Creamy Cheesecake Filling
This is where the luxury comes in. For the best possible texture, you need 4 full (8 ounce) packages of full-fat cream cheese. And listen up: they need to be completely softened! Leave them out for at least two hours before you start. We also need 1 1/2 cups of granulated sugar, 1/4 cup of sour cream—trust me on the sour cream, it adds that slight tang—plus 1 teaspoon of vanilla extract and just a tiny pinch of salt to balance it all out.
Finally, the eggs! You need 4 large eggs, and again, these must be at room temperature—it stops them from cooling down the batter too fast. Gently pour in 1/2 cup of cold heavy cream right at the end. Getting your ingredients prepped correctly early on prevents lumps, and that is how we end up with that incredible, rich texture everyone raves about!
How to Prepare the Ultimate Cheesecake Recipe Step-by-Step
You’ve got your ingredients ready—wonderful! Now comes the assembly where we put all that prep work to good use. Following these steps carefully is exactly how we make this cheesecake recipe turn out rich and smooth every single time. Think of this part like building a perfect foundation; we need precision so the top layer can shine!
Step 1: Preparing and Pre-Baking the Graham Cracker Crust Recipe
First things first, get that oven warmed up to 350°F (175°C). Remember that crust base we mixed? Take your 9-inch springform pan—I always use one with a removable bottom, it just makes life easier—and make sure that buttery graham cracker mixture is pressed down very, very tightly on the bottom. We want it packed solid!
Pop that pan into the oven for about 8 minutes. This just gives the crust some structure so it doesn’t dissolve once the wet filling goes on. Once those 8 minutes are up, pull it out. Don’t let it cool completely, but you do need to reduce your oven temperature down to 325°F (160°C). We use a lower, slower bake for the filling, so get that temp adjusted now while you mix.
Step 2: Mixing the Creamy Cheesecake Filling
This is the make-or-break moment for that lovely, creamy cheesecake tutorial texture we want. Grab your big bowl and start with just the room-temperature cream cheese. Beat that on its own until it’s totally silky and I mean *zero* lumps remaining. If you see lumps now, you’ll see them later, so really work it smooth!
Next, add your sugar slowly while mixing. Once that’s integrated, mix in the sour cream, vanilla, and salt. Keep the speed low so you aren’t whipping air into it. Now for the eggs. This is serious patience time: Add them *one at a time*. You mix on low speed just until the yellow yolk vanishes into the batter, then stop and add the next one. Seriously, do not overbeat once the eggs are in!
For the very last step, gently fold in that heavy cream. Just a few turns with a spatula until everything looks uniform. We are trying to keep the fluff *out* so the cake stays dense and luscious.
Step 3: Baking and The Essential No Crack Cheesecake Secrets
Carefully pour all that beautiful batter over your slightly cooled crust. If you see any big bubbles popping up on the surface, gently tap the pan—a few firm raps on the counter usually releases them. That’s less air to cause issues later!
Bake this dream at 325°F (160°C) for about 55 to 70 minutes. How do you know it’s done? Look for this: the edges should look totally set, firm almost, but the center two inches should still have a very slight jiggle when you gently nudge the pan. It shouldn’t look liquid, just wobbly, like Jell-O.
Now, deploy the cooling secret! Turn your oven off immediately. Take a wooden spoon—any heavy wooden spoon works—and wedge it into the oven door so it stays propped open just a tiny bit. Leave the cheesecake in that cooling oven for a full hour! This slow, gentle temperature drop is the magic trick that prevents the top from collapsing or cracking.

Step 4: Chilling for Rich and Smooth Cheesecake
After that hour in the warm oven, take it out and let it cool completely on a wire rack—this might take another hour or two. Do not get impatient! Once it’s just warm to the touch, loosely tent it with plastic wrap. Then, move it to the fridge. We need a minimum of 6 hours chilling, but I always push for overnight. That long, cold rest is what locks in that incredible rich and smooth cheesecake texture. You wake up to perfection!
If you want to see some of my other favorite baked successes, check out my tutorial on cheesecake cupcakes—they use the same base idea but in mini form!
Simple Cheesecake Baking Tips for Guaranteed Success
I know we walked through the steps, but the difference between a ‘good’ cheesecake and the Best Cheesecake Recipe you’ve ever had usually comes down to these tiny details. I want you to feel totally confident making this—it’s all about discipline with your ingredients and your mixer speed. You’ve got this!
Ingredient Temperature Matters for Your Cheesecake Recipe
If you take away only one thing today, let it be this: room temperature ingredients are non-negotiable for that ultra-creamy result. Cold cream cheese fights you every step of the way; it creates lumps that you just can’t beat out, even with the best mixer. When your cream cheese is soft—yielding easily to a gentle poke—it blends seamlessly with the sugar and sour cream.
It’s the same deal with the eggs! Cold eggs shock the room-temperature cream cheese mixture, creating tiny pockets of unmixed fat and liquid. If your batter looks strange or won’t smooth out, check your ingredient temps first. Cold equals lumpy structure, period.
Handling Batter: Avoid Overmixing
Once those eggs are in there, you’ve pretty much committed to the texture. Think about it: when you beat batter too hard, especially after the eggs are added, you are literally whipping tons of air into it. This air wants to expand in the oven, which causes your cheesecake to puff up like a beach ball during baking.
But once it comes out and starts cooling, all that trapped air escapes, and boom—you get a sinkhole or a big ol’ crack right down the middle. We want that dense, velvety texture, remember? So mix those eggs on the lowest speed just until they combine. Less air means less drama later on. Keep it simple, keep it low speed!

If you are looking for other easy baking guides, feel free to check out my main recipe index for more straightforward inspiration!
Decadent Dessert Ideas: Serving Suggestions for Your Cheesecake Recipe
Okay, holding back the urge to slice into this masterpiece right away is the hardest part, right? But once you’ve chilled it properly, it’s time to make it shine! Since this is a super rich New York Style cheesecake, you don’t need to do much heavy lifting on the topping front. It really shines on its own merit.
My classic recommendation, which gives it just a slight tang to cut through that richness, is a thin layer of a sour cream topping. You just whip up some sour cream with a tiny bit of powdered sugar and vanilla—I usually make this while the cheesecake is chilling. You spread that on top *after* it’s completely cold. It sets up beautifully and tastes amazing.

If you’re not into the sour cream swirl, fresh fruit is always the way to go, in my opinion. Think bright colors! A handful of fresh raspberries or some sliced strawberries just placed on top makes the presentation look absolutely professional. If you’re feeling a little extra fancy, a drizzle of good quality chocolate ganache works wonders, or maybe a little homemade caramel sauce. Speaking of extra fancy desserts, I have a recipe for a chocolate martini that pairs perfectly if you need a sophisticated sip alongside your slice!
The best part is that whatever you choose, the dense, creamy cheesecake base makes everything else taste better. Keep it simple, and enjoy that perfect slice!
Storage and Reheating Instructions for Baked Cheesecake
Alright, you’ve made it through the marathon bake and the long chill—the hard work is done! Now we need to talk about keeping this beauty perfect until you’re ready to slice into it. Since this is such a rich, decadent dessert, storage is actually pretty simple, but you have to be careful about two things: drying out and absorbing fridge smells. Nobody wants a vanilla-scented cheesecake that tastes vaguely like last night’s onion soup, right?
The truth is, you really shouldn’t reheat cheesecake; it’s meant to be served cold or slightly chilled. If it gets too warm, that beautiful, tight structure we worked so hard for starts to get soft and we run right back into the cracks issue. So, let’s focus on perfect chilling instead!
Keep your cheesecake in the springform pan, but make sure you remove the outer ring once it’s fully firm enough to handle. Then, cover the top tightly with plastic wrap. And I mean *tightly*. You want a good seal to lock in that pure, creamy flavor. If you are worried about the wrap touching the surface, you can lightly spray the plastic wrap itself with a little cooking spray before you cover it, or just place a piece of parchment paper right on the surface before the plastic goes over the top of the pan rim.

It will keep wonderfully in the refrigerator for at least 4 to 5 days. Honestly, I think this cheesecake recipe tastes even better on day two, so don’t feel like you have to devour the whole thing immediately! If you happen to have leftovers after that, yes, you can freeze it. Wrap the entire chilled cake very well in both plastic wrap and then a layer of foil to protect it from freezer burn. It’ll keep great in the freezer for about a month, thawing slowly overnight in the fridge before serving.
Variations on the Classic Cheesecake Recipe
While I stand by this Classic New York style as the pinnacle of decadent dessert experiences, I totally get wanting a little flavor adventure sometimes! You’ve mastered the technique now, right? The beauty of this base recipe is how easily it lets you play around with gourmet flavors. It’s a canvas, really. It’s fantastic plain, but you can easily turn this into a stunning seasonal treat that will blow everyone away.
If you love my more adventurous bakes, wait until you see how I’ve used this cheesecake concept in my Churro Cheesecake Bars recipe! But for right now, let’s stick to simple adjustments on this creamy giant.
Creating a Strawberry Swirl Cheesecake
If you’re ready for a Strawberry Swirl Cheesecake, this is super easy to incorporate right before it hits the oven. You just need a simple, thick fruit reduction. Take about 1 cup of strawberries—fresh or frozen works—and cook them down on the stovetop with just a couple of tablespoons of sugar and maybe a tiny squeeze of lemon juice until it’s thick. You want it jammy, not watery!
Once your filling is in the pan (right before that slow cool-down step!), take about half a cup of that thick strawberry goodness and dollop it randomly over the cheesecake surface. Then, take a butter knife or a skewer and gently trace a figure-eight pattern through the batter. Don’t swirl too much, or you’ll just make pink cheesecake! A few gentle passes is all you need to get those gorgeous ribbons of color. Bake as directed, and you’ll have the perfect swirl!
Simple Cheesecake Baking Tips for Lemon Cheesecake Recipe
For something bright and zesty, turning this into a Lemon Cheesecake Recipe is a total winner, especially when spring rolls around. The key is to layer that lemon flavor. If you want a subtle lift, add the zest of one whole lemon right into the filling along with the vanilla extract. That bright citrus oil is packed with aroma!
If you want it truly punchy and tangy, replace that 1/4 cup of sour cream with 1/4 cup of fresh lemon juice. Now, be careful here: if you add too much liquid, you might affect the set, so I usually replace the sour cream *and* add the zest of one lemon. You absolutely must ensure that lemon juice is at room temperature when you add it, or it can start to curdle the cream cheese mixture just a bit. A little bit of zest mixed into the crust crumbs also adds a gorgeous background note!
If you’re a big fan of my layered desserts, you might also want to check out how I use cream cheese filling in my Carrot Cake Cheesecake fusion recipe for serious indulgence!
Frequently Asked Questions About This Cheesecake Recipe
It’s funny how certain quirks of cheesecake making always pop up, isn’t it? When I first started messing around with this recipe, I had a million questions too. I’ve gathered the ones I hear most often right here to help you feel totally relaxed about baking this masterpiece. Don’t stress; these answers are simple!
Can I substitute the sour cream in this cheesecake recipe?
That’s a great question! Sour cream is really important here because it gives the filling that signature slight tang and helps keep the texture incredibly rich. If you absolutely need an alternative for the 1/4 cup, plain, full-fat Greek yogurt is the best swap. Make sure it’s full-fat though, because lower fat content can change the texture.
Just like with the cream cheese, make sure your yogurt is room temperature before adding it in. If you skip that, you risk curdling the batter slightly right there in the middle of the mixing process. It’s a small step, but it makes a difference in getting that smooth result.
How do I know if my cheesecake is perfectly baked (Creamy Cheesecake Tutorial)?
This is the crucial moment that separates a dry cheesecake from a luscious one! Remember Step 3? When you gently nudge the pan, the outer ring should look completely firm, but the center area—about the size of a tennis ball or maybe two inches wide—should still have a noticeable, soft jiggle. It shouldn’t look like liquid soup; it should look like really thick Jell-O.
If you bake it until that jiggle is gone, you’ve gone too far, and it will definitely dry out as it cools. Trust the wobble! That slight movement is the residual heat doing the final firming up during that long, slow cool-down time in the turned-off oven. Following that slow cool is the core of this Creamy Cheesecake Tutorial!
Can I make this Easy Homemade Cheesecake ahead of time?
Yes, please do! If you want the absolute best quality result from this Easy Homemade Cheesecake, chilling it overnight is actually part of the recipe’s success. I know it’s tough waiting, but that long chill time (at least 6 hours, but 12-18 is better) allows those fats and dairy proteins to fully set up and become that dense, velvety texture we crave.
You can generally leave it covered in the fridge for up to 5 days. I find the flavor gets even richer on day two! If you need to store it for longer, you can totally freeze it, but I always recommend making it the day before you plan to serve it for the best taste experience. If you end up with extra servings, I have some fun ideas for apple crumb bars you can make while you wait for your next craving to strike!
If you try this and have any other tricky questions, feel free to drop me a line on my page over at Facebook!
Nutritional Estimates for This Classic Baked Cheesecake Recipe
Now, I’m Alex, and I talk a lot about joy in food, not counting every single calorie! But I know some of us like to have a general idea of what we’re diving into, especially when we make something this rich. So, here are the ballpark numbers for one slice of this decadent, classic baked cheesecake. Please remember these are only estimates based on the ingredients listed above, using standard measurements. Cheesecake is definitely a treat, but every slice is pure heaven!
Think of this fantastic dessert as a decadent indulgence, not an everyday snack. We’ve used full-fat cream cheese for that essential rich texture, so naturally, the numbers reflect that deliciousness! I highly recommend just enjoying every single bite.
- Serving Size: 1 slice
- Calories: 450
- Sugar: 35g
- Sodium: 350mg
- Fat: 30g
- Saturated Fat: 18g
- Unsaturated Fat: 12g
- Trans Fat: 0.5g
- Carbohydrates: 40g
- Fiber: 1g
- Protein: 8g
- Cholesterol: 120mg
See? Worth every single calorie! That smoothness takes commitment, but the payoff is huge. Enjoy this luxurious dessert when you need a little pick-me-up!
Share Your Bakery Style Cheesecake at Home Results
Whew! We made it through the baking, the cooling, and the agonizing wait for the chill. Now comes my favorite part—seeing your stunning results! Honestly, when someone tells me they tried my totally foolproof cheesecake recipe and it came out perfectly creamy, that’s what keeps me inspired in the kitchen!
I really hope you feel proud of what you created. Whether you kept it plain New York style, or you added a swirl of strawberry or lemon, I want to hear about it. Did it achieve that bakery-level smoothness you were hoping for? Did the no-water-bath trick work its magic for you?
Please tell me how it went down in the comments below! Leave a star rating so other home bakers know this recipe is the real deal. If you ran into any tiny snags, ask me anything! I’m happy to hop in and help troubleshoot future bakes. If you want to send me a picture of your gorgeous slice, you can always reach out directly through the contact page. Happy slicing, friends—you earned it!
PrintClassic New York Cheesecake Recipe: Rich, Creamy, and No Water Bath Secrets
I’m Alex, and I’m glad you’re here. This is the ultimate, foolproof recipe for a rich, creamy, and smooth Classic New York Cheesecake. You get bakery-style results at home without needing a stressful water bath.
- Prep Time: 25 min
- Cook Time: 70 min
- Total Time: 8 hours 35 min
- Yield: 12 servings 1x
- Category: Dessert
- Method: Baking
- Cuisine: American
- Diet: Vegetarian
Ingredients
- For the Crust: 1 1/2 cups graham cracker crumbs
- 1/4 cup granulated sugar
- 6 tablespoons unsalted butter, melted
- For the Filling: 4 (8 ounce) packages full-fat cream cheese, softened to room temperature
- 1 1/2 cups granulated sugar
- 1/4 cup sour cream
- 1 teaspoon vanilla extract
- 1/4 teaspoon salt
- 4 large eggs, room temperature
- 1/2 cup heavy cream
Instructions
- Preheat your oven to 350°F (175°C). You will need a 9-inch springform pan.
- Prepare the crust: In a medium bowl, mix the graham cracker crumbs and 1/4 cup sugar. Pour in the melted butter and mix until the crumbs are evenly moistened.
- Press the crumb mixture firmly and evenly into the bottom of the springform pan. Bake the crust for 8 minutes. Remove from the oven and let it cool while you prepare the filling. Reduce the oven temperature to 325°F (160°C).
- Prepare the filling: In a large bowl, use an electric mixer to beat the softened cream cheese until it is completely smooth and there are no lumps. This step is key for a creamy texture.
- Gradually add the 1 1/2 cups of sugar to the cream cheese mixture, beating until just combined. Scrape down the sides of the bowl.
- Mix in the sour cream, vanilla extract, and salt until smooth.
- Add the eggs one at a time, mixing on low speed after each addition only until the yolk disappears. Do not overmix the batter once the eggs are added.
- Gently mix in the heavy cream until the batter is uniform.
- Pour the filling over the cooled crust in the springform pan. Gently tap the pan on the counter a few times to release any large air bubbles.
- Bake at 325°F (160°C) for 55 to 70 minutes. The edges should look set, but the center 2 inches should still have a slight jiggle when gently nudged.
- Turn off the oven, but leave the cheesecake inside with the oven door propped open slightly (use a wooden spoon) for 1 hour. This slow cooling prevents cracking.
- Remove the cheesecake from the oven and let it cool completely on a wire rack.
- Once cool, cover the pan loosely with plastic wrap and refrigerate for at least 6 hours, or preferably overnight, before serving. This resting time develops the rich, smooth texture.
Notes
- Use room temperature ingredients for the filling; this prevents lumps and ensures a smooth batter.
- Do not overbeat the batter after adding the eggs; too much air causes the cheesecake to puff up and then crack as it cools.
- If you want a topping, serve with fresh strawberries or a simple sour cream topping after the cheesecake has chilled completely.
Nutrition
- Serving Size: 1 slice
- Calories: 450
- Sugar: 35g
- Sodium: 350mg
- Fat: 30g
- Saturated Fat: 18g
- Unsaturated Fat: 12g
- Trans Fat: 0.5g
- Carbohydrates: 40g
- Fiber: 1g
- Protein: 8g
- Cholesterol: 120mg
