 Skip to content
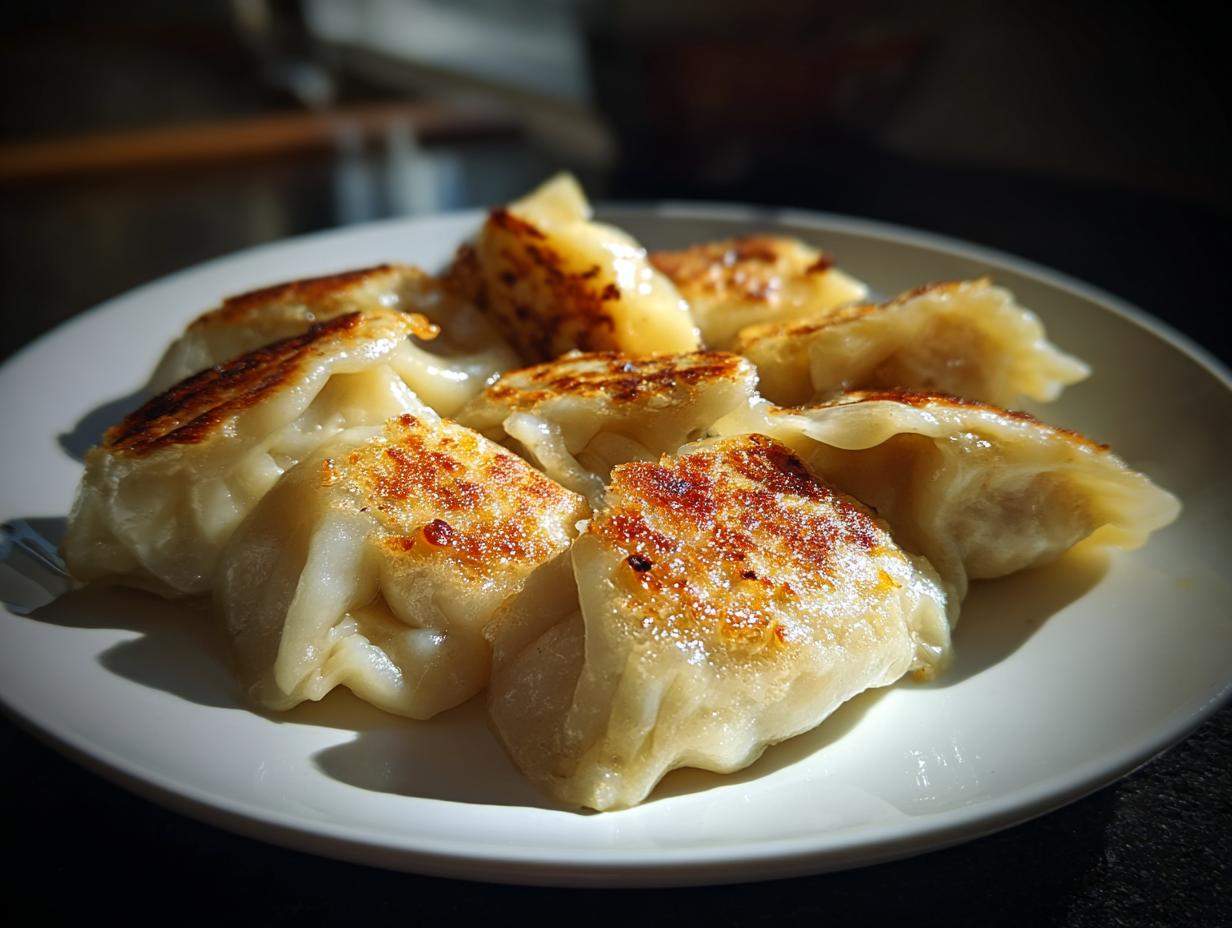

There’s just something so incredibly satisfying about making food from scratch, right? You know, like that feeling when you pull a beautiful loaf of bread out of the oven or finally nail that tricky recipe? For me, that same pure joy comes from making Traditional Chinese Dumplings. These little pockets of deliciousness – filled with savory pork and crisp cabbage – are more than just food; they’re a connection to tradition, perfect for celebrating Lunar New Year or, honestly, just making any weeknight feel special.
I remember when I was first getting comfortable in the kitchen, cooking felt like a chore, not a joy. But then I tried my hand at dumplings. Sure, my first few attempts were a little messy, and the wrappers weren’t exactly Pinterest-perfect, but the taste was already there! It’s amazing how simple ingredients like pork, cabbage, and a few pantry staples can come together to create something so comforting and flavorful. This recipe is all about bringing that authentic taste into *your* kitchen with techniques that are totally doable, even if you’re new to dumpling making. Trust me, you’re going to love it!
- Why You'll Love These Traditional Chinese Dumplings
- Authentic Jiaozi: Ingredients for Traditional Chinese Dumplings
- Crafting Traditional Chinese Dumplings: Step-by-Step
- Tips for Success with Your Traditional Chinese Dumplings
- Make-Ahead and Freezer Tips for Lunar New Year Dumplings
- Serving Suggestions for Your Pork Cabbage Dumplings
- Frequently Asked Questions about Traditional Chinese Dumplings
- Nutritional Estimates for Traditional Chinese Dumplings
- Share Your Traditional Chinese Dumplings Creations!
Why You’ll Love These Traditional Chinese Dumplings
Okay, so why are these the dumplings for you? Well, let me tell you:
- They’re surprisingly easy! We’re breaking down everything, from the dough to the filling, so you can feel totally confident.
- Incredible flavor, guaranteed. We’re using classic ingredients that just work together perfectly for that authentic taste.
- So versatile! Make a big batch for Lunar New Year, or freeze some for a super quick, delicious weeknight dinner. They really are freezer-friendly dumplings.
- The satisfaction of homemade. There’s just nothing like making something delicious with your own hands to share with loved ones. It’s pure joy!
Authentic Jiaozi: Ingredients for Traditional Chinese Dumplings
Alright, let’s talk ingredients! This is where the magic starts for our pork cabbage dumplings. You really don’t need a ton of fancy stuff, just good quality basics to get that authentic jiaozi flavor. For the filling, we’re using:
- 1 lb ground pork – go for something with a decent fat content, it makes the filling so much juicier!
- 1/2 head napa cabbage, finely chopped – make sure it’s really chopped up small so it mixes in nicely.
- 3 green onions, finely chopped – the green parts and some of the white bits add great flavor.
- 1 tbsp fresh ginger, minced – don’t skip this, it gives that essential zing!
- 2 cloves garlic, minced – because garlic makes everything better, right?
- 1 tbsp soy sauce – for that savory umami punch.
- 1 tsp sesame oil – just a touch for that wonderful aroma.
- 1/2 tsp salt and 1/4 tsp white pepper – for seasoning.
And of course, you’ll need about 50 round dumpling wrappers. You can totally grab these from the Asian grocery store – they’re a real time-saver! But if you’re feeling adventurous, making your own homemade dumpling wrappers is super rewarding, and I’ll show you how in a sec. Oh, and keep a little bowl of water handy for sealing; it’s key!
Homemade Dumpling Wrappers: The Secret to Authentic Jiaozi
Okay, so making your own wrappers sounds intimidating, but trust me, it’s SO easy and totally worth it! You really taste the difference. All you need is:
- 2 cups all-purpose flour
- 1/2 cup warm water
Seriously, that’s it! Just mix the flour and water together in a bowl. Start with a spoon, then get your hands in there. You want to knead it for about 5 or 10 minutes until it’s smooth and feels like a nice, soft earlobe. It shouldn’t be sticky, if it is, just add a tiny pinch more flour. Then, cover the dough with a damp cloth or plastic wrap and let it rest for at least 30 minutes. This resting step is super important, it makes the dough way more pliable and easier to roll out thinly. This step is a game-changer for getting that perfect tender wrapper.
Crafting Traditional Chinese Dumplings: Step-by-Step
Okay, now for the fun part – actually putting these delicious dumplings together! It’s like a little assembly line, and it’s honestly pretty therapeutic. Once your dough has rested and your filling is ready, here’s how we do it:
- Prep Your Station: Make sure you have your wrappers ready, your filling scooped into a bowl (I like to keep my filling really well-mixed, so I’ll give it another stir right before I start filling; this is my little trick to ensure every bite is packed with flavor!), and that bowl of water for sealing.
- Filling ‘Em Up: Grab a wrapper. Spoon about a tablespoon of the pork and cabbage filling right into the center. Don’t overfill it, or it’ll get messy trying to seal!
- Seal the Deal: Here comes the pleating!
Mastering the Pleating Technique for Pork Cabbage Dumplings
This is where your dumplings get their cute little shapes and, more importantly, stay sealed while they cook! It’s easier than it looks. Take your filled wrapper and just fold it in half, bringing the edges together. Now, starting from one corner, make small, overlapping pleats along the edge. Pinch each pleat tightly as you go. The key is to push out any air trapped inside as you seal. You want a nice, secure edge so none of that yummy filling escapes into the boiling water. It takes a little practice, but even if your first few aren’t picture-perfect, they’ll still taste amazing!
Boiled Chinese Dumplings: Achieving Perfection
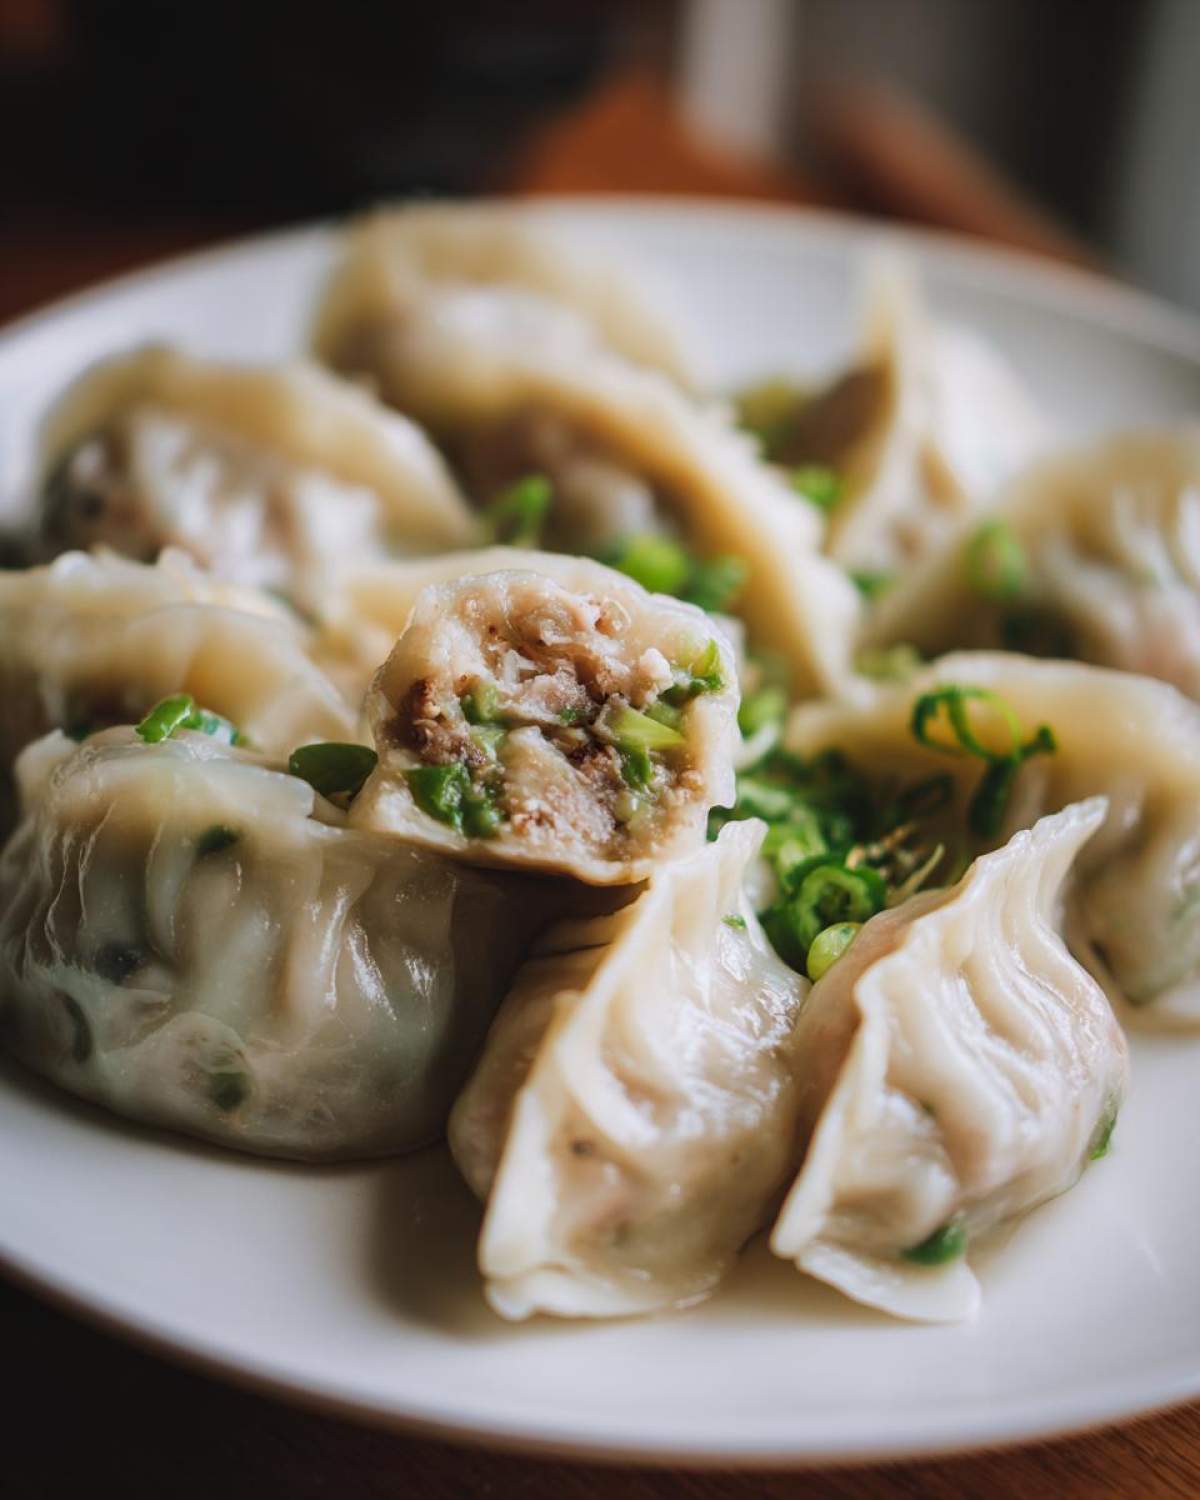
Once you’ve got a nice pile of beautifully pleated dumplings ready to go, it’s time to cook them! Bring a big pot of water to a rolling boil – and I mean a good, vigorous boil. Carefully drop your dumplings into the water, maybe 10-15 at a time, depending on how big your pot is. Give them a gentle stir right away with a wooden spoon to make sure they don’t stick to the bottom of the pot. Once the water comes back up to a boil, let them cook for about 5-7 minutes. You’ll know they’re ready when they float to the top and look plump and slightly translucent. Then, just scoop them out with a slotted spoon. So simple, so good!
Tips for Success with Your Traditional Chinese Dumplings
Making dumplings can feel like a bit of an art form, but really, it’s all about a few key things. First off, that filling consistency is crucial! You want it somewhere between a paste and crumbly – not too wet and not too dry. If it feels a bit too loose, just stir in a tiny bit more cooked cabbage, or even a pinch more flour. For the wrappers, aim for thin, but not so thin they’ll tear when you’re pleating them. If you’re using store-bought, they’re usually pretty perfect! But if you made yours, rolling them out evenly makes all the difference. And remember, a good seal is your best friend – make sure those pleats are pinched tight!
Now, about these being freezer friendly dumplings: this is a lifesaver! After you’ve pleatd them, lay them in a single layer on a baking sheet lined with parchment paper. Pop that baking sheet right into the freezer. Once they’re frozen solid – usually about an hour or so – you can just transfer them to a freezer bag. This way, they won’t stick together and you’ll have perfectly portioned dumplings ready whenever the craving strikes!
Make-Ahead and Freezer Tips for Lunar New Year Dumplings
Okay, listen up, because this is a total game-changer, especially if you’re prepping for Lunar New Year or just want delicious dumplings on demand: these babies freeze like a dream! Seriously, making a big batch and freezing them is the secret weapon to having homemade freezer friendly dumplings ready anytime. It saves so much time and makes celebrating traditions like the Lunar New Year so much easier.
Here’s how you do it: after you’ve made your beautiful Traditional Chinese Dumplings and pleated them all up, don’t cook them! Instead, grab a baking sheet and line it with parchment paper. This is super important because it stops them from sticking to the pan and to each other once they’re frozen. Lay your uncooked dumplings on the parchment paper in a single layer. Make sure they aren’t touching each other. Then, pop that baking sheet right into the freezer for about an hour, or until they’re solid. Once they’re frozen hard, carefully transfer them into a freezer-safe bag or container. You can keep them like this for a couple of months!
When you’re ready to cook your frozen darlings, just toss them straight from the freezer into your boiling water. Don’t thaw them first! They’ll need a few extra minutes in the boiling water compared to fresh ones, maybe an extra 2-3 minutes, so look for them to float and be cooked through. It’s that simple!
Serving Suggestions for Your Pork Cabbage Dumplings
Now that you’ve got this amazing batch of traditional Chinese dumplings, you need something to dip them in, right? My absolute go-to is a simple soy-ginger sauce – it’s just soy sauce, a splash of rice vinegar, a drizzle of sesame oil, and some finely minced fresh ginger. So easy and so good! A little chili oil on the side is also fantastic if you like a bit of heat.
Frequently Asked Questions about Traditional Chinese Dumplings
Gosh, I always get so many questions when people try making dumplings for the first time, and that’s totally normal! It’s such a fun process, but a few little things can sometimes trip you up. Let’s clear a few things up about our beloved Traditional Chinese Dumplings.
Can I use pre-made wrappers for these pork cabbage dumplings?
Oh, absolutely! While making your own homemade dumpling wrappers is super rewarding, store-bought wrappers are a fantastic time-saver, especially on busy weeknights. Just make sure you grab the round ones specifically for dumplings, and keep them covered with a damp cloth so they don’t dry out while you’re filling them.
What if my dumpling wrappers tear when I’m pleating?
Don’t panic! It happens. If a wrapper tears a little, you can often save it. Just dab a bit more water around the seam and gently press the torn edges together. For holes, you can even use a tiny scrap of another wrapper, dab it with water, and carefully patch it up. They might not look super pretty, but they’ll still seal and taste just as delicious!
How do I prevent my dumplings from sticking together during cooking?
This is a common one! The best trick is to make sure your pot of water is at a rolling boil *before* you add the dumplings, and then give them a gentle stir right away. This stops them from clumping on the bottom. Also, don’t overcrowd the pot! Cook them in batches if you have to. If you’re freezing them, the parchment paper trick is key – making sure they’re frozen individually before bagging them will make sure they pop right apart when you’re ready to cook.
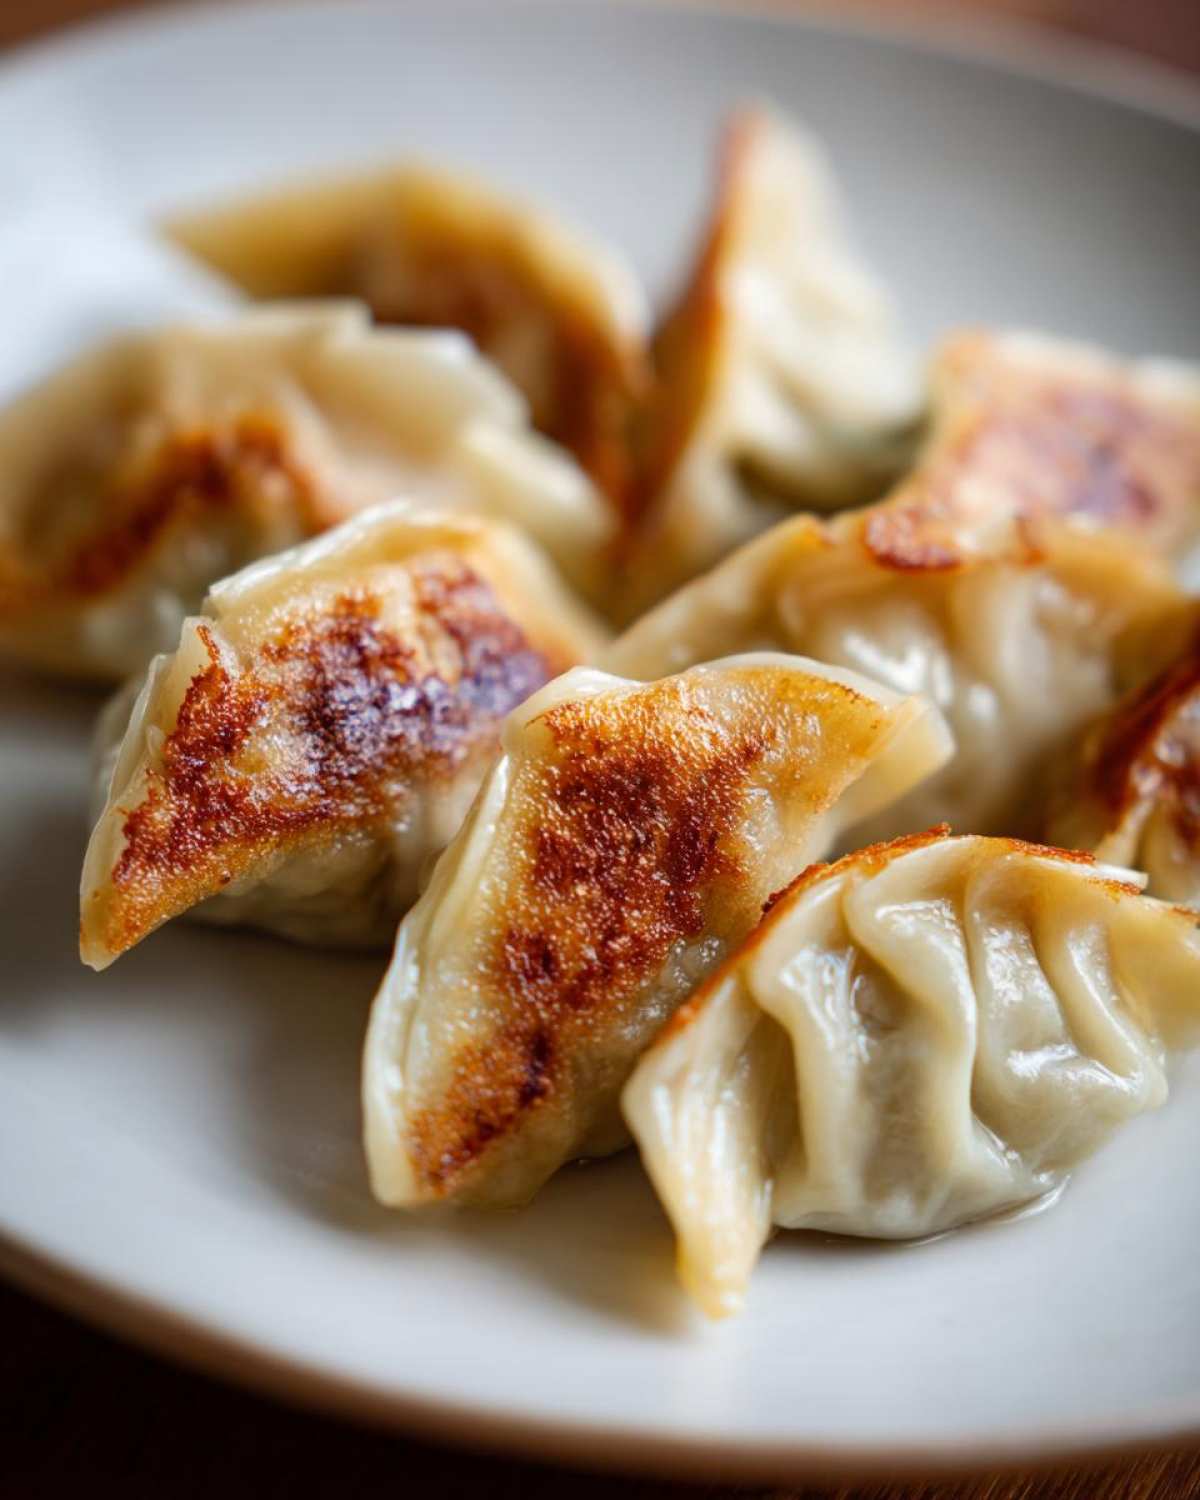
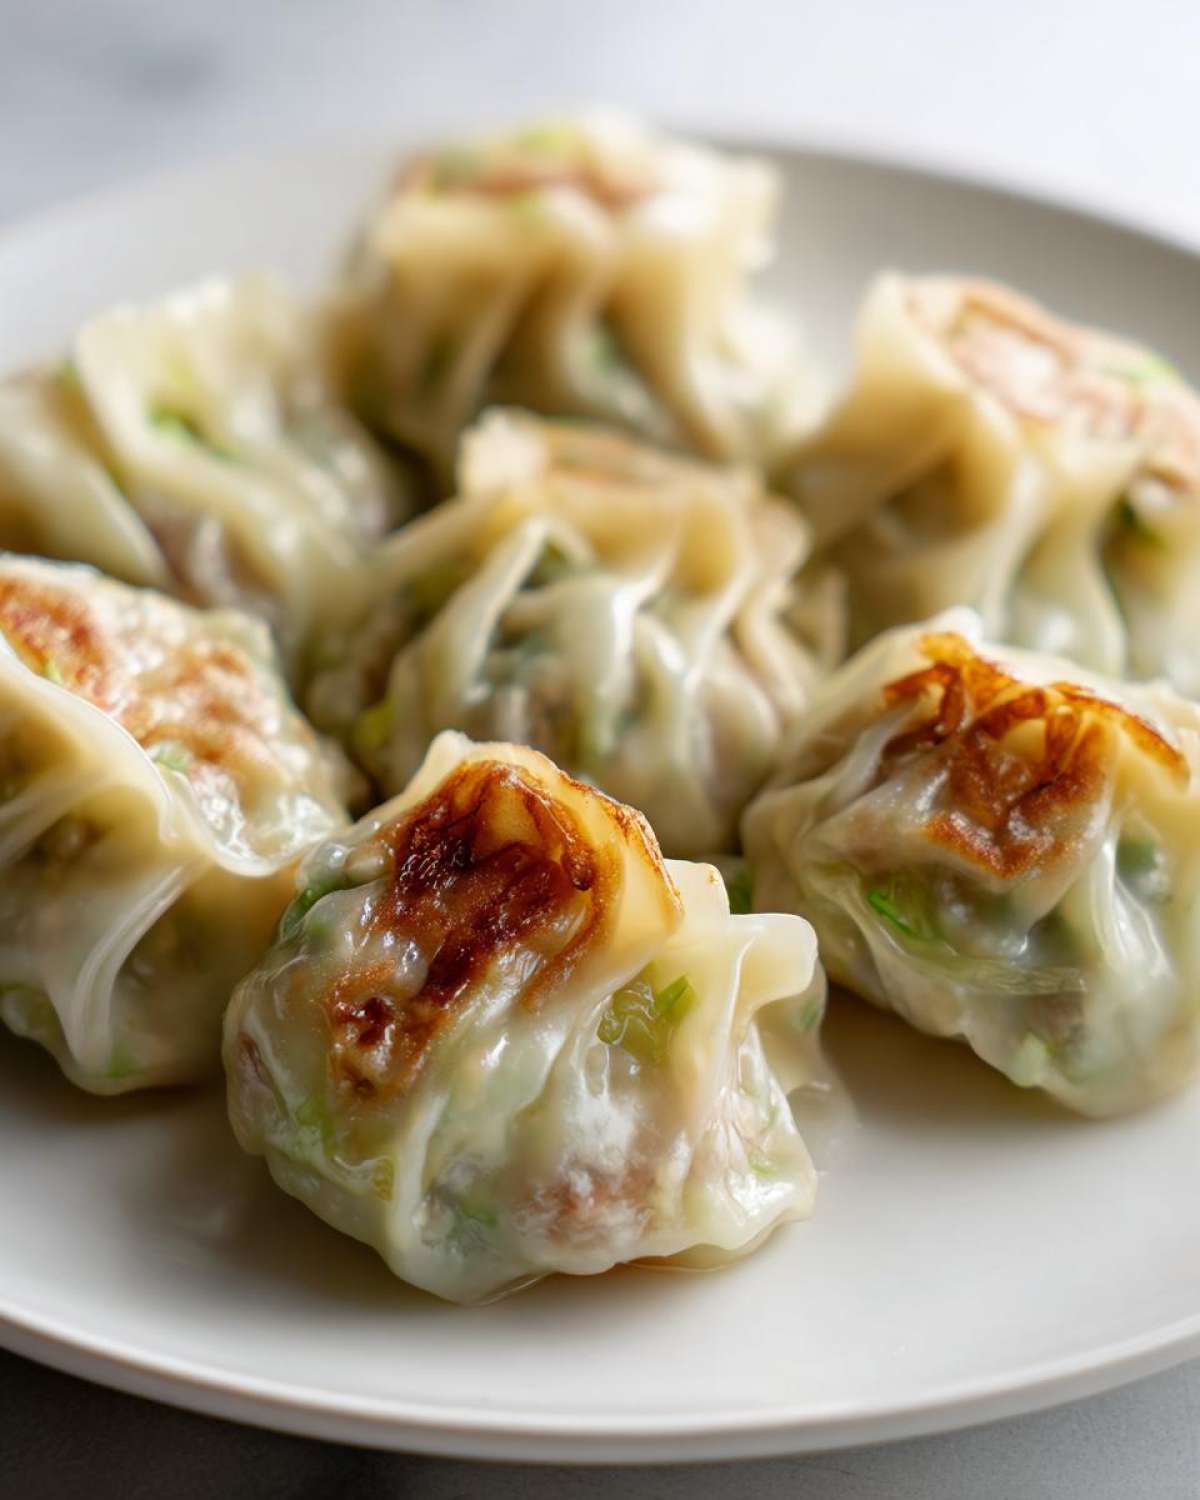
Can I pan-fry these dumplings instead of boiling them?
You totally can! Pan-frying gives them a lovely crispy bottom, which is delicious. After you’ve pleated them, heat a tablespoon or two of oil in a non-stick skillet over medium-high heat. Place the dumplings flat side down, cook for about 2-3 minutes until golden brown, then carefully add about 1/4 cup of water to the pan and immediately cover it. Let them steam for about 5-7 minutes, or until the water has evaporated and the dumplings are cooked through. It’s a different kind of yummy!
What are the best dipping sauces for authentic jiaozi?
Oh, the sauces! My favorite is a simple soy-ginger sauce: soy sauce, a little rice vinegar, a tiny bit of sesame oil, and some super finely minced fresh ginger. You can also add a pinch of sugar or some chopped cilantro. A sprinkle of chili flakes or a drizzle of chili oil on top is fantastic if you like a bit of heat. Whatever you choose, it just takes your lunar new year dumplings or weeknight meal to the next level!
Nutritional Estimates for Traditional Chinese Dumplings
Just a little note on nutrition! Since everyone’s ingredients can vary just a smidge, these amounts are estimates for one lovely dumpling. You’re looking at roughly 50 calories, with about 2g of fat, 3g of protein, and 5g of carbs. It’s a good measure to keep in mind, but honestly, the joy these bring is the most important part!
Share Your Traditional Chinese Dumplings Creations!
Okay, now it’s YOUR turn! I truly hope you give these Traditional Chinese Dumplings a try. Whether you’re making pork cabbage dumplings for the first time or you’re a seasoned pro, I’d absolutely *love* to hear how they turn out for you. Did you discover a new favorite way to pleat them? Did your family devour them? Pop your thoughts in the comments below, or even better, share a pic of your amazing creations on Facebook and tag me at @PureCookingJoy – seeing your culinary adventures is honestly the best part of all of this!
PrintTraditional Pork and Cabbage Dumplings
Learn to make authentic Chinese pork and cabbage dumplings from scratch, including homemade wrappers and pleating techniques. These freezer-friendly dumplings are perfect for Lunar New Year or any weeknight meal.
- Prep Time: 45 min
- Cook Time: 10 min
- Total Time: 55 min
- Yield: 50 dumplings 1x
- Category: Dinner
- Method: Boiling
- Cuisine: Chinese
- Diet: Vegetarian
Ingredients
- 1 lb ground pork
- 1/2 head napa cabbage, finely chopped
- 3 green onions, finely chopped
- 1 tbsp fresh ginger, minced
- 2 cloves garlic, minced
- 1 tbsp soy sauce
- 1 tsp sesame oil
- 1/2 tsp salt
- 1/4 tsp white pepper
- 50 dumpling wrappers
- Water for sealing
Instructions
- In a large bowl, combine ground pork, napa cabbage, green onions, ginger, garlic, soy sauce, sesame oil, salt, and white pepper. Mix well until thoroughly combined.
- To make the wrappers, combine 2 cups all-purpose flour and 1/2 cup warm water. Knead until a smooth dough forms. Let rest for 30 minutes.
- Roll out the dough thinly and cut into 3-inch circles for wrappers.
- Place about 1 tablespoon of filling in the center of a wrapper.
- Moisten the edge of the wrapper with water. Fold the wrapper in half and pleat the edges to seal.
- Bring a large pot of water to a boil. Add dumplings and cook for 5-7 minutes, or until they float and are cooked through.
- Remove dumplings with a slotted spoon.
- Serve immediately with your favorite dipping sauce.
Notes
- For freezer-friendly dumplings, place uncooked dumplings on a baking sheet lined with parchment paper and freeze until solid. Transfer to a freezer bag.
- To cook frozen dumplings, add them directly to boiling water and cook for a few extra minutes until heated through.
- You can pan-fry these dumplings for a crispy bottom.
Nutrition
- Serving Size: 1 dumpling
- Calories: 50
- Sugar: 1g
- Sodium: 100mg
- Fat: 2g
- Saturated Fat: 1g
- Unsaturated Fat: 1g
- Trans Fat: 0g
- Carbohydrates: 5g
- Fiber: 0g
- Protein: 3g
- Cholesterol: 10mg
