 Skip to content

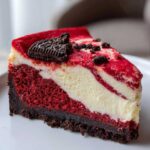
Oh, my goodness, are you ready for something truly decadent? Sometimes you just need a dessert that screams “special occasion,” and nothing does that better than this Red Velvet Cheesecake. Forget struggling through complicated bakes; I’m sharing my formula for The Ultimate Creamy Red Velvet Cheesecake with Oreo Crust. When I first started sharing my recipes here at Pure Cooking Joy, I realized how much happiness a gorgeous, show-stopping dessert could bring to a table. Trust me, making this dessert, with its vibrant color and smooth texture, is going to bring you that same quiet joy. It’s surprisingly easy, and everyone always asks for the secret!
If you’ve ever loved that beautiful carrot cake cheesecake hybrid but wanted a bit more drama in your life, this is it. We are combining the beloved, rich flavors of velvet cake right into the creamiest filling you can imagine. This recipe is pure indulgence, and I can’t wait for you to try it.
- Why This Red Velvet Cheesecake Recipe is Your Next Showstopper Dessert
- Gathering Ingredients for Your Red Velvet Cheesecake
- Step-by-Step Instructions for the Red Velvet Cheesecake
- Tips for a Perfect Red Velvet Cheesecake Every Time
- Variations on the Classic Red Velvet Cheesecake Recipe
- Serving Suggestions for Your Decadent Dessert
- Storing and Keeping Your Homemade Cheesecake Fresh
- Frequently Asked Questions About Red Velvet Cheesecake
- Nutritional Estimates for This Red Velvet Cheesecake
- Share Your Baking Joy
- Nutritional Estimates for This Red Velvet Cheesecake
- Share Your Baking Joy
Why This Red Velvet Cheesecake Recipe is Your Next Showstopper Dessert
Look, there are desserts, and then there are showstopper desserts. This red velvet cheesecake absolutely falls into the latter category. Forget struggling through complicated bakes; I’m sharing my formula for The Ultimate Creamy Red Velvet Cheesecake with Oreo Crust. When I first started sharing my recipes here at Pure Cooking Joy, I realized how much happiness a gorgeous, show-stopping dessert could bring to a table. Trust me, making this dessert, with its vibrant color and smooth texture, is going to bring you that same quiet joy. It’s surprisingly easy, and everyone always asks for the secret!
If you’re looking for that rich, deeply satisfying chocolate flavor you see in my chocolate crinkle cookies but want it in a creamy cake form, you’ve found your winner. This isn’t just cheesecake; it’s an experience waiting to happen.

Achieving That Signature Creamy Cheesecake Texture
The secret to that melt-in-your-mouth texture? Patience with your dairy, my friends. It’s critical that your cream cheese, eggs, and sour cream are all at room temperature—seriously, don’t rush this! Also, once those eggs go in, you need to mix on low and stop as soon as they disappear. Overmixing traps air, and trapped air causes cracks. Low and steady wins the race for a smooth finish.
The Perfect Balance: Red Velvet Cake and Cheesecake Fusion
What I love most is how the flavors play off each other. You get the richness of the cheesecake, but then that little hint of tanginess and cocoa comes through from the red velvet. It’s not too sweet, which is why it’s so addictive. This velvet cake and cheesecake combination proves that sometimes two awesome things are even better when baked together. It’s richer than a standard cake but lighter than a pure cheesecake pound for pound.
Gathering Ingredients for Your Red Velvet Cheesecake
Alright, let’s get serious for a second. To get that stunning layer effect and that incredible texture we talked about, we need quality ingredients ready to go before we even turn on the mixer. I always lay everything out on the counter first—it’s my little version of mise en place, which just means getting organized so the actual mixing is smooth sailing. Don’t worry about running to the store for fancy stuff. Seriously, the ingredients for this homemade cheesecake are straightforward; it’s the technique that makes it look like it came from a five-star bakery. Let’s break down exactly what you need for each part of this rich dessert recipe.
I’ve grouped everything below so you can check off your list easily. Remember, if you are planning to make that flaky pie crust recipe I shared earlier, make sure to check its ingredient list separately, but for this fantastic cheesecake, we are going dark and crunchy!
For the Crunchy Oreo Crust
- 1 3/4 cups crushed Oreo cookies (that’s about 25 cookies, roughly!)
- 1/4 cup granulated sugar
- 6 tablespoons unsalted butter, melted
For the Creamy Cheesecake Filling
This is the primary, rich, tangy base layer for our dessert. Make sure these items are truly softened!
- 3 (8 ounce) packages cream cheese, softened
- 1 1/2 cups granulated sugar
- 1/4 cup all-purpose flour
- 1 teaspoon vanilla extract
- 1/2 cup sour cream
- 2 large eggs
For the Red Velvet Layer
This thin layer is what gives us that beautiful color and signature flavor swirl.
- 1 teaspoon white vinegar
- 2 tablespoons unsweetened cocoa powder
- 2 tablespoons red food coloring (use gel if you want super deep color, liquid works fine!)
- 1/4 cup buttermilk
- 1 teaspoon baking soda
- 1/2 cup all-purpose flour
- 1/2 cup granulated sugar
- 1/4 cup unsalted butter, softened
- 1 large egg
- 1/2 teaspoon vanilla extract
Optional Cream Cheese Topping
If you want that extra fluffy, slightly tart finish, have these ready!
- 1/4 cup cream cheese, softened
- 1/2 cup powdered sugar
- 1 tablespoon milk
Step-by-Step Instructions for the Red Velvet Cheesecake
Okay, deep breath! This is where we turn those beautiful ingredients into the showstopper dessert you’ve been dreaming about. Baking a red velvet cheesecake means layers of love, and we are treating them gently. Since we are using a water bath—which is non-negotiable for that smooth finish—we need to get organized first. This layered beauty needs time, but don’t worry, most of that is just chilling time! This process results in that perfectly creamy cheesecake everyone raves about.

Preparing the Pan and Baking the Oreo Crust Cheesecake
First things first, let’s get the oven humming at 350\u00b0F (175\u00b0C). Now, take your 9-inch springform pan—and listen closely here—wrap the outside bottom and sides really well with heavy-duty foil. I recommend two or even three layers. This protects it from the water bath later. Once wrapped, mix up your crust ingredients (Oreos, sugar, melted butter) and press them firmly into the bottom. Pop that into the oven for about 10 minutes. When it comes out, reduce the temperature down to 325\u00b0F (160\u00b0C). We’re ready for the fillings!
Mixing the Plain Cheesecake Filling
In your big bowl, grab that softened cream cheese, the main sugar amount, and the flour. Beat this until it’s nice and smooth—no lumps allowed! Then, add your vanilla and the sour cream. The critical part: add your two eggs one at a time, mixing only until they just disappear. Seriously, stop mixing immediately! If you beat it too much now, you’re inviting cracks into your homemade cheesecake later.
Creating the Red Velvet Layer Batter
Time for the vibrant color pop! In a small bowl, whisk together the vinegar, cocoa powder, and all that brilliant red food coloring. Then, mix your buttermilk and baking soda. Keep those two separate until they are ready to combine with the dry ingredients for this layer: the remaining flour and sugar, softened butter, the final egg, and vanilla. Just stir until it’s barely combined. We want deep flavor, not toughness!
Assembling and Baking the Red Velvet Cheesecake
Pour half of your plain white cheesecake batter gently right over that shiny Oreo crust. Next, drop spoonfuls of the red velvet batter randomly over the white layer. Now, pour the rest of the plain batter over top. Grab a butter knife or a skewer and gently swirl through the batters—just a quick figure-eight motion a few times. Don’t drag it down to the crust! Transfer the foil-wrapped pan into a larger roasting pan. Carefully pour hot water (that’s your water bath!) into the roasting pan until it comes halfway up the sides of your springform pan. Bake at 325\u00b0F (160\u00b0C) for 60 to 75 minutes. You want the edges set but the very center to still have a gentle wobble, like JELL-O.
The Critical Cooling and Chilling Process
Don’t take it out yet! Turn your oven off but leave the door cracked open just a sliver. That slow, gradual cooling inside the oven is what prevents the shock that causes cracking—it’s essential for a beautiful cheesecake cupcake texture, too! Let it hang out in the cooling oven for a full hour. After that, take it out of the water bath, pull off the foil, and let it cool completely on a wire rack. Then, cover it and chill it for at least six hours, but honestly, overnight is best for truly perfect slicing.
Tips for a Perfect Red Velvet Cheesecake Every Time
Even with the best recipe in the world, things can sometimes go rogue in the oven, right? Don’t panic! Based on the times I’ve made this red velvet cheesecake—especially when I was trying to hurry it—I’ve learned exactly what smooths out the ride. These little tricks are straight from my personal experience; they are the difference between “pretty good” and “I can’t believe you made this at home!” They are the key to ensuring that creamy texture we aim for every single time.
One thing I always stress is using ingredients straight from the fridge when they need to be cold, and letting them relax when they need to soften. When you’re ready to make the topping, you’ll find my recipe for a super stable cream cheese frosting is a lifesaver!
Room Temperature Dairy is NOT Optional
I know, I know, you’re ready to bake *now*. But listen to me: All chilly ingredients throw off the batter chemistry. When cold cream cheese meets the sugar, it doesn’t cream properly. This leaves little gritty lumps, and worse, it prevents the mixture from properly incorporating the eggs later. I use an instant-read thermometer sometimes to check—if the cream cheese is around 68°F, it’s perfect. Don’t even *think* about skipping this step if you want that wonderfully creamy dessert!
The Gentle Hand: Halt Overmixing After Eggs
Once those eggs are in, we are done with heavy mixing. Eggs bring structure, but too much beating develops gluten in the flour we added (yes, we add a little flour for stability!). Overmixing equals a cake that’s tough or, worse, one that cracks because it puffed up too fast in the oven. Mix just until you stop seeing ribbons of yolk or white, and then switch to the lowest speed—or better yet, switch to a spatula for the final fold.
The Water Bath and Slow Cooling Combo
This is the ticket to avoiding sunken centers or those dreaded sharp cracks. The water bath provides gentle, moist heat around the pan, which cooks the outside layers slowly and evenly. But the cooling process is just as important! That hour you spend letting it cool *inside* the turned-off oven is crucial. It gradually brings the temperature down, stopping the cheesecake from having a sudden temperature drop that would cause it to shrink too quickly and pull away from the sides.
Variations on the Classic Red Velvet Cheesecake Recipe
You know I love a detailed, luscious, baked beauty like this red velvet cheesecake, but sometimes you need options, right? Baking is all about playing around once you master the core technique. Once you’ve created the swirls successfully, you can totally pivot! We can take this flavor profile and turn it into bars, or we can lean into the cake aspect even harder. I’ve got tons of red velvet dessert ideas brewing, but here are two ways you can adapt this absolute dream for your next gathering.
If you are looking for something different but equally impressive, check out my recipe for churro cheesecake bars for a fun texture change, or if you want something totally decadent, you have to see the cheesecake stuffed red velvet cookies!

Making a Layered Cheesecake or Red Velvet Cheesecake Cake
Remember in the steps above when I mentioned you can layer the batters instead of swirling them? If you skip the swirling tool and just pour all the plain batter, then all the red velvet, then the rest of the plain batter on top, you get a stunning layered cake look! Another fun idea many people ask about is the red velvet cheesecake cake—that version uses actual layers of baked red velvet cake surrounding a cheesecake center. For that, you’d bake two thin red velvet cakes first, then use this cheesecake filling as the delicious, creamy filling between those layers. It’s a commitment, but wow, is it a showstopper!
Incorporating an Oreo Crust Cheesecake Base
Now, since we already built our foundation with the Oreo crust cheesecake base here, I just want to affirm that this is one of the best ways to go! The slight saltiness and crunch of those chocolate cookies are just the perfect counterpoint to the sweet, rich filling. If—and I mean *if*—you wanted to try a version without Oreos, you could use a graham cracker crust, but honestly, the Oreo crust just makes this dessert feel that much more luxurious and fun. Stick with the Oreos; your taste buds will thank you for this textural contrast!
Serving Suggestions for Your Decadent Dessert
Phew! You’ve successfully navigated the bath, the chill, and the patience test. Now comes the best part: serving this gorgeous baby. Because this red velvet cheesecake is so rich, you don’t really need much to dress it up, but a little flourish goes a long way, especially when you’re bringing out this holiday cheesecake centerpiece!
I find that pairing something deeply rich with something bright or slightly bitter just cuts through the creaminess perfectly. Think about what you’re serving alongside it. For example, you want to serve something that won’t crash the party, flavor-wise, but will complement that delicious red color.

The Perfect Drink Pairing
Honestly, after making something so decadent, you need a great drink pairing. A strong cup of coffee or espresso is fantastic because the slight bitterness balances the sweetness perfectly. If you make my homemade coffee creamer recipe, you get that creamy hug *and* the necessary counter-punch! For a fancy evening, a slightly sweet port wine or even a chilled espresso martini works wonders.
Simple Drizzles and Garnishes
If you made the optional topping, you might be done, but here are a couple of quick additions. A light dusting of good quality cocoa powder right before serving makes the top look professional. If you want an extra sauce, keep it light. A slightly tart raspberry coulis is beautiful against the red and cream, or even a simple chocolate ganache drizzle if you’re really leaning into the richness. Avoid anything too heavy; this dessert is the main event!
Storing and Keeping Your Homemade Cheesecake Fresh
So, you survived the baking process, you let it chill overnight (I hope you did!), and now you have this spectacular slice of heaven sitting in your fridge. How do we make sure this creamy dessert stays perfect for days? Cheesecake, while it tastes amazing the next day, needs a little special handling to keep that glorious texture intact.
The biggest enemy here is air exposure. Air dries out the edges and can make the top look sad and slightly duller. We are aiming for maximum freshness here so that every leftover slice tastes just as incredible as that first one.
Refrigeration: The Minimum Chill Time
If you skipped the overnight chill because you couldn’t possibly wait (I almost never can!), you must give it at least six hours of dedicated fridge time. Seriously, set a timer. The structure of the cheesecake needs time at cold temperatures to fully set up. Trying to slice it before that, especially since we have that dual layer of velvet and cream cheese layers, is just asking for disaster. You’ll end up scraping the batter off the knife!
How to Properly Wrap Your Leftovers
Once the cheesecake is fully chilled and you’ve cut the slices you need (or if you’re wrapping the whole thing), wrap it tightly. First, cover the top surface directly with plastic wrap. Make sure that plastic touches the surface—this prevents condensation from forming on the top layer. Then, cover the entire springform pan (or the cut edge if you only have pieces left) with a second layer of plastic wrap, or even better, foil over the plastic. This double barrier keeps out any weird fridge smells and locks in that moisture so your next bite is just as smooth.
Freezing for Future Joy
Can you freeze this rich dessert? Absolutely! If you know you won’t get to it within five days, freezing is your friend. You must chill it fully first, as mentioned above. Then, wrap it *very* tightly, just like I described. I like using two layers of plastic wrap followed by a layer of heavy-duty aluminum foil. To thaw, transfer the totally wrapped cheesecake from the freezer right into the refrigerator for about 24 hours. Don’t take it out of the wrapping until it’s completely thawed in the fridge. If you hurry the thawing—say, by leaving it on the counter—you risk condensation pooling on top, making that beautiful surface soggy.
Frequently Asked Questions About Red Velvet Cheesecake
I always get so many questions after people see pictures of this dessert bubbling away! It’s totally normal, especially when we’re crossing categories like cake and cheesecake hybrids. I’ve compiled the most common queries I receive about nailing this red velvet cheesecake recipe, so you can bake with complete confidence. If you ever have more questions, just drop a comment below!
For folks who want to try something different after mastering this one, you might enjoy my ideas for easy chewy cookie bars—always a hit!
Can I make this Red Velvet Cheesecake Recipe without a water bath?
Look, I totally get it—the water bath seems like extra fuss. For a standard dense cake, maybe you could skip it, but for cheesecake, especially one with two different batters like this one, the water bath is your insurance policy against disaster. The moist heat keeps the sides from overcooking before the center is set. If you skip it, you are almost certainly guaranteeing cracks, sinking, or a grainy texture. If you absolutely must skip it, try placing a pan of boiling water on the rack *below* your cheesecake, but honestly, wrapping that springform pan tightly and using the water bath is the key to that gorgeous, smooth top.
How do I get a truly smooth and Creamy Cheesecake filling?
This ties right back to what we talked about in the tips section, but I’ll say it again because it’s so important for achieving that signature creamy cheesecake mouthfeel! You must use room-temperature dairy. Cold cream cheese acts like cement; it won’t blend smoothly with the sugar. Second, once the eggs are in, slow down! Mix only until just combined. We want to incorporate everything gently so we don’t whip in too much air that escapes during baking, leaving you with a less-than-smooth texture.
Can I freeze this dessert?
Yes, you totally can! This is a fantastic rich dessert recipe to make ahead, especially if you’re busy around the holidays. You have to make sure it’s completely chilled first—overnight, please! Once it’s firm, wrap it extremely well. I usually do plastic wrap covering the entire surface right to the top, followed by a tight layer of aluminum foil. Freeze it for up to two months. When you’re ready to eat it, move the wrapped cheesecake straight into the fridge for 24 hours to thaw slowly. Resist the urge to put it on the counter; slow thawing keeps that gorgeous texture intact!
Nutritional Estimates for This Red Velvet Cheesecake
Now, this is absolutely not a diet food; we both know that! This red velvet cheesecake is indulgence delivered on an Oreo crust. When I calculated the estimates based on the recipe amounts, they reflect a generous slice of this decadent treat. Please remember these numbers are based on the specific ingredients listed, and if you go wild with extra cream cheese frosting, those numbers are going to sneak up on you!
For a single average slice, here is what you can generally expect:
- Serving Size: 1 slice
- Calories: 550
- Sugar: 45g
- Sodium: 350mg
- Fat: 35g
- Saturated Fat: 20g
- Unsaturated Fat: 15g
- Trans Fat: 0.5g
- Carbohydrates: 55g
- Fiber: 1g
- Protein: 8g
- Cholesterol: 100mg
Share Your Baking Joy
If you baked this Ultimate Creamy Red Velvet Cheesecake, I really, really want to see it! Please take a photo and tag me on social media; I love watching your bakes come to life. Don’t forget to rate the recipe right here on the blog if you loved it—it helps other home cooks find their way to pure joy in the kitchen. You can find me hanging out over on Facebook right here. Happy baking, friends!
Nutritional Estimates for This Red Velvet Cheesecake
Now, this is absolutely not a diet food; we both know that! This red velvet cheesecake is indulgence delivered on an Oreo crust. When I calculated the estimates based on the recipe amounts, they reflect a generous slice of this decadent treat. Please remember these numbers are based on the specific ingredients listed, and if you go wild with extra cream cheese frosting, those numbers are going to sneak up on you!
For a single average slice, here is what you can generally expect:
- Serving Size: 1 slice
- Calories: 550
- Sugar: 45g
- Sodium: 350mg
- Fat: 35g
- Saturated Fat: 20g
- Unsaturated Fat: 15g
- Trans Fat: 0.5g
- Carbohydrates: 55g
- Fiber: 1g
- Protein: 8g
- Cholesterol: 100mg
Share Your Baking Joy
If you baked this Ultimate Creamy Red Velvet Cheesecake, I really, really want to see it! Please take a photo and tag me on social media; I love watching your bakes come to life. Don’t forget to rate the recipe right here on the blog (you can find my main blog page for links!) if you loved it—it helps other home cooks find their way to pure joy in the kitchen. You can find me hanging out over on Facebook right here. Happy baking, friends!
PrintThe Ultimate Creamy Red Velvet Cheesecake with Oreo Crust
Hi, I’m Alex, and I’m so glad you’re here. This recipe delivers a show-stopping, creamy Red Velvet Cheesecake built on a crunchy Oreo crust. It combines classic red velvet flavor with rich cheesecake for a decadent dessert that is surprisingly approachable to make at home.
- Prep Time: 30 min
- Cook Time: 75 min
- Total Time: 9 hours 45 min
- Yield: 12 servings 1x
- Category: Dessert
- Method: Baking
- Cuisine: American
- Diet: Vegetarian
Ingredients
- 1 3/4 cups crushed Oreo cookies (about 25 cookies)
- 1/4 cup granulated sugar
- 6 tablespoons unsalted butter, melted
- 3 (8 ounce) packages cream cheese, softened
- 1 1/2 cups granulated sugar
- 1/4 cup all-purpose flour
- 1 teaspoon vanilla extract
- 1/2 cup sour cream
- 2 large eggs
- 1 teaspoon white vinegar
- 2 tablespoons unsweetened cocoa powder
- 2 tablespoons red food coloring (liquid or gel)
- 1/4 cup buttermilk
- 1 teaspoon baking soda
- 1/2 cup all-purpose flour
- 1/2 cup granulated sugar
- 1/4 cup unsalted butter, softened
- 1 large egg
- 1/2 teaspoon vanilla extract
- 1/4 cup cream cheese, softened (for optional topping)
- 1/2 cup powdered sugar (for optional topping)
- 1 tablespoon milk (for optional topping)
Instructions
- Preheat your oven to 350°F (175°C). Wrap the outside of a 9-inch springform pan tightly with heavy-duty aluminum foil to prevent water seepage during the water bath.
- Prepare the Oreo Crust: In a medium bowl, mix the crushed Oreos, 1/4 cup sugar, and melted butter until combined. Press the mixture firmly into the bottom of the prepared springform pan. Bake for 10 minutes. Set aside to cool slightly. Reduce oven temperature to 325°F (160°C).
- Prepare the Cheesecake Filling: In a large bowl, beat the softened cream cheese, 1 1/2 cups sugar, and 1/4 cup flour with an electric mixer until smooth. Beat in the vanilla extract and sour cream. Add the eggs one at a time, mixing just until combined after each addition. Do not overmix.
- Prepare the Red Velvet Layer: In a separate small bowl, whisk together the vinegar, cocoa powder, red food coloring, buttermilk, and baking soda until smooth. In another small bowl, whisk together the remaining 1/2 cup flour and 1/2 cup sugar. Add this dry mixture to the red velvet liquid mixture and mix until just combined.
- Assemble the Cheesecake: Pour half of the plain cheesecake batter over the cooled Oreo crust. Carefully spoon dollops of the red velvet batter over the plain layer. Pour the remaining plain cheesecake batter over the red velvet dollops.
- Create the Swirl: Use a knife or skewer to gently swirl the layers together, creating a marbled effect. Be careful not to scrape the bottom crust.
- Bake: Place the foil-wrapped springform pan into a larger roasting pan. Carefully pour hot water into the roasting pan until it reaches halfway up the sides of the springform pan (this is the water bath). Bake at 325°F (160°C) for 60 to 75 minutes, or until the edges are set and the center has a slight jiggle.
- Cool: Turn off the oven, crack the door open slightly, and let the cheesecake cool inside the oven for 1 hour. Remove from the water bath and foil, and let it cool completely on a wire rack. Chill in the refrigerator for at least 6 hours, or preferably overnight.
- Prepare Optional Topping: If using, beat the softened cream cheese and powdered sugar until smooth. Add milk until you reach a spreadable consistency. Spread over the chilled cheesecake before serving.
Notes
- For the creamiest texture, bring all dairy ingredients (cream cheese, sour cream, eggs) to room temperature before starting.
- Do not overmix the batter once the eggs are added; this prevents cracks.
- If you prefer a simpler look, you can layer the batters instead of swirling them for a layered cheesecake effect.
Nutrition
- Serving Size: 1 slice
- Calories: 550
- Sugar: 45g
- Sodium: 350mg
- Fat: 35g
- Saturated Fat: 20g
- Unsaturated Fat: 15g
- Trans Fat: 0.5g
- Carbohydrates: 55g
- Fiber: 1g
- Protein: 8g
- Cholesterol: 100mg
