 Skip to content
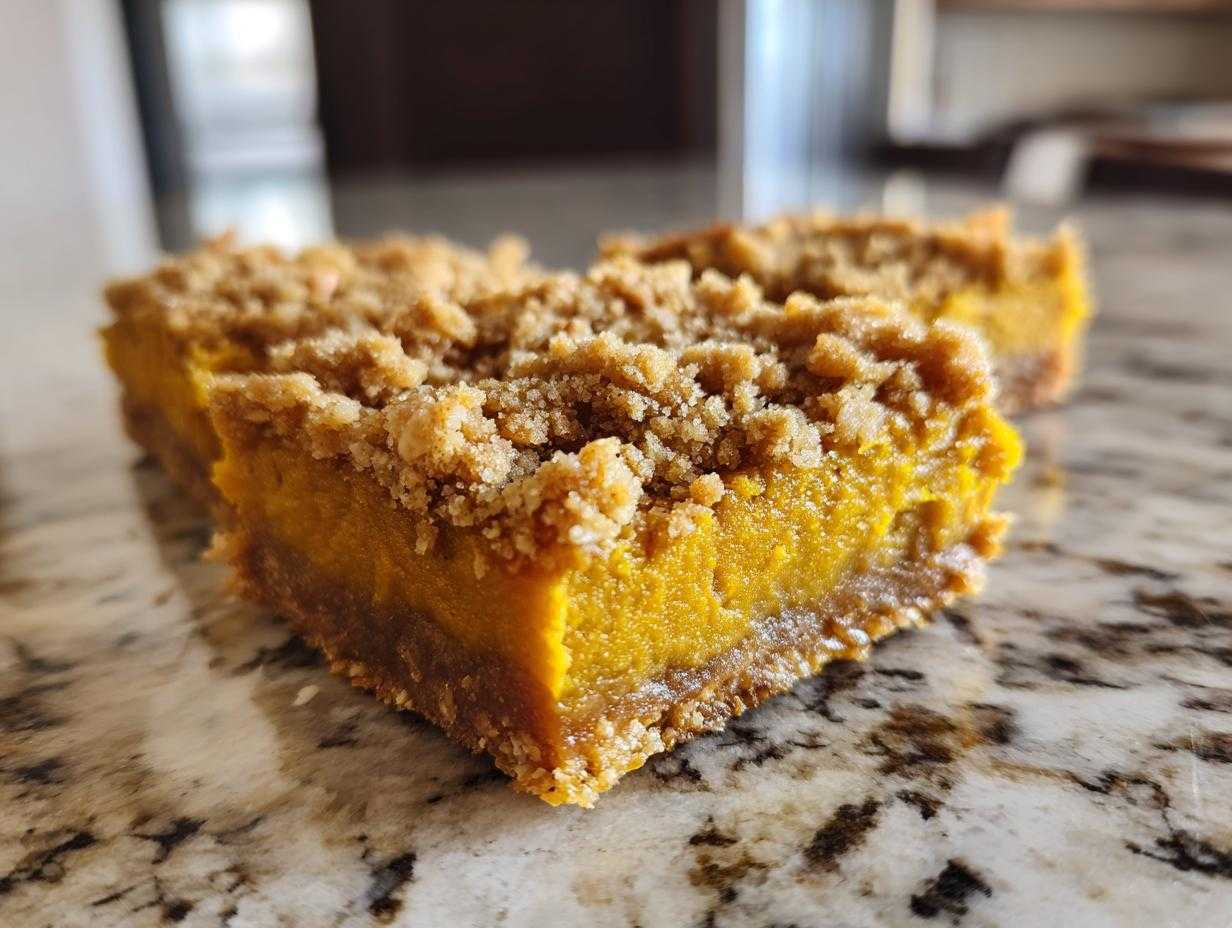

Okay, so you’re craving pumpkin pie, that classic taste of autumn, but maybe the idea of dealing with a pie crust feels a little… daunting? Trust me, I’ve been there! For years, the kitchen felt like a foreign land, filled with complicated techniques and ingredients I couldn’t pronounce. My life was all about work, and cooking, honestly, felt like just another chore. But then one day, after a particularly brutal week, I decided to try baking a simple loaf of bread. And when that golden loaf came out of the oven, warm and smelling amazing, something clicked. It wasn’t just bread; it was pure joy. That’s exactly the feeling I want you to have with these pumpkin pie bars!
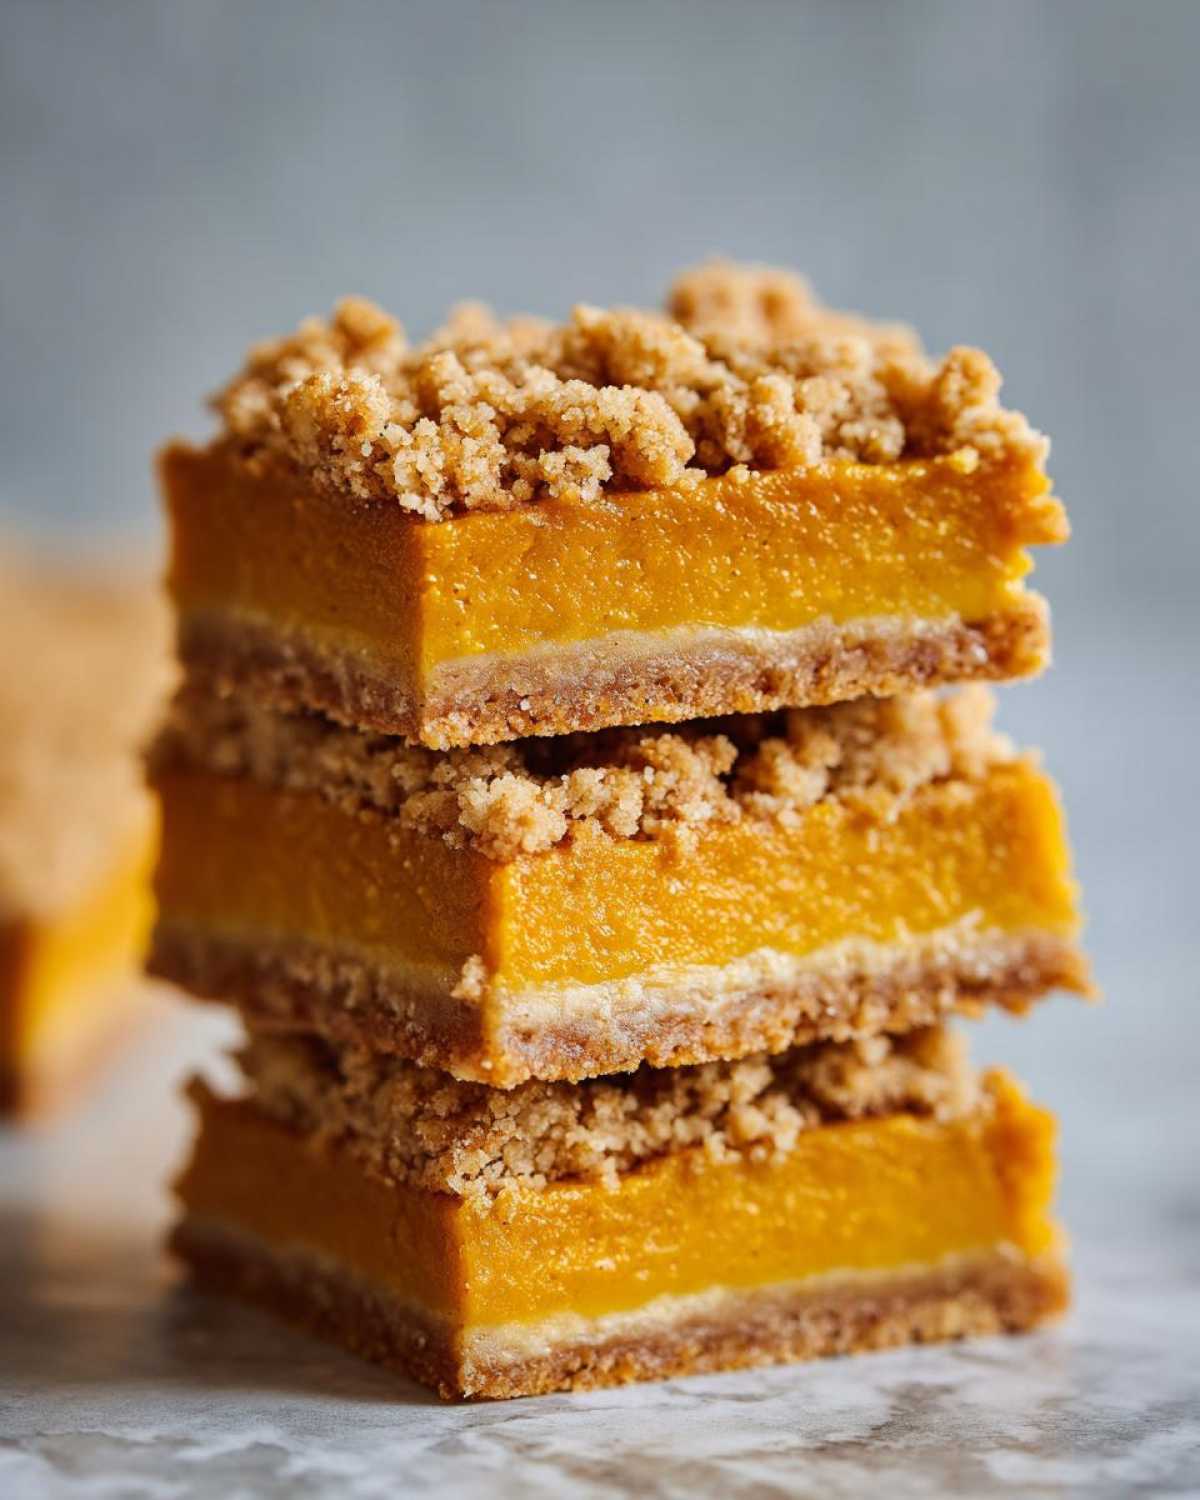
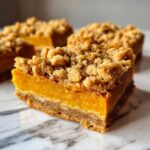
These aren’t your fussy, traditional pies. These are pumpkin pie bars, designed to be ridiculously easy and totally crave-worthy. They’ve got that same creamy, spiced pumpkin filling you love, all nestled on a perfectly crumbly crust. It’s the whole delicious package, just in a format that’s way easier to slice and share. Honestly, making them feels less like a chore and more like a little moment of peace in the kitchen, just like finding that perfect loaf of bread did for me. They’re proof that amazing desserts don’t need to be complicated!
- Why You'll Love These Pumpkin Pie Bars
- Gather Your Ingredients for Perfect Pumpkin Pie Bars
- Step-by-Step Guide to Making Pumpkin Pie Bars
- Tips for Perfect Pumpkin Pie Bars Every Time
- Variations for Your Pumpkin Pie Bars
- Serving and Storing Your Delicious Pumpkin Pie Bars
- Frequently Asked Questions About Pumpkin Pie Bars
- Understanding the Nutrition of Pumpkin Pie Bars
Why You’ll Love These Pumpkin Pie Bars
They’re Seriously Easy: Forget fussing with pie crusts! This recipe is all about simple steps and straightforward ingredients. You get all that amazing pumpkin pie flavor without the stress, making it perfect for busy weeknights or when you just want a sweet treat without the fuss. This really fits my whole “pure cooking joy” vibe, you know?
Crowd-Pleasing Flavor, Always: Seriously, who doesn’t love pumpkin pie? This recipe delivers that warm, spiced, creamy goodness that everyone adores. It’s that classic comfort food flavor that brings smiles to faces, and the bar format just makes it even more fun to share. These are guaranteed to be a hit!
Super Convenient Bar Format: No more messy slices with flaky crusts! These bars are neat, tidy, and incredibly easy to serve to a crowd. Whether you’re bringing them to a potluck, a family gathering, or just want an easy dessert for yourself, the bar format is a game-changer. It’s made for sharing, just how I like it.
Gather Your Ingredients for Perfect Pumpkin Pie Bars
Alright, let’s get down to business! Having the right ingredients makes all the difference, and honestly, this recipe is pretty forgiving. You probably have most of this stuff lurking in your pantry right now. The key is to have everything measured and ready to go. It really makes the whole process smooth sailing, just like I discovered makes cooking pure joy! Here’s what you’ll need to whip up these delightful pumpkin pie bars:
- 1 cup all-purpose flour
- 1/2 cup rolled oats (I like the regular old-fashioned kind)
- 1/2 cup packed brown sugar (make sure it’s packed down!)
- 1/2 teaspoon ground cinnamon
- 1/4 teaspoon ground nutmeg
- 1/4 teaspoon ground ginger
- 1/8 teaspoon ground cloves (just a pinch is perfect)
- 1/2 cup (1 stick) unsalted butter, melted (good old regular butter works great)
- 1 (15 ounce) can pumpkin puree (make sure it’s *puree*, not pumpkin pie filling!)
- 1 (14 ounce) can sweetened condensed milk (this gives it that creamy goodness)
- 2 large eggs
- 1 teaspoon vanilla extract
- 1/2 teaspoon pumpkin pie spice (you can totally use this if you have it, or just stick with the cinnamon, nutmeg, ginger, and cloves we listed!)
Step-by-Step Guide to Making Pumpkin Pie Bars
Okay, making these pumpkin pie bars is honestly way easier than it sounds, and it’s where the real magic happens! It’s like a little cooking adventure, and I promise it all flows together perfectly. Remember how I was talking about finding peace in the kitchen? This is it! It’s just a few simple steps, and soon you’ll have these gorgeous, delicious bars that are just begging to be eaten. So, tie on that apron, maybe pop on some music, and let’s do this!
Preparing the Crust for Your Pumpkin Pie Bars
First things first, let’s get that perfect base down. In a bowl, just toss together your flour, oats, brown sugar, and all those warm spices – cinnamon, clove, nutmeg, ginger. Give it a little whisk to mix it all up. Then, pour in that melted butter and stir it all together until it looks like lovely, crumbly sand. Now, here’s a little trick: you’re gonna press about two-thirds of this delicious crumb mixture into the bottom of your baking pan. Just use your hands or the bottom of a glass. Make sure it’s nice and even! Save the rest of that crumbly goodness for later – it’s going to be our topping!
Crafting the Creamy Pumpkin Filling
Alright, time for the filling! Grab a separate, bigger bowl for this. You’re going to dump in your pumpkin puree – and remember, make sure it’s just the puree, not the pie filling, okay? Then add your sweetened condensed milk, those two eggs, and a splash of vanilla extract. Whisk it all together until it’s super smooth and creamy. You want it to look really well combined, no streaks of egg or anything. Then, give it a little stir with your pumpkin pie spice. Oh, that smell! If you don’t have pumpkin pie spice, those other spices we used in the crust are totally fine on their own.
Assembling and Baking Your Pumpkin Pie Bars
Now for the assembly line! Carefully pour that gorgeous, creamy pumpkin filling right over the crust you pressed into the pan. Try to get it as even as you can. Then, take that reserved crumb mixture you saved and sprinkle it all over the top of the pumpkin filling. Just do a nice, even layer. Now, pop that pan right into your preheated oven at 350°F (175°C). You’ll want to bake it for about 35 to 45 minutes. You’ll know they’re ready when the filling looks set – not jiggly – and that crumbly topping is a lovely golden brown. Ooooh, the aroma is going to fill your house, it’s the best part!
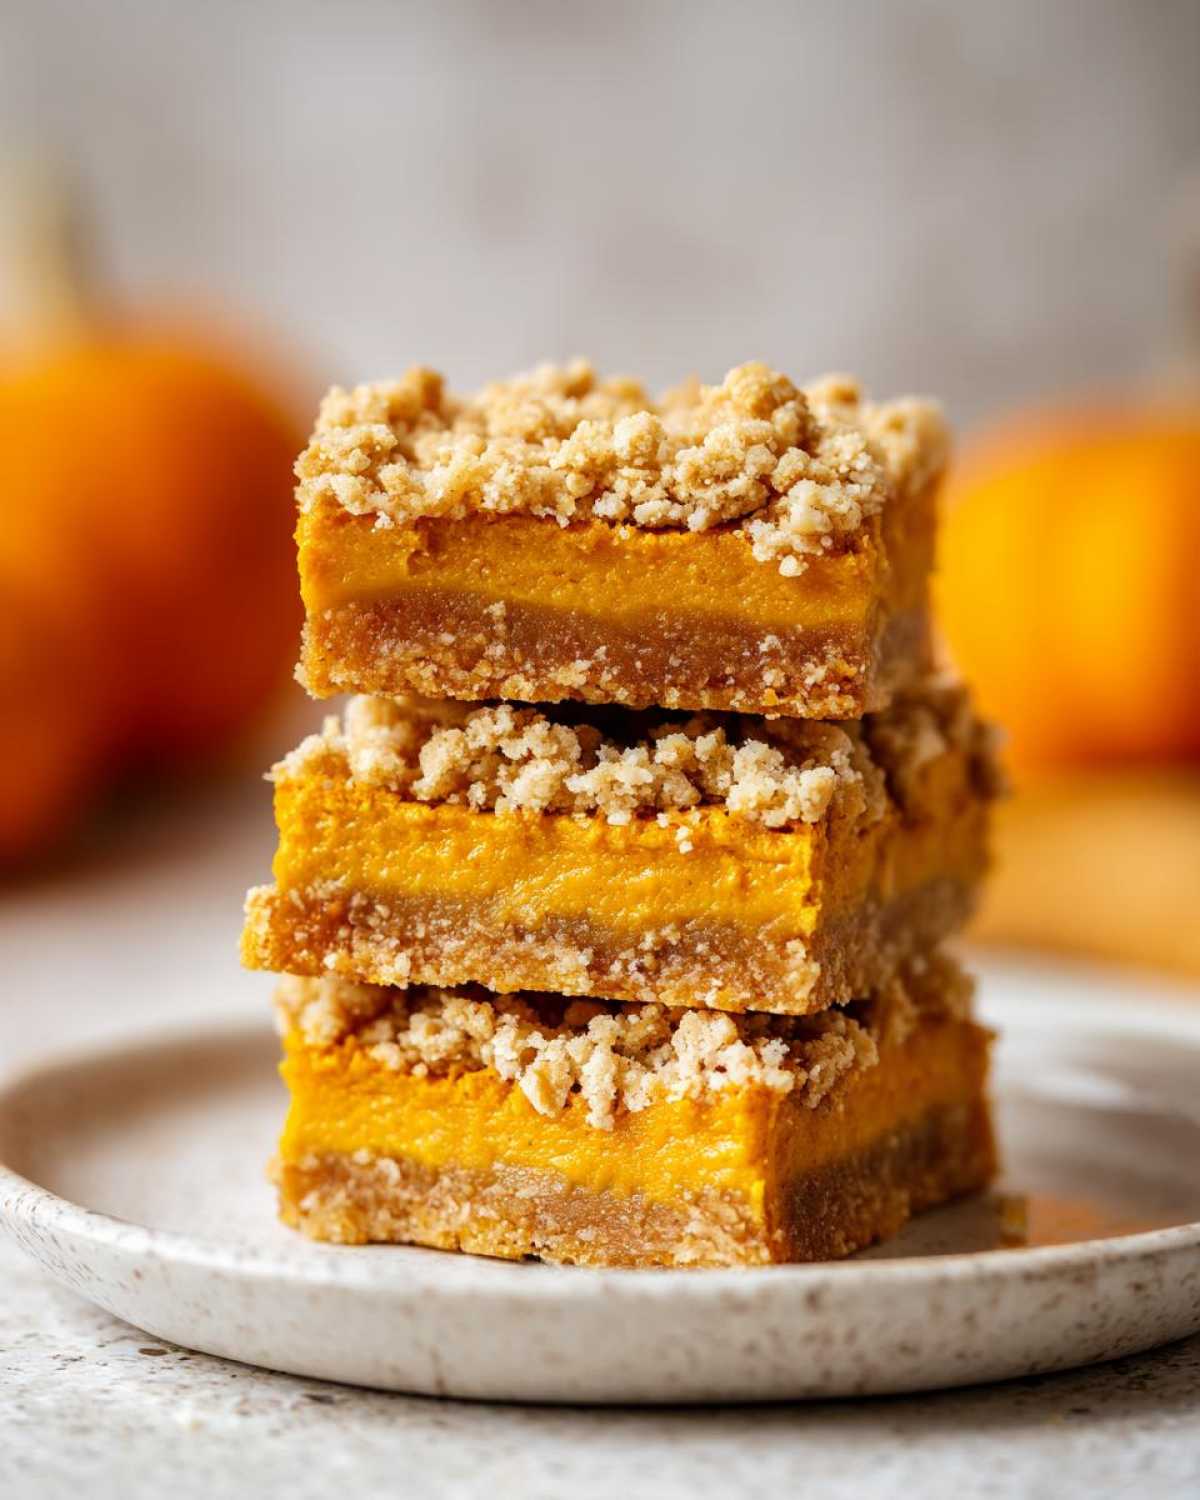
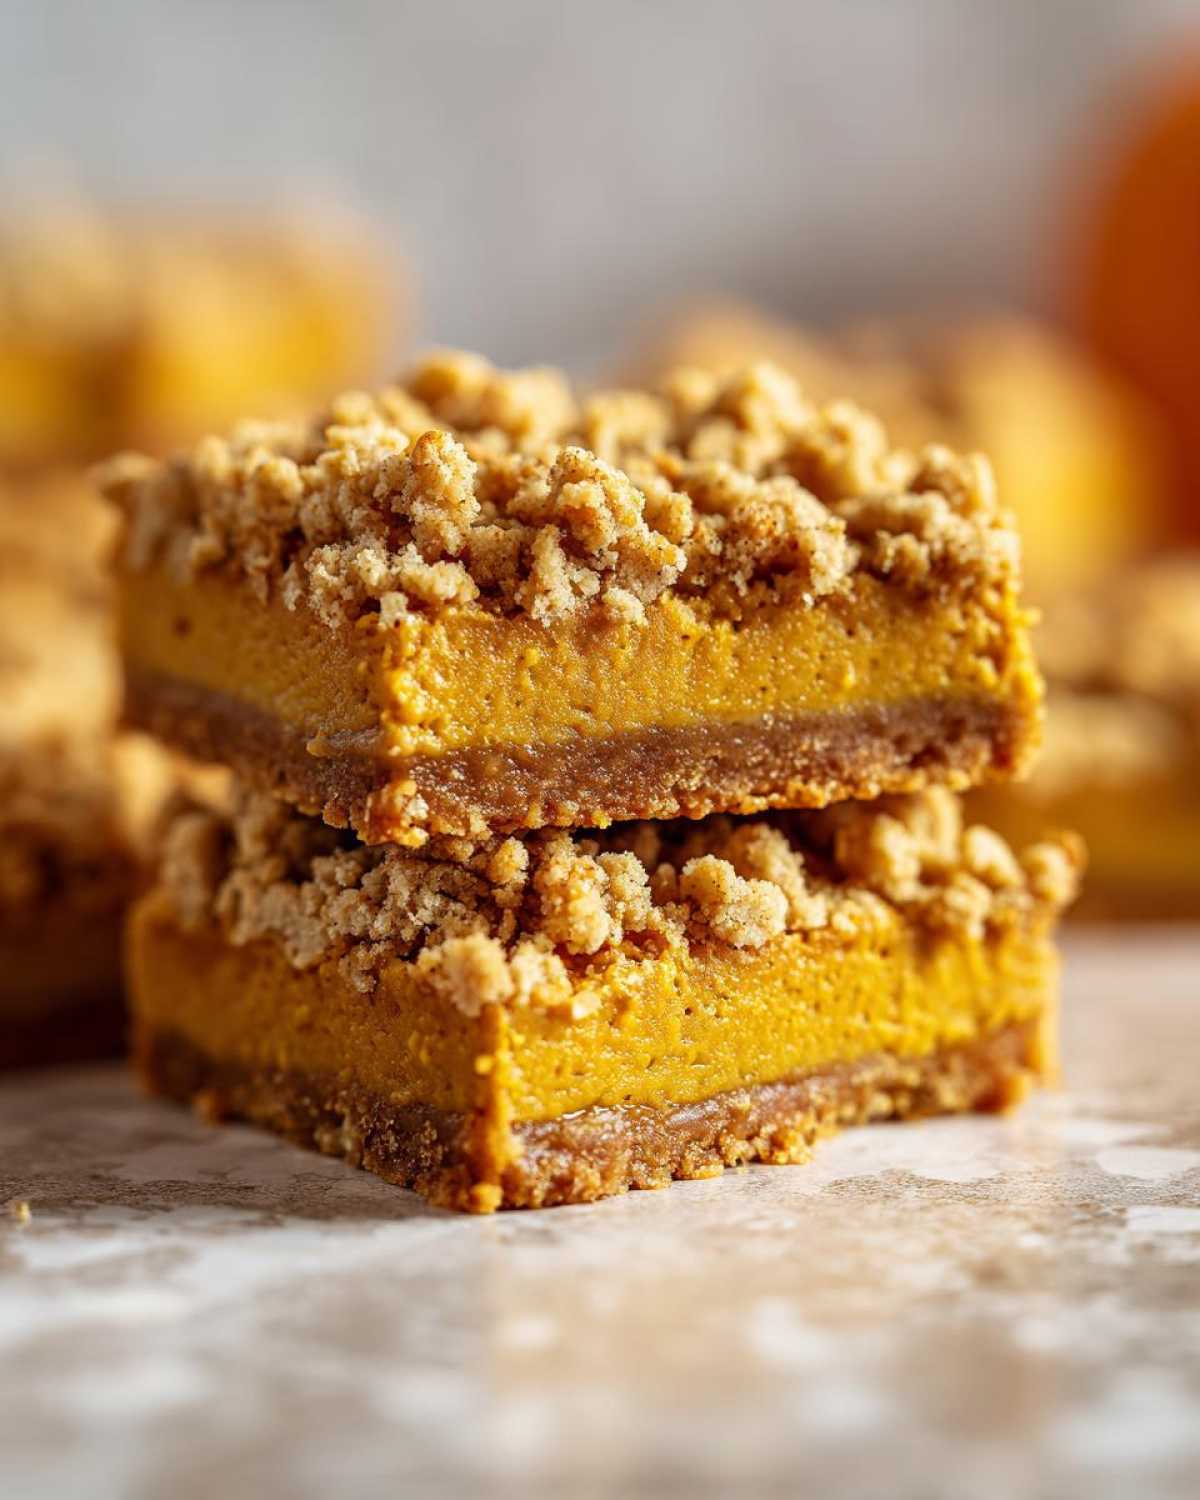
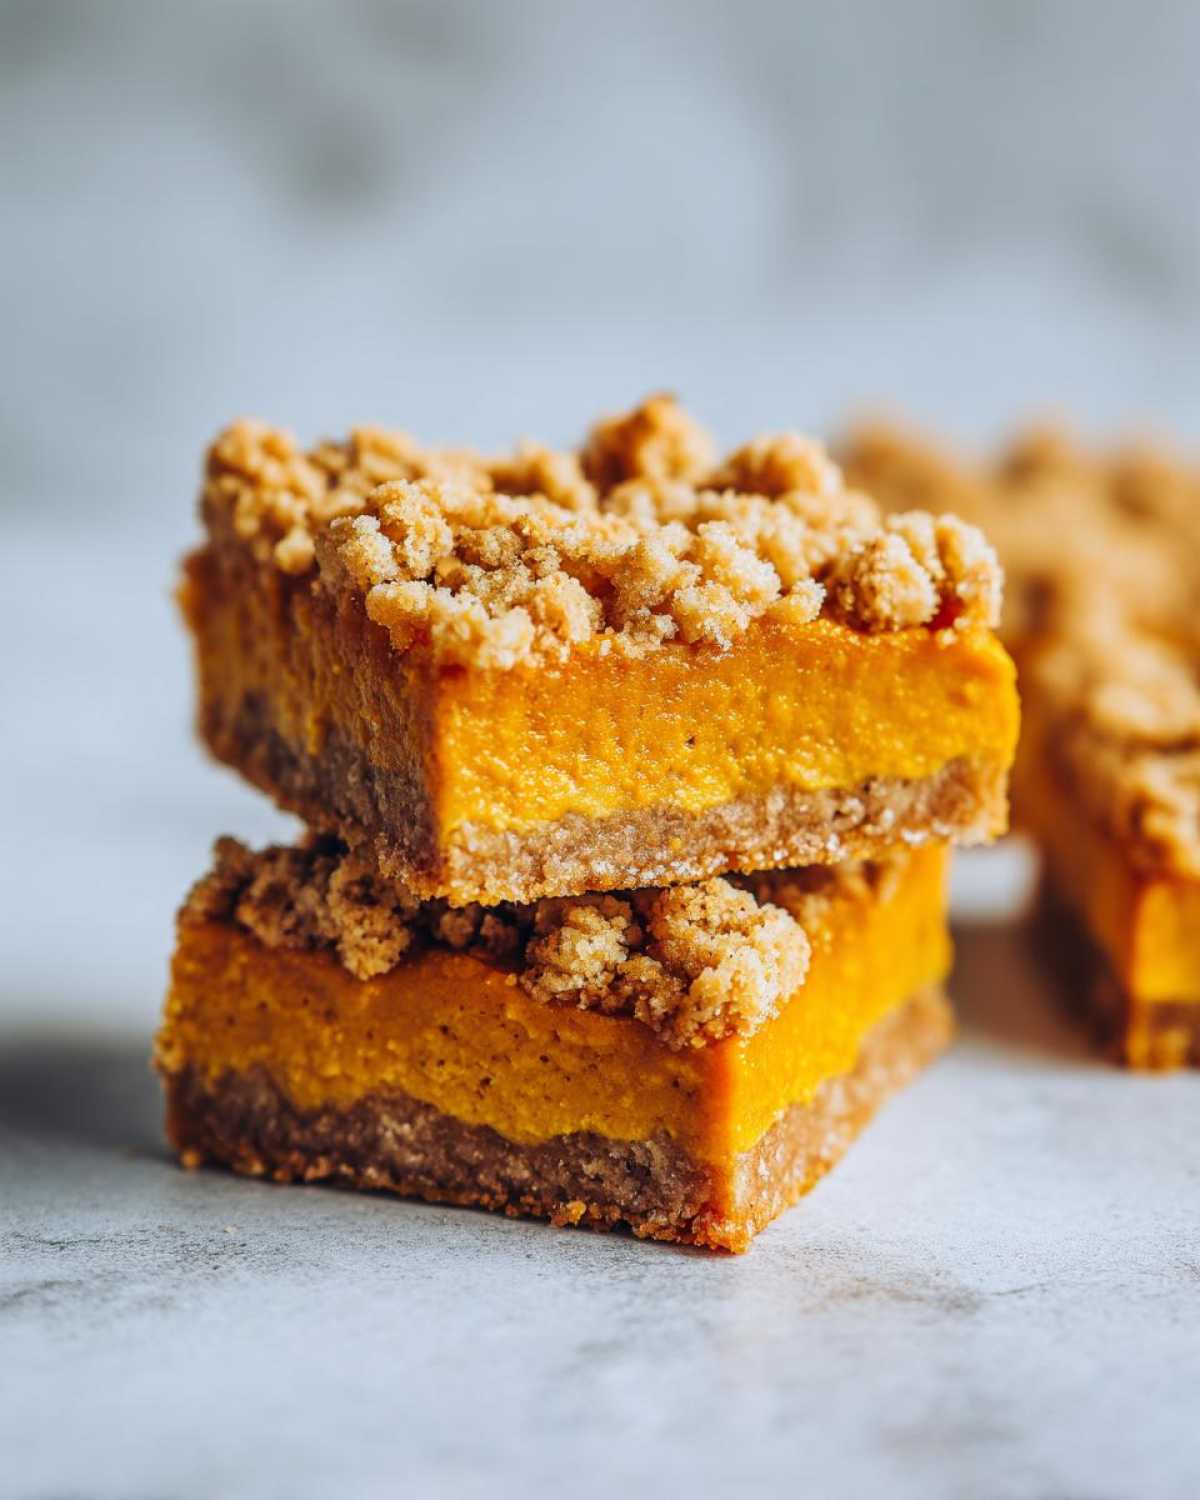
Cooling and Cutting Your Pumpkin Pie Bars
This is the hardest part, I know! But you *have* to be patient. Let those bars cool completely in the pan on a wire rack before you even think about cutting into them. Seriously, if you try to cut them while they’re warm, they’ll just turn into a gooey mess. Once they’re totally cool, that’s when you can slice them into nice, tidy squares. This is what makes them so easy to serve, and they’ll look so pretty!
Tips for Perfect Pumpkin Pie Bars Every Time
You know, I used to think making perfect baked goods was some kind of dark art, but it’s really just about a few little tricks and paying attention. These pumpkin pie bars are pretty forgiving, but a few simple tips will guarantee they turn out beautifully every single time. It’s all about building that confidence in the kitchen, right? So, let’s make sure your bars are as amazing as Grandma’s (if I had a Grandma who made these, she’d totally approve!).
First off, make sure your pumpkin puree is *just* puree, not the pie filling. It makes a huge difference because the filling already has sugar and spices, so it can throw off the flavor and texture. Also, don’t overbake! That’s a big one. Bake until the center is just set – it will continue to firm up as it cools. If you gently shake the pan and the center still looks super wobbly, give it a few more minutes. And seriously, letting them cool completely is key for those clean slices. Patience really does pay off here!
Variations for Your Pumpkin Pie Bars
Now, while these pumpkin pie bars are absolutely delightful just as they are, you know me – I love a little tweak here and there! These bars are like a blank canvas for fun flavor additions. Want to kick it up a notch? Try sprinkling a handful of chocolate chips (mini ones are great!) into the crumb topping before baking, or maybe some chopped pecans for an extra crunch. You could even add a bit more spice to that topping, maybe some chopped candied ginger for a little zing!
And if you’re feeling fancy or just want a really big batch for a party, you can totally think of this as a ‘slab pumpkin pie.’ Just use a bigger pan, maybe a jelly roll pan with sides, and you’ll have a massive sheet of pumpkin deliciousness. It’s all about making it your own and having fun with it, right?
Serving and Storing Your Delicious Pumpkin Pie Bars
There’s nothing quite like these pumpkin pie bars fresh from the cooling rack! They are fantastic served just as they are, but if you want to make them extra special, a dollop of whipped cream or a drizzle of caramel sauce is always a good idea. They’re honestly perfect for any gathering, from a casual get-together to a more formal holiday meal. Keep any leftovers covered at room temperature for a day or two. If you need to store them longer, pop them in the fridge; they’ll be good for about 4-5 days. I sometimes even pop a cooled bar in the microwave for just 10-15 seconds to warm it up just a little – pure comfort!
Frequently Asked Questions About Pumpkin Pie Bars
Got questions? I’ve got answers! People often ask me about making sure these pumpkin pie bars turn out just right, and especially about how to make them gluten-free. Honestly, these bars are pretty forgiving, but a little info can go a long way. Let’s tackle some of those common kitchen queries!
Can I make these pumpkin pie bars gluten-free?
Absolutely! Making these easy pumpkin bars gluten-free is super simple. You’ll just want to swap out the all-purpose flour for a good quality gluten-free all-purpose flour blend. I usually find that a blend with xanthan gum in it works best for baking. Just follow the recipe as usual, using the gluten-free flour instead of regular flour. You might find the texture is just *slightly* different, but the flavor will be just as amazing!
What’s the difference between pumpkin puree and pumpkin pie filling?
This is a really important one for getting these pumpkin pie bars just right! Canned pumpkin puree is literally just cooked, mashed pumpkin. Pumpkin pie filling, on the other hand, already has sugar, spices, and sometimes even other ingredients mixed in. You want to make sure you grab the plain pumpkin puree. If you accidentally use the pie filling, your bars might end up way too sweet and might not set up properly. Stick to the puree for the best results!
My bars seem a little soft in the middle. Did I do something wrong?
Don’t worry, this is super common with pumpkin bars! Remember how I mentioned letting them cool *completely*? That’s the biggest key. The pumpkin filling continues to set up as it cools, both on the counter and even in the fridge. If the center still looks a bit wobbly when you take them out of the oven, that’s usually okay. Just be patient and let them cool down fully. If they’re still really wet after cooling, they might need a few extra minutes in the oven next time, but don’t stress too much – they’ll still taste delicious!
Can I add anything extra to the crumb topping for these easy pumpkin bars?
Oh, you totally can! I love that you’re thinking about adding your own spin! For a little extra flavour and texture, try mixing in some chopped pecans or walnuts into the reserved crumb mixture before you sprinkle it on top. Cinnamon chips or even a few mini chocolate chips would be amazing too! It’s a great way to customize these already delicious pumpkin pie bars.
Understanding the Nutrition of Pumpkin Pie Bars
Just a little note here: the nutrition information you might see for these delicious pumpkin pie bars is always an estimate. It can really vary depending on the specific brands you use and how you might tweak things. So, think of it as a good guideline rather than gospel!
For another take on these bars, check out this recipe from King Arthur Baking. You might also enjoy this recipe from Taste of Home or this one from Brown Eyed Baker.
PrintEasy Pumpkin Pie Bars
Enjoy the classic taste of pumpkin pie in an easy-to-slice bar format, perfect for gatherings.
- Prep Time: 20 min
- Cook Time: 40 min
- Total Time: 60 min
- Yield: 24 bars 1x
- Category: Dessert
- Method: Baking
- Cuisine: American
- Diet: Vegetarian
Ingredients
- 1 cup all-purpose flour
- 1/2 cup rolled oats
- 1/2 cup packed brown sugar
- 1/2 teaspoon ground cinnamon
- 1/4 teaspoon ground nutmeg
- 1/4 teaspoon ground ginger
- 1/8 teaspoon ground cloves
- 1/2 cup (1 stick) unsalted butter, melted
- 1 (15 ounce) can pumpkin puree
- 1 (14 ounce) can sweetened condensed milk
- 2 large eggs
- 1 teaspoon vanilla extract
- 1/2 teaspoon pumpkin pie spice
Instructions
- Preheat your oven to 350°F (175°C). Grease and flour a 9×13 inch baking pan.
- In a medium bowl, combine the flour, rolled oats, brown sugar, cinnamon, nutmeg, ginger, and cloves.
- Pour the melted butter over the dry ingredients and mix until crumbly.
- Press about two-thirds of the crumb mixture evenly into the bottom of the prepared baking pan to form the crust. Reserve the remaining crumb mixture for the topping.
- In a separate large bowl, whisk together the pumpkin puree, sweetened condensed milk, eggs, and vanilla extract until smooth.
- Stir in the pumpkin pie spice.
- Pour the pumpkin filling evenly over the crust in the baking pan.
- Sprinkle the reserved crumb mixture evenly over the pumpkin filling.
- Bake for 35-45 minutes, or until the filling is set and the topping is golden brown.
- Let the bars cool completely in the pan on a wire rack before cutting into squares.
Notes
- For a gluten-free version, substitute a gluten-free all-purpose flour blend for the all-purpose flour.
- Ensure your pumpkin puree is not pumpkin pie filling, which already contains sweeteners and spices.
- Allow the bars to cool completely for cleaner cuts.
Nutrition
- Serving Size: 1 bar
- Calories: 200
- Sugar: 25g
- Sodium: 50mg
- Fat: 10g
- Saturated Fat: 6g
- Unsaturated Fat: 4g
- Trans Fat: 0g
- Carbohydrates: 28g
- Fiber: 1g
- Protein: 3g
- Cholesterol: 30mg
