 Skip to content

There’s honestly nothing quite like opening a jar of perfectly preserved goodness made right in your own kitchen! For me, that simple act of preserving brings such a wave of satisfaction, a feeling that I’ve captured a little bit of sunshine and flavor to enjoy later. And when it comes to homemade preserves , my pickled okra recipe is a total winner. It’s one of those recipes that just makes you feel good, you know? Super crunchy, bursting with flavor, and perfect for nibbling on or, my favorite, as that classic bloody mary garnish.
You know, finding this joy in preserving really reminds me of my own journey. For the longest time, the kitchen felt like a place of stress, not joy. But when I finally conquered making this pickled okra, discovering that perfect balance of crunch and tang, it was like unlocking a new level of happiness. It truly embodies what Pure Cooking Joy is all about: approachable food that tastes incredible and brings people together. This recipe is proof that you *can* make something special and delicious, even on a busy weeknight!
Gather Your Ingredients for Pickled Okra
Okay, so to get started on these amazing pickled okra pods, you’re going to need a few simple things. Make sure you grab the freshest okra you can find – that’s key for that perfect crunch! Here’s what goes into my go-to recipe:
- 3 pounds of lovely fresh okra pods, trimmed up nice
- 3 cups of white vinegar – make sure it’s 5% acidity, that’s important for canning!
- 3 cups of water
- 3 tablespoons of pickling salt (don’t use table salt, it can make your brine cloudy!)
- 6 cloves of fresh garlic, peeled – I just eyeball peeling them, no need to be fancy!
- 6 sprigs of fresh dill – I love the smell of dill!
- And for a little kick, 1 teaspoon of red pepper flakes, but you can totally adjust this to make your pickled okra perfectly spicy for you!
How to Make Delicious Pickled Okra
Alright, now for the fun part – turning those fresh okra pods into tangy, crunchy delights! It’s a pretty straightforward process, and honestly, the payoff is so worth it. We’re going to use the water bath canning method, which is super safe and reliable for getting those pickles perfectly preserved.
Preparing the Okra and Brine
First things first, give your okra pods a good wash under cool water. Then, you’ll want to trim off just the very tops of the stems – don’t cut too much, just enough to clean them up. While you’re doing that, let’s get our brine going. In a decent-sized pot, pour in your white vinegar, water, and that crucial pickling salt. Give it a good stir and bring it all up to a boil. We want to make sure that salt is completely dissolved before we move on.
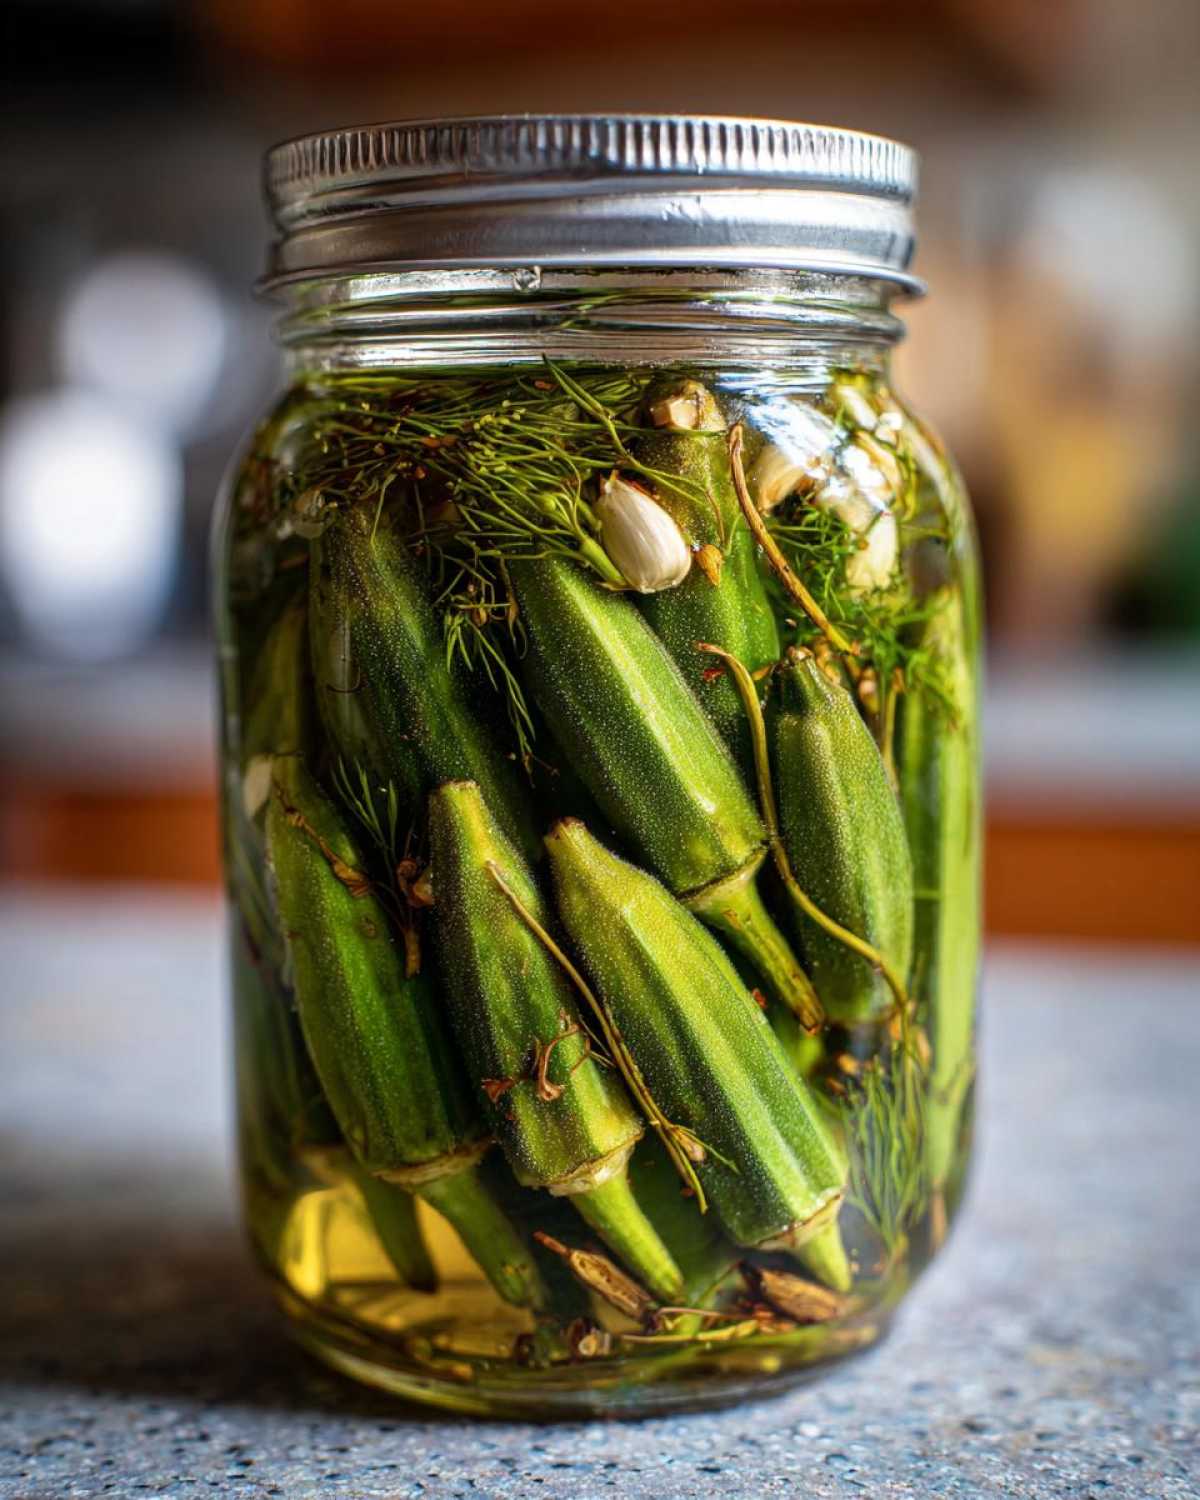
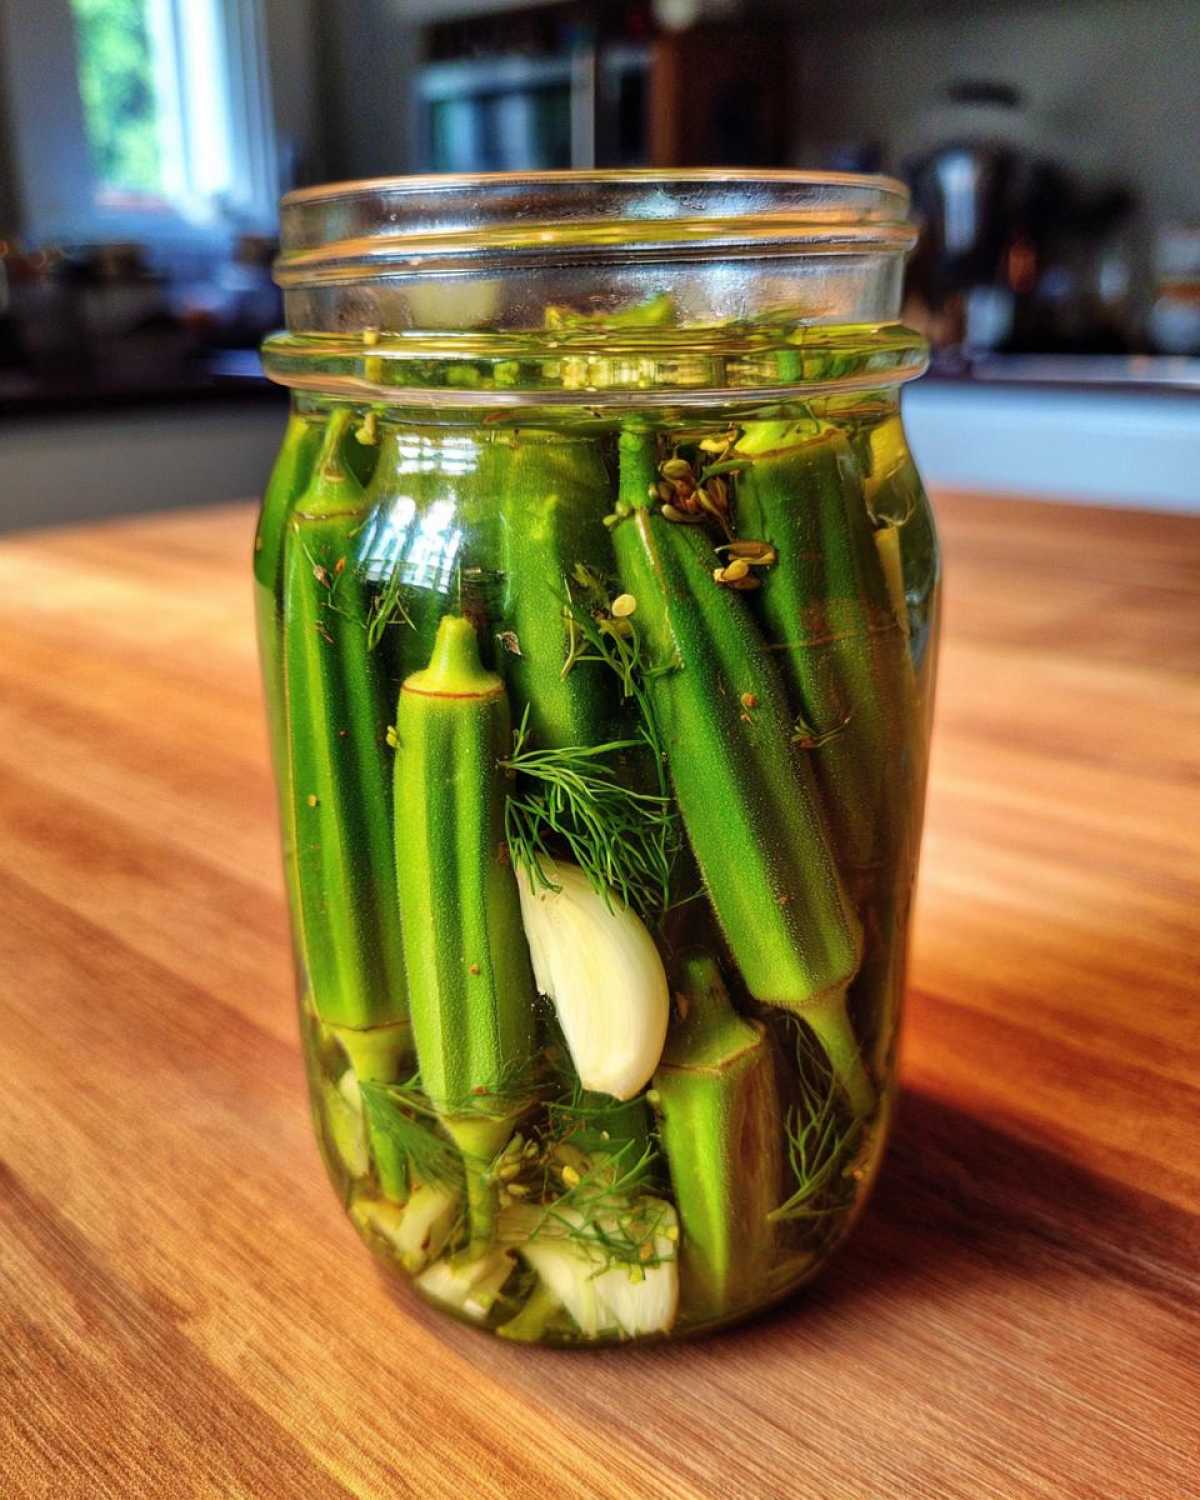
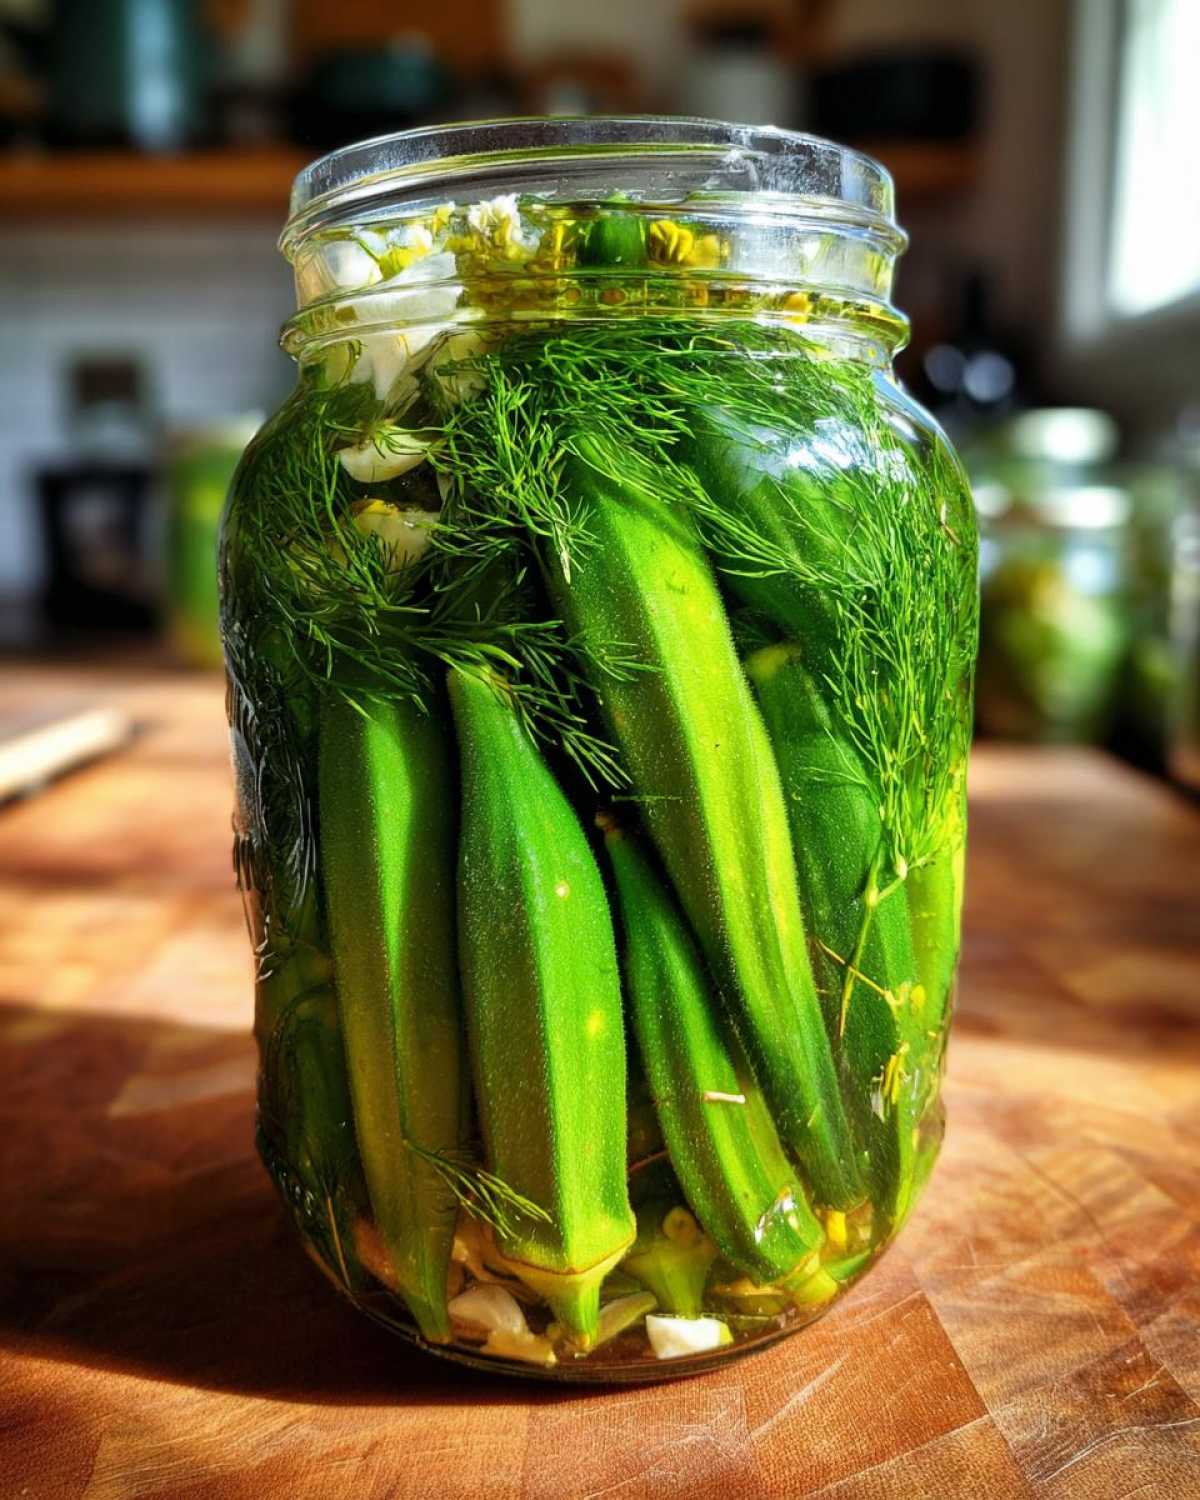
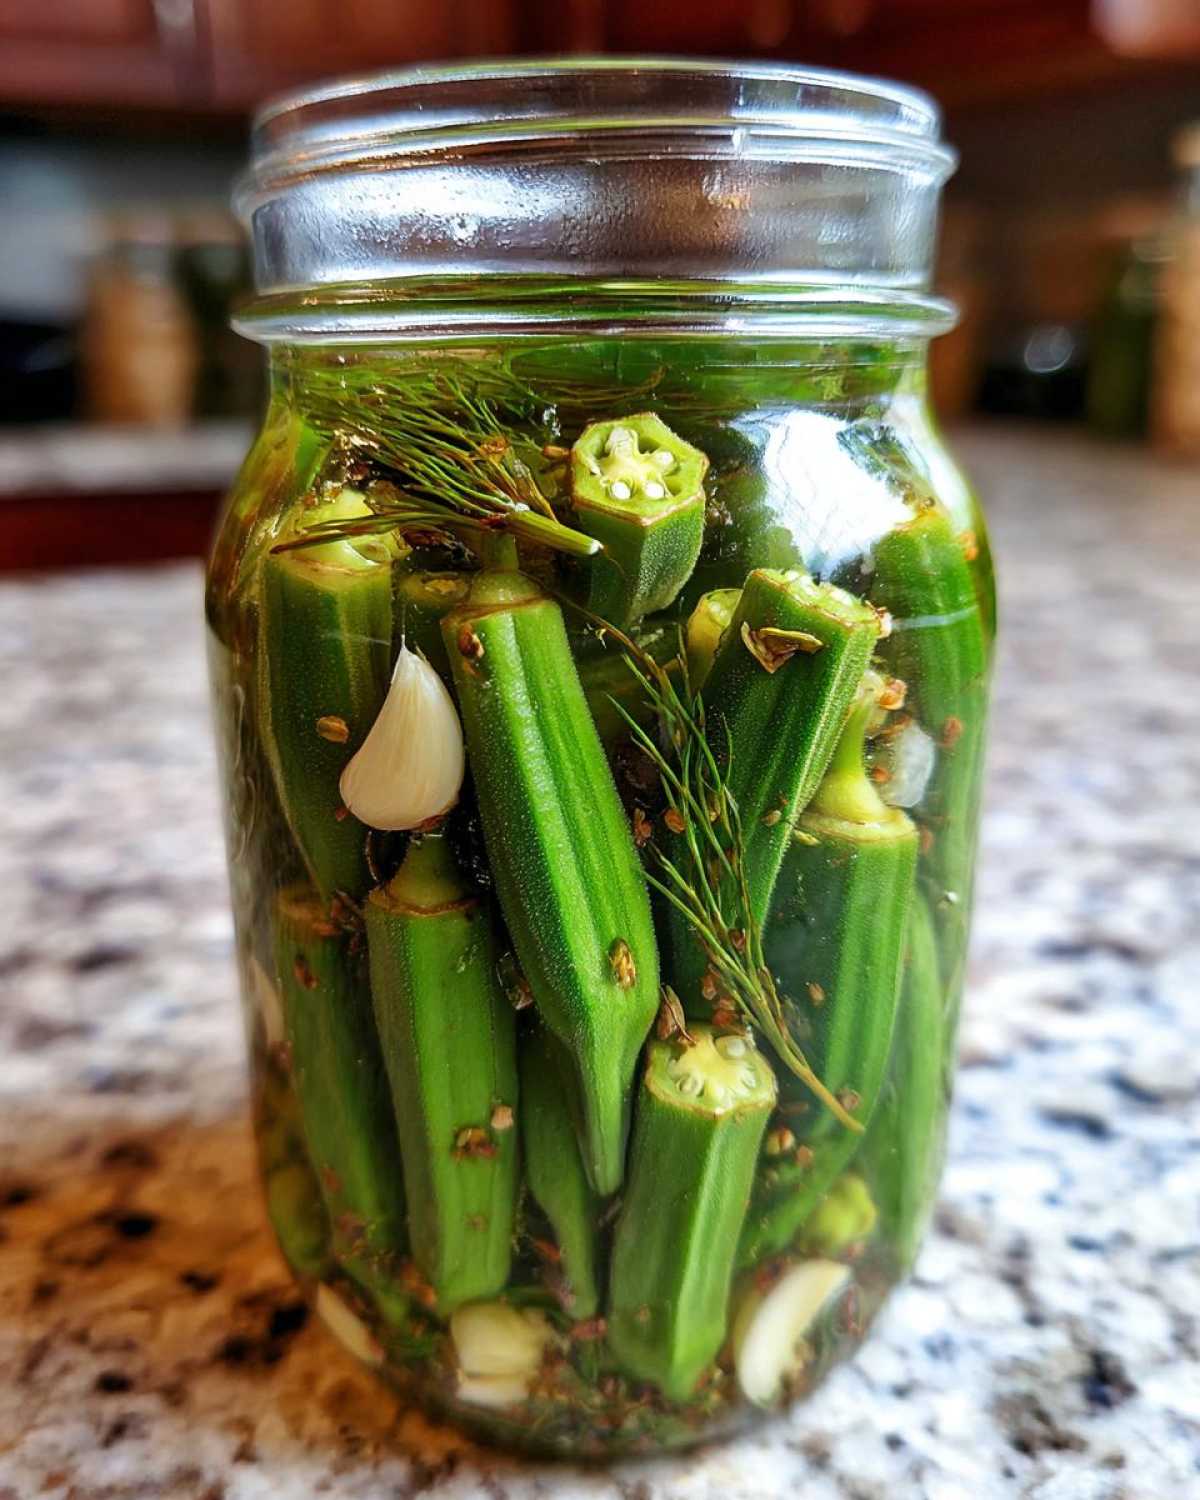
Packing the Jars for Pickled Okra
Now, grab your clean, sterilized canning jars. This is where we pack in all that flavor! Tightly pack the okra pods into each jar, standing them up as best you can. Then, into each jar goes one clove of garlic, a lovely sprig of fresh dill, and if you’re feeling brave, a little pinch of those red pepper flakes for a bit of zing! Make sure you leave about a half-inch of space at the top of the jar – that’s called headspace, and it’s really important for a good seal. If you see any air bubbles hiding in there, just run a rubber spatula or a chopstick gently around the inside edge of the jar to pop them.
Water Bath Canning and Cooling
Get your water bath canner ready and bring that water to a rolling boil. Carefully place your filled jars into the boiling water. We need to process these for exactly 10 minutes. Once the time is up, use your jar lifter to gently pull the jars out and set them on a towel-lined counter to cool completely. You’ll hear a satisfying little ‘thwack’ or ‘ping’ as the lids seal airtight. It’s a good idea to let them sit for about 12 to 24 hours before giving them a little press on the lid. If it doesn’t flex, hooray, they’re sealed and ready for the pantry! If it does flex, just pop that jar in the fridge!
Tips for Crisp Dill Okra
Want that perfect, satisfying crunch every single time you bite into your pickled okra? It’s all about a few key tricks! First off, using the freshest okra you can possibly find is the absolute foundation for that crisp dill okra. Seriously, the fresher, the better! When you’re packing your jars, really try to nestle those okra pods in there nice and snug, but don’t mash them. This helps keep things from getting mushy. And patience, my friends, patience! Letting your pickled okra cure for at least a week or two makes all the difference in getting that ultimate crunch. Trust me, it’s worth the wait!
Variations for Your Pickled Okra
Now, while my classic dill version is pretty fantastic, you know I love to play around in the kitchen! These pickled okra pods are a total blank canvas. If you’re a fan of some real Southern heat, add a pinch of your favorite Cajun seasoning right into the jar with the garlic and dill. It gives it this amazing, complex flavor that’s just *chef’s kiss*. And like I said, don’t be shy with those red pepper flakes if you like things extra spicy!
Serving Your Southern Pickled Okra
Oh, the absolute best part! My southern pickled okra are just begging to be enjoyed. Of course, they make the most *fantastic* bloody mary garnish – that little crunch and tang is unbeatable. But don’t stop there! I love popping a few into my mouth straight from the jar as a spicy snack, or serving them up as a tangy side dish with fried chicken or barbecue. Yum!
Frequently Asked Questions about Pickled Okra
I get asked these questions all the time, usually while someone’s already eyeing my jar of pickles! Here are the answers straight from my canning-stained notebook:
Is it safe to can okra using this water bath recipe?
Absolutely! As long as you follow the recipe for the brine – making sure you have the right acidity from the vinegar and using pickling salt – and process them for the correct time in the water bath, these canned okra pods are perfectly safe. It’s all about that precise ratio!
How long does pickled okra last?
Properly canned pickled okra will last in your pantry for about a year, though they’re usually best within the first 6-8 months for peak crunchiness. Once you open a jar, just pop it in the fridge, and it should be good for a few weeks.
Can I make spicy pickled okra without the heat?
You sure can! If you’re not a fan of spice, or you’re making these for folks who aren’t, just skip the red pepper flakes entirely. You’ll still get that fantastic tangy flavor from the brine and the dill. You can also add other spices like mustard seeds or coriander if you want a different flavor profile without the heat.
Understanding the Nutrition of Pickled Okra
Just a little heads-up: the nutritional info you see is just an estimate, okay? It can really change depending on the exact brands of ingredients you use. So, while I focus on flavor and that perfect pickle, I don’t provide super precise nutritional data for this recipe. For more information on okra nutrition, check out nutritionvalue.org.
Share Your Pickled Okra Creations
I just *love* hearing about your kitchen adventures! Did you make these pickled okra pods? What did you think? Please leave a comment below, rate the recipe, or even share some of your favorite ways to enjoy them. Your feedback totally makes my day!
PrintCrisp Dill Pickled Okra

Learn how to make crunchy, delicious pickled okra at home with this easy water bath canning recipe. Perfect for snacking or as a Bloody Mary garnish.
- Prep Time: 20 minutes
- Cook Time: 15 minutes
- Total Time: 35 minutes plus curing time
- Yield: 6 pints 1x
- Category: Preserves
- Method: Water Bath Canning
- Cuisine: Southern
- Diet: Vegetarian
Ingredients
- 3 pounds fresh okra pods
- 3 cups white vinegar (5% acidity)
- 3 cups water
- 3 tablespoons pickling salt
- 6 cloves garlic, peeled
- 6 sprigs fresh dill
- 1 teaspoon red pepper flakes (optional, for spicy pickled okra)
Instructions
- Wash okra pods and trim off the stems.
- In a large pot, combine white vinegar, water, and pickling salt. Bring to a boil, stirring until salt dissolves.
- Pack the okra pods tightly into sterilized canning jars.
- Add one clove of garlic, one sprig of dill, and a pinch of red pepper flakes (if using) to each jar.
- Ladle the hot brine over the okra, leaving about 1/2 inch of headspace.
- Remove air bubbles by running a clean utensil around the inside of the jar.
- Wipe jar rims clean and place sterilized lids and rings on the jars.
- Process the jars in a boiling water bath for 10 minutes.
- Carefully remove jars from the water bath and let them cool completely on a towel-lined counter.
- Check seals after 12-24 hours. If a lid doesn’t flex when pressed, refrigerate that jar.
- Allow pickles to cure for at least 1-2 weeks before enjoying.
Notes
- Ensure your canning jars and lids are sterilized before use.
- Adjust the amount of red pepper flakes to control the spice level.
- For a Cajun-style pickled okra, add a pinch of your favorite Cajun seasoning to each jar.
Nutrition
- Serving Size: 2 tablespoons
- Calories: 5
- Sugar: 0g
- Sodium: 190mg
- Fat: 0g
- Saturated Fat: 0g
- Unsaturated Fat: 0g
- Trans Fat: 0g
- Carbohydrates: 1g
- Fiber: 0g
- Protein: 0g
- Cholesterol: 0mg
