 Skip to content
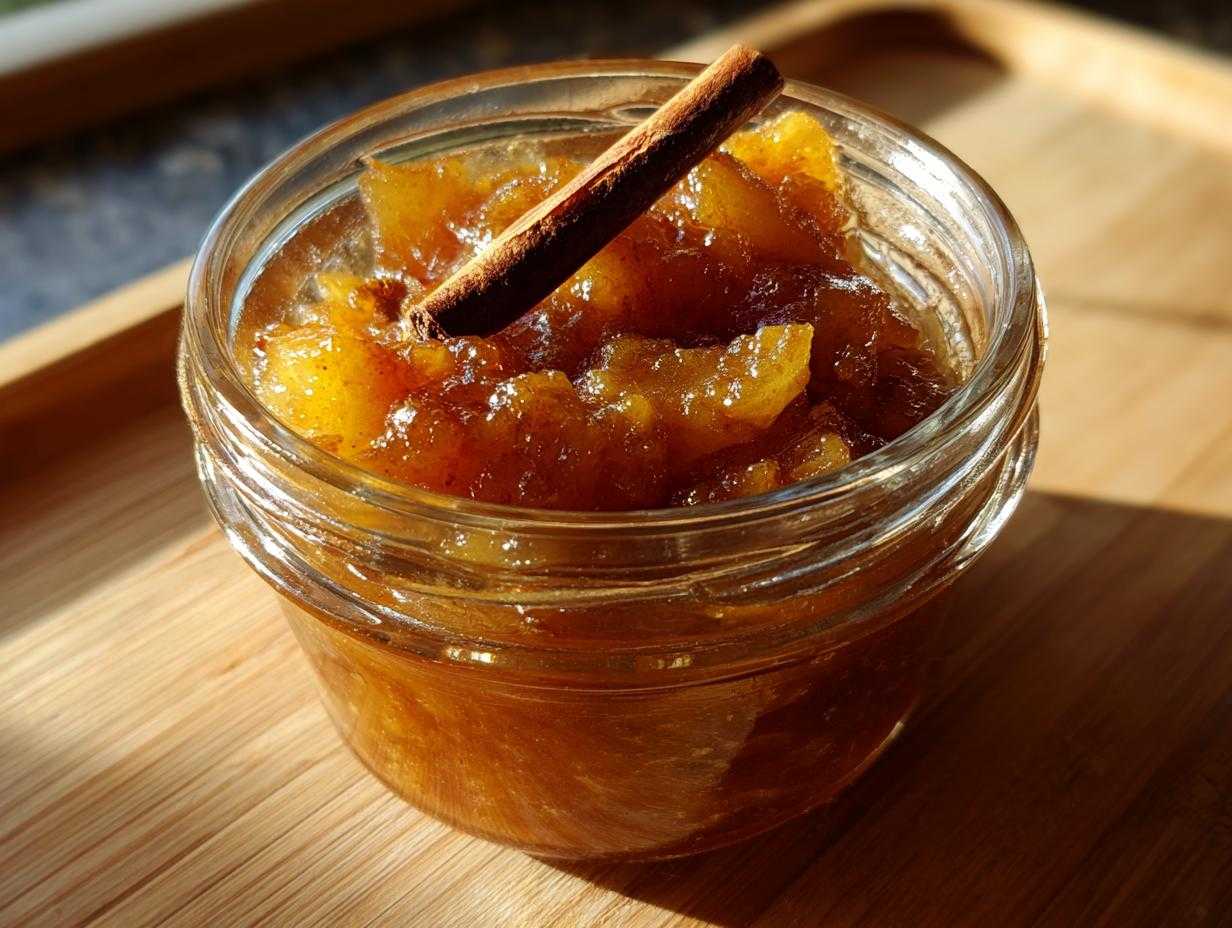

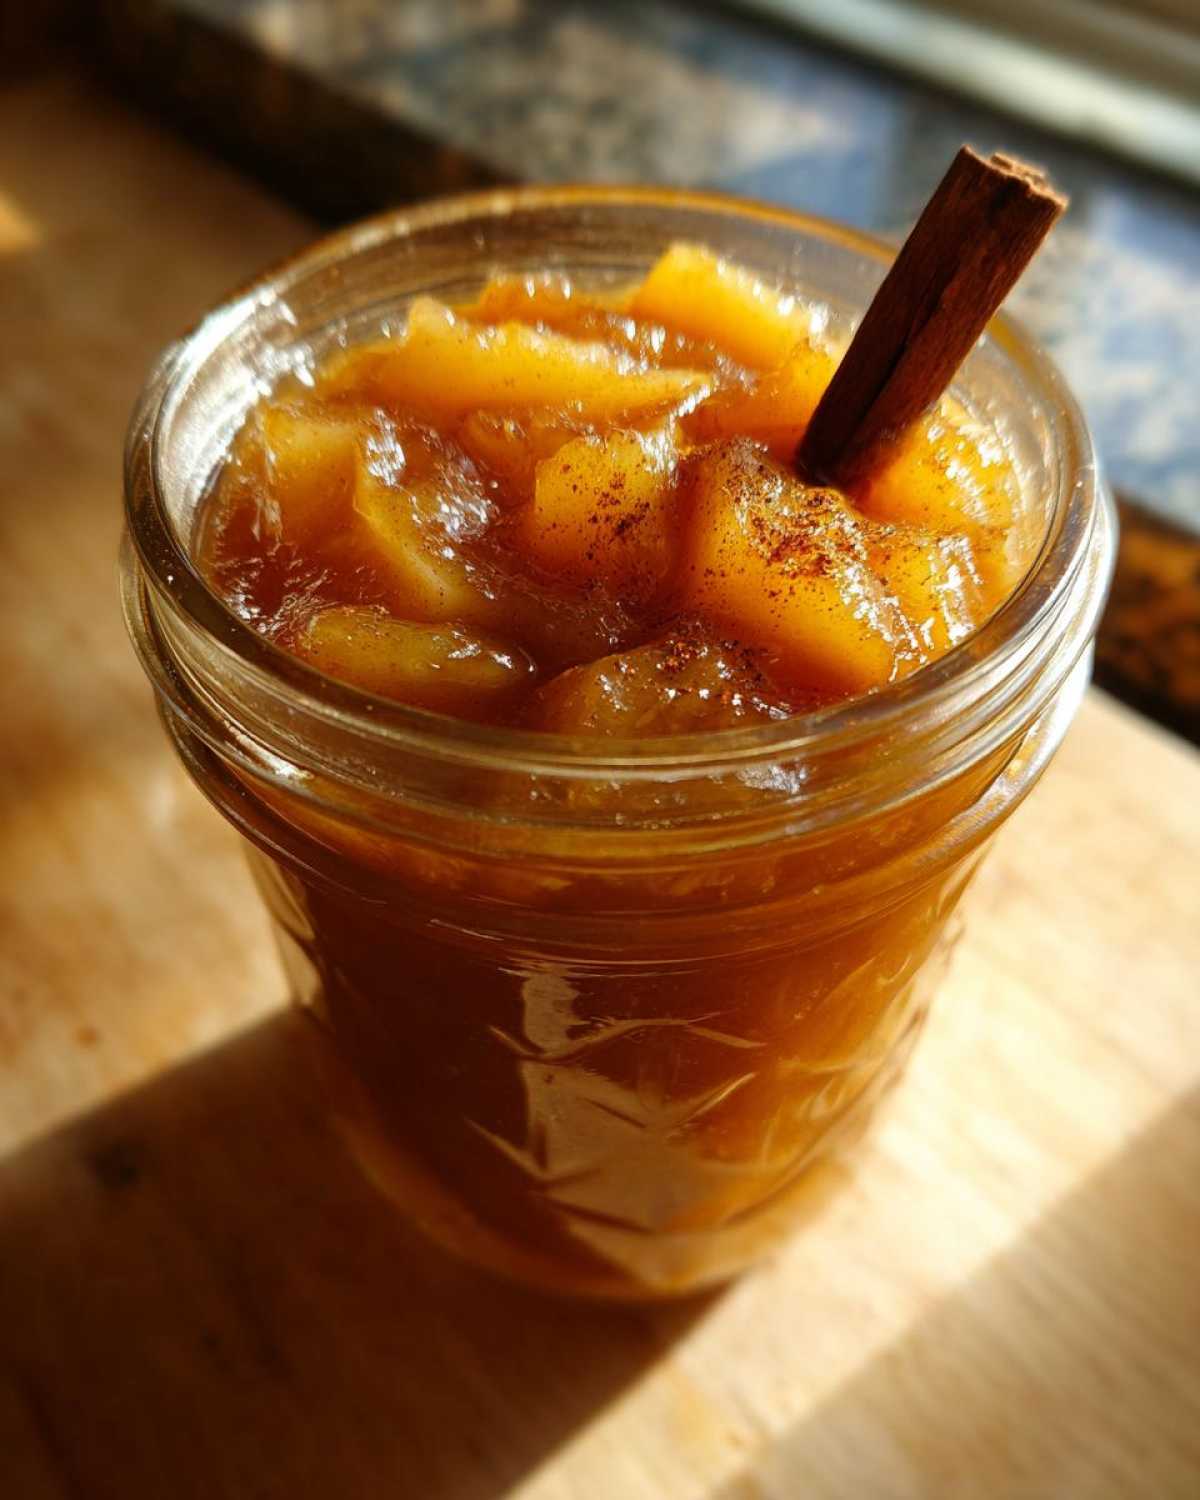
There’s something truly magical about a jar of homemade pear preserves, isn’t there? It’s that feeling of warmth, that hint of spice, that perfect chunky texture all wrapped up in a beautiful jar, ready to be shared. When I first started my journey away from kitchen burnout, just like Alex talks about, cooking became my therapy. And making simple, soul-satisfying food, like this no-pectin, water-bath safe, cinnamon-laced pear preserves, brought me so much joy. It’s really proof that delicious food doesn’t have to be complicated; it just needs a little love and the right ingredients.
- Why You'll Love This Pear Preserves Recipe
- Gather Your Ingredients for Pear Preserves
- Step-by-Step Guide to Making Pear Preserves
- Tips for Perfect Pear Preserves Every Time
- Making Small Batch Pear Preserves
- Water Bath Canning Your Pear Preserves
- Creative Ways to Use Your Spiced Pear Spread
- Storing and Gifting Your Pear Preserves
- Frequently Asked Questions About Pear Preserves
- Understanding the Nutrition of Pear Preserves
Why You’ll Love This Pear Preserves Recipe
Seriously, making this pear preserves recipe is just about the easiest way to capture that warm, spiced pear goodness! Here’s why it’s going to become a favorite in your kitchen:
- No Pectin Needed! We let the pears do all the work for that lovely, chunky texture.
- Super Simple: Just a few ingredients and a straightforward process from start to finish.
- Perfect for Canning: It’s totally water-bath safe, so you can preserve that taste of autumn for months.
- Cozy Spiced Flavor: Cinnamon, nutmeg, and cloves give it that comforting, old-fashioned pear jam taste.
- Amazing for Gifts: These little jars of homemade joy are perfect for holiday presents or just because!
- Pure Cooking Joy: It embodies that feeling of accomplishment and simple happiness that comes from making something delicious yourself.
Gather Your Ingredients for Pear Preserves
Alright, let’s get our little pear preserve-making station set up! You’ll want to grab ripe but still firm pears – think Bartlett or Anjou, they hold their shape so nicely. You’ll need about 2 pounds of them, which will chop down to roughly 4 cups. Then, for that sweetness and preservation power, we need 3 cups of regular granulated sugar. Don’t forget the lemon juice – that’s 1/4 cup of it – it adds a touch of brightness and helps everything gel. And for that wonderful cozy flavor? We’re going with 1 teaspoon of ground cinnamon, a pinch of nutmeg (1/4 teaspoon), and just 1/4 teaspoon of ground cloves. That’s it! Simple, right?
Step-by-Step Guide to Making Pear Preserves
Making this old-fashioned pear jam is really straightforward, and I promise it’s worth every second! First things first, get your water bath canner ready with jars, lids, and bands. It’s important to have all your canning supplies prepped and sterilized. Now, grab your chopped ripe pears – aren’t they pretty? – and toss them into a big pot with your sugar, lemon juice, cinnamon, nutmeg, and cloves. Give it all a good stir to make sure those warm spices are coating every single pear.
- Get your water bath canner all set up with your jars, lids, and rings. Make sure everything is clean and ready to go!
- Combine the chopped pears, sugar, lemon juice, cinnamon, nutmeg, and cloves right into a big pot.
- Give everything a really good stir so all those pear pieces are coated in the lovely spices and sugar.
- Pop the pot over medium-high heat and bring it to a boil, stirring all the time so nothing sticks.
- Once it’s boiling, turn the heat down to low and let it simmer. Stir it every now and then for about 45 to 60 minutes. You’re looking for it to get nice and thick, and ideally, it should reach 220°F (104°C) on a candy thermometer. If you don’t have one, no worries!
- Do the “set test”: put a little spoonful of the preserves onto a chilled plate you’ve had in the freezer for a few minutes. If it gels up and doesn’t stay watery, it’s ready!
- Carefully ladle the hot preserves into your clean jars, leaving about 1/4 inch of space at the top (that’s your headspace).
- Wipe the rims of the jars super clean with a damp cloth – this is key for a good seal! Screw on the lids and bands just until they feel snug, not super tight.
- Gently place the jars into your simmering water bath canner and process them for 10 minutes. (If you live higher up, you might need to add a bit more time, so check your altitude canning guidelines!)
- Carefully take the jars out of the canner and let them cool completely on a towel-lined counter. You’ll hear little pinging noises as they seal – that’s the best sound!
Tips for Perfect Pear Preserves Every Time
You know, the best part about making these pear preserves is that they’re pretty forgiving! But to make sure you get that perfect, old-fashioned pear jam taste and texture, here are a few little secrets I’ve picked up. First off, pick your pears wisely! You want them ripe enough to be sweet, but still with a bit of firmness – no mushy pears allowed here, or they’ll just turn to applesauce. I find Bartlett or Anjou are usually my go-to’s. If your preserves seem a little thin after simmering, don’t fret! Pop a spoonful onto that chilled plate test again; sometimes it just needs a few more minutes to thicken up. And about those spices? Feel free to nudge them up or down to your liking. More cinnamon? Less cloves? Make it yours!
Making Small Batch Pear Preserves
Sometimes you just have a few star pears hanging around, or maybe you just want to try this pear preserves recipe without committing to a big batch. Totally get it! You can easily halve this recipe. Just use 2 cups of chopped pears, 1.5 cups of sugar, 2 tablespoons of lemon juice, and about half of the spices. It’s a fantastic way to use up that smaller harvest or to experiment with making your own jams for the first time. You get all that delicious spiced flavor and the joy of canning, just on a more manageable scale!
Water Bath Canning Your Pear Preserves
Now for the part that lets you save all this deliciousness for later: water bath canning! This process makes sure your beautiful, chunky pear preserves stay safe and sound on your shelf for up to a year. So, after you’ve done your set test and carefully ladled the hot preserves into your clean jars, making sure to leave that 1/4 inch headspace, it’s time to process. Wipe those rims clean (super important!) and put on the lids finger-tip tight.
Gently lower your filled jars into a pot of simmering water. Make sure the jars are fully submerged by about an inch of water. We’ll process these for a solid 10 minutes. Oh, and if you happen to live in a higher altitude, remember to add a little extra processing time! It makes all the difference for a proper seal.
Creative Ways to Use Your Spiced Pear Spread
You know, this spiced pear spread is so much more than just a jam for your morning toast – though it’s fantastic that way too! Think of it as your secret weapon for adding a little something special to meals. It’s divine dolloped onto a warm slice of brie or cheddar cheese, making any cheese board fancy! I also love swirling a spoonful into plain yogurt or oatmeal in the morning. And talk about a glaze! It’s absolutely perfect brushed over pork chops or roasted chicken towards the end of cooking. Honestly, the possibilities are endless!
Storing and Gifting Your Pear Preserves
Once your beautiful pear preserves have cooled and sealed with that satisfying ‘ping,’ store them in a cool, dark place, and they’ll be delicious for up to a whole year! But honestly, who can wait that long? These little jars are just begging to be given away. For holiday gifting, I love to tie a cute ribbon around the lid, maybe add a little sprig of rosemary or cinnamon stick, and definitely a nice handwritten label. They feel so much more special than store-bought, don’t they? It’s the taste of pure joy, bottled up!
Frequently Asked Questions About Pear Preserves
I get asked these questions all the time when I’m teaching my canning classes, so here are the answers straight from my recipe notes!
What kind of pears should I use for this preserves recipe?
You want to use pears that are ripe but still have some firmness! Think Bartlett or Anjou pears. They have a lovely sweetness when ripe but hold their shape really well during cooking, which is key for that chunky texture in our no-pectin pear preserves. Avoid pears that are too soft, or you’ll end up with more of a puree than a preserve.
My pear preserves didn’t seem to set. What did I do wrong?
Oh no! Don’t worry, it happens sometimes. The most common reasons for preserves not setting are not cooking them quite long enough, or not having enough natural pectin in the fruit. Since this is an old-fashioned pear jam without added pectin, make sure you cooked it until it reached that 220°F mark or passed the chilled plate test. If they’re still a bit runny, you can gently reheat them and cook a bit longer, or just enjoy them as a lovely spiced pear syrup for pancakes!
Can I use honey or maple syrup instead of sugar?
You can, but it will change the flavor and the way the preserves set. Honey and maple syrup have different sugar compositions and moisture content than granulated sugar. For this specific recipe, especially since we’re not using added pectin and relying on sugar for preservation, granulated sugar gives the most reliable results for that classic, old-fashioned pear jam texture and shelf life.
What if my jar didn’t seal properly?
If you find a jar that didn’t seal (usually the lid stays slightly popped up), don’t fret! You can definitely reprocess it. Either remove the lid, check the rim for any debris, put on a new lid, and reprocess for the full 10 minutes, or you can just pop that jar in the fridge and enjoy your pear preserves right away. They’re still perfectly delicious!
Understanding the Nutrition of Pear Preserves
Just a little note about the nutrition info for these pear preserves: the numbers you might see are always just estimates, you know? They can change a bit depending on the exact pears you used, what brands of spices you picked up, and how ripe those pears were when they went into the pot. It’s all part of the homemade charm!
PrintSpiced Pear Preserves
A simple recipe for chunky, cinnamon-spiced pear preserves made without pectin. Perfect for water bath canning and gifting.
- Prep Time: 20 minutes
- Cook Time: 60 minutes
- Total Time: 1 hour 20 minutes
- Yield: Approximately 4 half-pint jars 1x
- Category: Preserves
- Method: Water Bath Canning
- Cuisine: American
- Diet: Vegetarian
Ingredients
- 4 cups chopped ripe pears (about 2 pounds)
- 3 cups granulated sugar
- 1/4 cup lemon juice
- 1 teaspoon ground cinnamon
- 1/4 teaspoon ground nutmeg
- 1/4 teaspoon ground cloves
Instructions
- Prepare your water bath canner, jars, lids, and bands.
- Combine chopped pears, sugar, lemon juice, cinnamon, nutmeg, and cloves in a large pot.
- Stir well to combine.
- Bring the mixture to a boil over medium-high heat, stirring constantly.
- Reduce heat to low and simmer, stirring occasionally, until the preserves have thickened, about 45-60 minutes. The preserves should reach 220°F (104°C) on a candy thermometer.
- Test for set by placing a small spoonful on a chilled plate. If it gels, it is ready.
- Ladle hot preserves into prepared jars, leaving 1/4 inch headspace.
- Wipe jar rims clean and screw on lids and bands fingertip tight.
- Process in a water bath canner for 10 minutes (adjust for altitude if necessary).
- Remove jars from canner and let cool completely on a towel-lined counter.
Notes
- Use ripe but firm pears for the best texture.
- Adjust spices to your preference.
- Ensure your jars are properly sterilized for safe canning.
- Properly sealed jars can be stored in a cool, dark place for up to a year.
Nutrition
- Serving Size: 2 tablespoons
- Calories: 70
- Sugar: 17g
- Sodium: 0mg
- Fat: 0g
- Saturated Fat: 0g
- Unsaturated Fat: 0g
- Trans Fat: 0g
- Carbohydrates: 18g
- Fiber: 0g
- Protein: 0g
- Cholesterol: 0mg
