 Skip to content
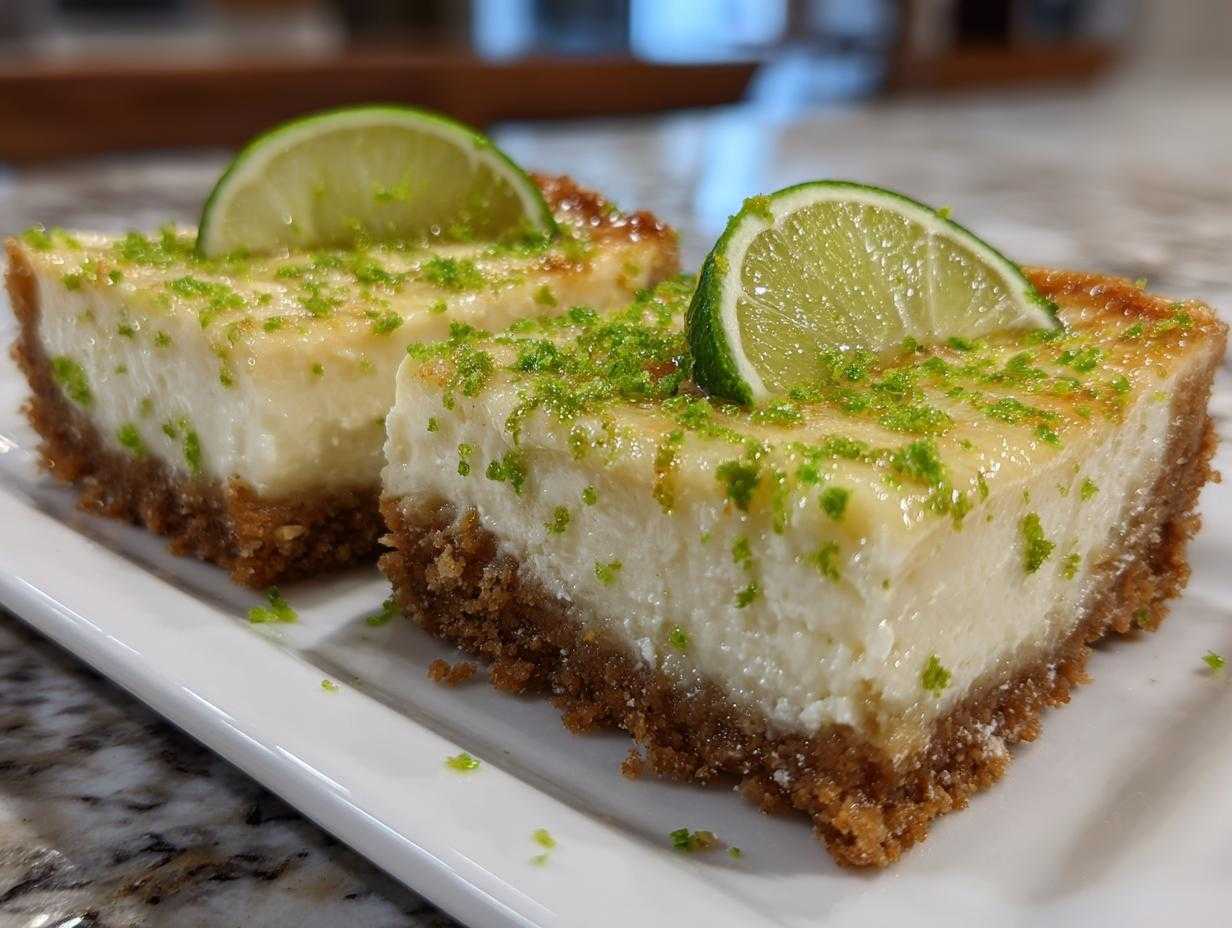

Oh my gosh, when that summer heat hits or you just need a seriously bright dessert that snaps your taste buds awake, nothing beats Key Lime! But let’s be real—sometimes those restaurant cheesecakes are just too complicated to recreate. Well, forget that stress! I finally perfected my **Key Lime Cheesecake** recipe. This one hits that rich, thick, and unbelievably creamy spot, almost like that decadent version you get at the big cheesecake place, but trust me, it’s totally achievable right here in your kitchen. Seriously, mastering this dessert after all those stressful spreadsheets was my big ‘Pure Joy’ moment. It’s the perfect balance of sweet and tart, and you are going to love making this Key Lime Cheesecake from scratch!
- Why This Creamy Key Lime Cheesecake Recipe Works (E-E-A-T)
- Ingredients for the Best Key Lime Cheesecake
- Step-by-Step Instructions for Your Key Lime Cheesecake
- Tips for Homemade Cheesecake Factory Style Key Lime Cheesecake
- Making Easy Key Lime Cheesecake Variations
- Storage and Serving Suggestions for Your Tangy Lime Dessert
- Frequently Asked Questions About Key Lime Cheesecake Recipe
- Making This Decadent Key Lime Dessert From Scratch
- Nutritional Estimate for Key Lime Cheesecake
- Share Your Perfect Key Lime Cheesecake Experience
Why This Creamy Key Lime Cheesecake Recipe Works (E-E-A-T)
I know what you’re thinking: Cheesecake is intimidating! But this Key Lime Cheesecake recipe is different. It’s designed for maximum flavor payoff with minimal fuss. We’re building in stability so you get that stunning, professional set without any cracks.
The trust here comes from technique. We’re not just throwing things in a bowl; we’re using specific methods to guarantee a beautiful result every single time. Trust me on this one—it’s worth the couple of extra steps!
Achieving the Perfect Tangy Lime Dessert Texture
The secret to that dreamy, velvety interior is how we treat the dairy. I use all three components—cream cheese, sour cream, and eggs—in a specific ratio. The sour cream is key here; it cuts the richness just enough to let that bright flavor shine through, giving you the ultimate Tangy Lime Dessert. It sets up thick and creamy, never grainy, and you’ll wonder why you ever bothered with store-bought!
Buttery Graham Cracker Crust Cheesecake Foundation
Nobody wants a soggy bottom when they are biting into a rich dessert, right? That’s why we give the Graham Cracker Crust Cheesecake base a little head start in the oven. Baking that buttery crumb for just ten minutes locks it in place. It keeps it perfectly crisp and sturdy, so it stands up beautifully under the weight of that wonderful Key Lime Cheesecake filling. It’s that foundational detail that makes this recipe truly shine.
Ingredients for the Best Key Lime Cheesecake
When you’re making something this special, you need quality ingredients ready to go. Being organized here is half the battle, trust me. Having everything measured out before you start mixing means you won’t mess up the crucial batter stage! This recipe asks for some specific things, especially regarding temperature, but the overall ingredient list is surprisingly straightforward. We’re breaking this down into the three main parts you need: the crust, the filling, and the garnish, so you can get set up easily.
For the Graham Cracker Crust Cheesecake Base
This part is simple, but don’t skimp on pressing it down! You need:
- 1 1/2 cups graham cracker crumbs (make sure they are finely crushed!)
- 1/4 cup granulated sugar
- 6 tablespoons unsalted butter, melted
Make sure you press this mixture firmly into that springform pan. Use the bottom of a measuring cup or glass; you want this base tight!
Simple Lime Cheesecake Filling Components
This is where the magic happens for that rich, thick texture we are after. The most important thing here? Your cream cheese needs to be perfectly softened—room temperature soft, not microwave-soft! For our Simple Lime Cheesecake Filling, grab:
- 3 (8 ounce) packages cream cheese, softened
- 1 1/2 cups granulated sugar
- 1/4 cup all-purpose flour (this helps stabilize it!)
- 1 teaspoon vanilla extract
- 1/2 cup sour cream
- 1/2 cup key lime juice (and I mean freshly squeezed if you can manage it—the flavor difference is huge!)
- 4 large eggs
If you use bottled juice, start with a little less than a half cup and taste it before you add the eggs, just so it doesn’t get too intensely sour. We want that perfect, balanced tang!
Step-by-Step Instructions for Your Key Lime Cheesecake
Okay, deep breaths! This is where we turn those gorgeous ingredients into the absolute best Key Lime Cheesecake you’ve ever had. Don’t let the water bath scare you; it’s our secret weapon for smoothness! I’ve broken this down into manageable chunks so you can focus on just one part at a time. If you follow these steps, you’ll totally nail that professional look and decadent texture. Ready? Grab that mixing bowl!
Preparing the Graham Cracker Crust Cheesecake
First things first, make sure your oven is set to 325°F (160°C). Now, take your 9-inch springform pan and wrap the *outside* bottom and sides super tightly with heavy-duty aluminum foil—like three good layers. This wrap is essential because we are putting the pan in a big bath of hot water, and we definitely don’t want any leaks! Mix your crust ingredients until they look like wet sand, press it down firmly into the pan bottom, and pop it into the oven for about 10 minutes. Let it cool a tiny bit while you whip up the filling.
Mixing the Creamy Key Lime Cheesecake Filling
This sequence is non-negotiable if you want that smooth texture! Start by beating your softened cream cheese until it’s genuinely light and fluffy—no lumps allowed! Gently mix in your sugar and flour, just until they disappear. Then, stir in the vanilla, sour cream, and that gorgeous key lime juice. Here’s the big reveal: add the eggs one at a time. You should only mix until the yolk disappears before adding the next one. Stop mixing once the last egg is just incorporated! Overmixing now introduces too much air, and trust me, we want a dense, Creamy Key Lime Cheesecake, not an airy sponge!
Baking the Key Lime Cheesecake with a Water Bath
Once the filling is poured over that crust, nestle your foil-wrapped springform into a larger roasting pan. Carefully pour hot water into the roasting pan until it comes halfway up the sides of the cheesecake pan. This steam bath keeps everything baking evenly. Bake it for about 55 to 65 minutes. You are looking for the edges to finally look set, but the very center should still wobble softly when you gently nudge the pan. When it’s done, turn the oven OFF, crack the door open just an inch, and just leave it in there for a full hour. This slow cool-down trick prevents that awful cracking. After an hour, take it out, let it finish cooling on the counter, and then it seriously needs at least six hours—overnight is better—in the fridge before slicing!
If you want tips on speeding up your kitchen routine, check out some of my best baking tips for making things easier!
Tips for Homemade Cheesecake Factory Style Key Lime Cheesecake
Okay, so you’ve nailed the bake, and now we’re moving into the territory of making this an absolute showstopper dessert—something that rivals those incredible desserts you see in fancy restaurants! That rich, tall, slightly intense flavor of the Homemade Cheesecake Factory Style Key Lime Cheesecake isn’t just luck; it comes down to a few key decisions right at the end. Since I’m all about creating big flavor without adding extra stress, these finishing touches are simple but make a huge visual and flavor impact.
Remember, we’re aiming for excellence here, but it all flows from that creamy base we already established. You don’t need fancy equipment, just attention to detail!
Perfecting the Cheesecake with Lime Zest Topping
This might seem minor, but please hear me out on the zest! After all that effort, you don’t want to skip the crowning jewel. The green part of the lime—the zest—is where almost all the lovely, fragrant oils live. If you skip this, your key lime cheesecake will taste good because of the juice, but it won’t smell bright and electric! I use a microplane zester right before I serve it. That sharp little tool shaves off only the green part, leaving the bitter white pith behind.
Sprinkle that fresh zest generously over the top. It adds a final, potent burst of lime essence that completes the whole experience. It’s the difference between a good cake and the one everyone asks for the recipe for later! For a little extra flair, sometimes I mix the zest right into a simple dusting of powdered sugar before putting it on. If you want to see how I apply finishing touches to rich desserts, check out how I handle the top layer on my creme brulee cheesecake—the idea is always maximum impact with minimal actual work!

Making Easy Key Lime Cheesecake Variations
I love that you’re already thinking about playing around with this recipe! That’s the joy of cooking, right? It’s great that we have this sturdy, classic baked Key Lime Cheesecake down pat, but sometimes you just need something faster for a summer gathering, or maybe you only need a few servings. Totally understandable!
I’ve tried tons of different approaches, and I’ve got a couple of simple pivots for you that keep the flavor profile fantastic while changing up the process. You can totally adapt this to your schedule. For more inspiration on shifting gears for easy entertaining, take a peek at my ideas for German Chocolate Cheesecake—sometimes a different base changes everything!
How to Make No Bake Key Lime Cheesecake
If the thought of the oven in July sends you running, you can absolutely transform this into a fantastic no-bake dessert. The biggest difference, obviously, is that you have to skip the eggs. Since the eggs are what truly set this creamy filling up when baked, for a no-bake version, you need something else to create structure. You can dramatically increase the chilling time—like, make it the day before and let it set overnight in the fridge—or, for a firmer set that mimics the baked texture better, I suggest using a small amount of softened gelatin dissolved in a tiny bit of warm water.
Just mix that gelatin mixture right into the filling after you blend everything else, pour it over your pre-baked crust, and chill! This approach gives you a lighter, yet still firm, No Bake Key Lime Cheesecake that is incredibly refreshing for a truly easy dessert.
Baking Mini Key Lime Cheesecakes
This is my favorite trick for parties! Making Mini Key Lime Cheesecakes cuts down on baking time and makes serving a breeze—no slicing required! You can use a standard muffin tin for these, but you absolutely need cupcake liners. Don’t skip the liners; getting baked cheesecake out of those small metal cups without damage is nearly impossible.
The crust measurement stays the same; just divide the mixture evenly among the lined cups. For the filling, you’ll likely get about 12 to 15 minis. Because they are so small, they bake way faster. Keep a close eye on them—they usually take only 18 to 22 minutes! You’ll know they are done when the edges look set and they only have a tiny wobble right in the center. They cool super fast right there on the counter before you stick them in the fridge.

Storage and Serving Suggestions for Your Tangy Lime Dessert
Whew! You made it past the water bath and the slow cool-down. Congratulations! Now comes the hardest part: waiting. Because this Key Lime Cheesecake is so rich and thick, it needs that proper chill time. Seriously, if you slice it too early, you’ll get a messy disaster, and nobody wants that! You need minimum of six hours hanging out in the cold, but I always cover mine loosely with plastic wrap and leave it overnight. It lets the flavors really marry up, and the texture firms up into that perfect sliceable state.
Leftovers are fantastic, by the way. Because of the high acidity from the lime juice, this keeps beautifully in the fridge for up to five days. Just keep it covered tightly! I actually think the flavors are even better on day two. These cheesecakes are sturdy enough that you don’t even need to worry about them drying out, which is great for busy weeks. If you need quick ideas for serving savory mains before this huge dessert, have a look at some of my light entertaining recipes!
Serving Suggestions for This Refreshment Citrus Dessert
Because our Key Lime Cheesecake is already so intensely flavorful—that pop of tartness mixed with the creamy sweetness—you don’t need to do much heavy lifting on the sides. We want toppings that enhance the citrus, not compete with it. My favorite way to serve this amazing, Refreshment Citrus Dessert is very simple.
First, make sure you hit it with that fresh lime zest we talked about! Then, you have a couple of options:
- A dollop of lightly sweetened whipped cream. Don’t over-sweeten this cream; the cake itself is sweet enough!
- A sprinkle of finely chopped toasted pecans or macadamia nuts for crunch.
- A side of fresh raspberries or blackberries. The slight earthiness of berries is a lovely contrast to the lime.
I sometimes see people trying to serve this with chocolate sauce, and honestly, I just don’t get it! Keep it light and bright. This is the perfect endnote to a heavy meal, or honestly, it’s perfect with just a strong cup of coffee or maybe even a cold beer! If you ever want to check in with me on social media about a serving query, you can always find me over on Facebook!

Frequently Asked Questions About Key Lime Cheesecake Recipe
I always get so many great questions after people try making this dessert, which tells me you all are really diving into the details—that’s what I love to see! Since we want everyone to feel confident making this Key Lime Cheesecake Recipe, I pulled together the common things people ask right after they’ve read through all the steps. Don’t stress if something confuses you; these little details can make or break a perfect bake!
Can I use bottled lime juice instead of fresh for this Key Lime Cheesecake Recipe?
That’s an honest question, especially when fresh key limes are hard to track down! Look, I’m loyal to fresh citrus because you just can’t beat that vibrant aroma and flavor, which is so important for a top-tier Key Lime Cheesecake Recipe overall. However, if bottled is your only option, go for it! But here’s the catch—bottled juice is often less potent or sometimes a little more sharp than fresh juice. If you notice your filling tastes overwhelmingly acidic after mixing, you might want to dial back the sugar by a tablespoon or two, or conversely, if it tastes a little flat, add just a tiny bit more zest for aroma.
What causes my homemade cheesecake to crack?
Ugh, the dreaded crack! It’s almost always because of a dramatic temperature change, which is why we spend so much time talking about the cooling process. When you rush a cheesecake from a hot oven to a cold counter, the structure shrinks too fast and BAM—crack! That’s why the water bath is non-negotiable for me; it creates a perfectly gentle baking environment. Then, that one-hour slow cool down inside the turned-off oven makes sure the cheesecake settles down nicely before you face the reality of the fridge temperature changes. If you skip that slow cool, you are begging for a hairline fracture, believe me!
Is this recipe better than a traditional Key Lime Pie?
Oh, that’s like asking me to choose a favorite child! They are just wonderfully different desserts, but they scratch different itches. A traditional Key Lime Pie is lighter, sort of jiggly, almost like a set custard on a thinner crust. This recipe, though? This is rich, tall, and deeply satisfying because of that luxurious cream cheese base. It offers a true Decadent Key Lime Dessert experience. If you want something that feels heavier, creamier, and requires a real fork, this cheesecake wins. If you want something super light after a huge holiday meal, maybe stick to a pie. But for supreme indulgent flavor? Cheesecake all the way!
Making This Decadent Key Lime Dessert From Scratch
See? You didn’t need a complicated catering team for this masterpiece! Creating the absolute best Key Lime Cheesecake entirely From Scratch Cheesecake is proof that you absolutely *can* create those showstopping desserts without the stress. That feeling when you slice into that rich, perfectly set layer the next day? Pure gold! That’s what Pure Cooking Joy is all about—making delicious, memorable food achievable for you in your own kitchen. I promise, once you master this technique, you’ll be feeling so confident about making any Decadent Key Lime Dessert!
If you want to see another example of a recipe that delivers big results through smart technique, take a look at my guide for the flourless chocolate torte. It’s all about the payoff!
Nutritional Estimate for Key Lime Cheesecake
I always feel a little nervous sharing nutrition facts because I focus purely on joy and flavor, not calorie counting! I’m Alex, and while I believe in enjoying food fully, I know some of you like to keep track. So, think of these numbers as a helpful ballpark estimate only, not a hard guarantee. I calculated this based on the 12 servings listed in the recipe. Since this is a big, rich dessert, it’s definitely meant to be enjoyed as an indulgence!
These estimates are calculated per slice, assuming you get exactly 1/12th of the whole dessert. If you end up making those mini cheesecakes instead, you’ll need to adjust things based on how many you make!
Here is the breakdown for one generous slice of this Key Lime Cheesecake Recipe:
- Serving Size: 1 slice
- Calories: 450
- Fat: 30g (with 18g being saturated fat)
- Carbohydrates: 40g
- Sugar: 35g
- Protein: 8g
- Cholesterol: 120mg
As you can see, this is going to be a bit decadent! That rich cream cheese and buttery crust add up, but that’s why it tastes so incredible! Don’t sweat the numbers too much; just relax and enjoy the bright citrus flavor. Food is totally meant to bring happiness, and this tart, creamy treat definitely delivers on that front!
Share Your Perfect Key Lime Cheesecake Experience
Okay, you’ve cooled it, you’ve chilled it, and you’ve sliced into that gorgeous, thick, vibrant Key Lime Cheesecake! Now, the best part of cooking, for me, is seeing how this recipe comes to life in *your* kitchen. Remember what I always say? Food is a love language, and sharing your successes is how we build this community!
I really, really want to hear about it! Did you manage to get that perfect texture? Did the sour cream balance that amazing tartness just right? Don’t be shy!
- Did you try the slow cool-down trick? Tell me if it stopped the cracking!
- Did you stick with the fresh zest topping, or did you get creative with any other garnishes?
- Be sure to leave a rating at the top—five stars means I get to do a happy little dance over here!
If you snapped a picture of your beautiful slice—especially if you made those Mini Key Lime Cheesecakes—please tag me! Seriously, seeing your delicious results makes all the testing and refining worth it. It reminds me why I started Pure Cooking Joy in the first place: to share delicious, achievable comfort with everyone.

If you have any last-minute questions that popped up while enjoying this Tangy Lime Dessert, or if you want to suggest another classic dessert that needs the ‘Pure Joy’ treatment next, head over to my contact page! Let’s keep cooking happy!
PrintThick and Creamy Key Lime Cheesecake

You can make this thick, creamy Key Lime Cheesecake with a buttery graham cracker crust. This recipe balances sweet and tangy flavors for a refreshing dessert.
- Prep Time: 25 min
- Cook Time: 65 min
- Total Time: 7 hours 30 min
- Yield: 12 servings 1x
- Category: Dessert
- Method: Baking
- Cuisine: American
- Diet: Vegetarian
Ingredients
- 1 1/2 cups graham cracker crumbs
- 1/4 cup granulated sugar (for crust)
- 6 tablespoons unsalted butter, melted
- 3 (8 ounce) packages cream cheese, softened
- 1 1/2 cups granulated sugar (for filling)
- 1/4 cup all-purpose flour
- 1 teaspoon vanilla extract
- 1/2 cup sour cream
- 1/2 cup key lime juice (freshly squeezed is best)
- 4 large eggs
- Lime zest for topping
Instructions
- Preheat your oven to 325°F (160°C). Wrap the outside of a 9-inch springform pan tightly with heavy-duty aluminum foil.
- Prepare the crust: Mix graham cracker crumbs, 1/4 cup sugar, and melted butter until combined. Press the mixture firmly into the bottom of the prepared springform pan. Bake for 10 minutes. Let cool slightly.
- Prepare the filling: In a large bowl, beat the softened cream cheese until smooth. Gradually beat in the 1 1/2 cups sugar and flour until just combined. Do not overmix.
- Mix in the vanilla extract, sour cream, and key lime juice until smooth. Beat in the eggs one at a time, mixing only until each egg is incorporated. Scrape down the sides of the bowl as needed.
- Pour the filling over the cooled crust. Place the springform pan inside a larger roasting pan. Carefully pour hot water into the roasting pan until it reaches halfway up the sides of the springform pan (this creates a water bath).
- Bake for 55 to 65 minutes, or until the edges are set but the center still has a slight jiggle.
- Turn off the oven, prop the door open slightly, and let the cheesecake cool inside the oven for 1 hour. This prevents cracking.
- Remove the cheesecake from the water bath and let it cool completely on a wire rack. Once cool, cover and refrigerate for at least 6 hours, or preferably overnight.
- Before serving, carefully remove the sides of the springform pan. Top with fresh lime zest. This recipe is a great alternative to complex meal planning when you want a showstopper dessert.
Notes
- For a tangier flavor, increase the key lime juice by 1 tablespoon.
- If you are planning a party, consider making mini cheesecakes in a muffin tin using cupcake liners for easy serving.
- If you want to avoid the water bath, reduce the baking time by 10 minutes and cool slowly at room temperature before refrigerating.
Nutrition
- Serving Size: 1 slice
- Calories: 450
- Sugar: 35g
- Sodium: 250mg
- Fat: 30g
- Saturated Fat: 18g
- Unsaturated Fat: 12g
- Trans Fat: 0.5g
- Carbohydrates: 40g
- Fiber: 1g
- Protein: 8g
- Cholesterol: 120mg
