 Skip to content

If you think all marshmallows are created equal, trust me, you haven’t truly lived! There is a world of difference between the squishy, flavorless cubes from a bag and biting into something truly ethereal. That’s why I’m so excited to share this recipe for homemade marshmallows with you today. For me, learning to make something simple, yet spectacular, like this fluffy treat was a huge turning point in finding my joy in the kitchen. Seriously, if you want an accessible win that feels incredibly gourmet, this is it. It’s the easiest, fluffiest recipe I have found, and it proves that even candy making isn’t as scary as it sounds! I talk more about how that joy transformed my life over on my About Page, but for now, let’s get whipping!
- Why This is the Best Recipe for Homemade Marshmallows
- Ingredients for Perfect Homemade Marshmallows
- How to Make Marshmallows From Scratch: Step-by-Step
- Tips for Success When Making Homemade Marshmallows
- Using Your Freshly Made Homemade Marshmallows
- Storage and Shelf Life for Homemade Marshmallows
- Frequently Asked Questions About Homemade Marshmallows
- Nutritional Estimates for Homemade Marshmallows
- Share Your Pillowy Homemade Sweets
Why This is the Best Recipe for Homemade Marshmallows
I’m going to tell you a secret right now: the ones you buy in the store? They just don’t compare. These homemade marshmallows are on another level. They aren’t just sweeter; they are genuinely soft, and that melt-in-your-mouth quality is something you just cannot replicate with preservatives.
The primary reason this is the best marshmallow recipe is all about that perfect, pillowy texture. We aren’t guessing here; we are hitting a precise temperature. Once that sugar syrup hits the soft-ball stage—that magical 240 degrees Fahrenheit—we know we have the perfect structure locked in. That’s what guarantees these turn out as fluffy homemade marshmallows instead of a sticky mess.

The Secret to Pillowy Homemade Sweets
Getting that incredibly soft, chewy candy result comes down to aeration. Think of the gelatin as the canvas and the hot syrup as the binder. When you pour that super-hot mix into the bloomed gelatin and then whip it on high—really high—for a solid 12 to 15 minutes, you are whipping tons of air into it. That long, steady beat creates the stable matrix that results in a truly recipe for soft marshmallows. It takes a little patience, but trust me, the resulting cloud texture is worth every minute of standing by that mixer!
Ingredients for Perfect Homemade Marshmallows
Okay, when you see the list, don’t panic. While candy making sounds intimidating, the ingredients list itself is incredibly simple—it’s the technique where the magic happens! For this batch of pure, bright vanilla flavor, you will need:
- Three packets of unflavored gelatin – that’s about 21 grams total.
- 1 cup of cold water, divided into two portions.
- 1 cup of granulated sugar.
- 1 cup of light corn syrup.
- A quarter cup of water for the syrup.
- A quarter teaspoon of salt.
- 1 tablespoon of pure vanilla extract.
- And finally, you need a good dusting mix: half a cup of powdered sugar combined with half a cup of cornstarch.
Here’s my little tip that saves so much headache: When you sprinkle your gelatin over that initial half-cup of cold water, just let it sit for about five to ten minutes. This is called blooming, and it lets the gelatin soften up so it can dissolve beautifully later. Don’t rush this crucial setup step!
Ingredient Notes and Substitutions for Homemade Marshmallows
I want you to feel good about what you put into these treats. If you’re aiming for something cleaner, you absolutely can try making no corn syrup marshmallows! You can swap the corn syrup for an equal amount of pure maple syrup or brown rice syrup. Just know that those substitutes change the internal texture just a tiny bit; they might not set quite as stiffly, but they’ll still be amazing soft chewy candy.
And listen, if you want to elevate these from great to absolutely unforgettable—I’m talking about stepping straight into the world of gourmet marshmallows—try scraping out a whole vanilla bean. Adding those tiny black specks into your batter alongside the extract gives you the most beautiful vanilla bean marshmallows. It smells heavenly as they whip!

How to Make Marshmallows From Scratch: Step-by-Step
Alright, this is where we turn liquid sugar into a fluffy dream! Don’t let the candy thermometer scare you; we’re going step-by-step to master how to make marshmallows from scratch, and I promise, it’s totally manageable. You’ll be amazed at what you can achieve right on your stovetop and with your trusty stand mixer.
Preparing the Pan for Homemade Marshmallows
First things first: you have to secure your vessel! A sticky marshmallow slab is nobody’s friend. Grab a 9×13 inch baking pan. You need to grease it really well, then line it with parchment paper. Make sure you save plenty of overhang on those long sides—that’s your built-in handle for lifting the whole thing out later. Now for the insurance policy: mix your powdered sugar and cornstarch together. Dust *everything* generously—the bottom, the sides, that parchment paper! We are fighting stickiness at every turn here.
Cooking the Syrup and Whipping the Gelatin
While your gelatin is happily blooming in the mixer bowl (don’t forget that essential first step!), get your sugar, corn syrup, water, and salt going in a saucepan. Get it stirring until the sugar dissolves, then stop touching it! You need to let it boil unattended until that candy thermometer screams 240 degrees Fahrenheit. That’s the soft-ball stage, and it’s non-negotiable for the best fluff! As soon as it hits 240°F, get it off the heat.
This is the exciting part—safety first, though! Keep your mixer running on low and slowly, carefully, drizzle that screaming hot syrup down the side of the bowl into the gelatin. You absolutely do not want to hit that whisk directly! Once it’s all in, crank that mixer up to high. You need to beat this mixture for a solid 12 to 15 minutes. Seriously, set a timer. This process develops the air and builds the structure for those gorgeous fluffy homemade marshmallows.
Cutting and Dusting Your Homemade Marshmallows
Once the mixture is thick, glossy white, and holding stiff peaks, take it down to low and mix in your vanilla. Now, work fast because this mixture sets up quickly! Scrape it all into your prepared pan—use an iced or oiled spatula to smooth the top quickly. Dust the top generously again with that sugar mix. Let it sit, uncovered, for at least four hours, but overnight is truly better!
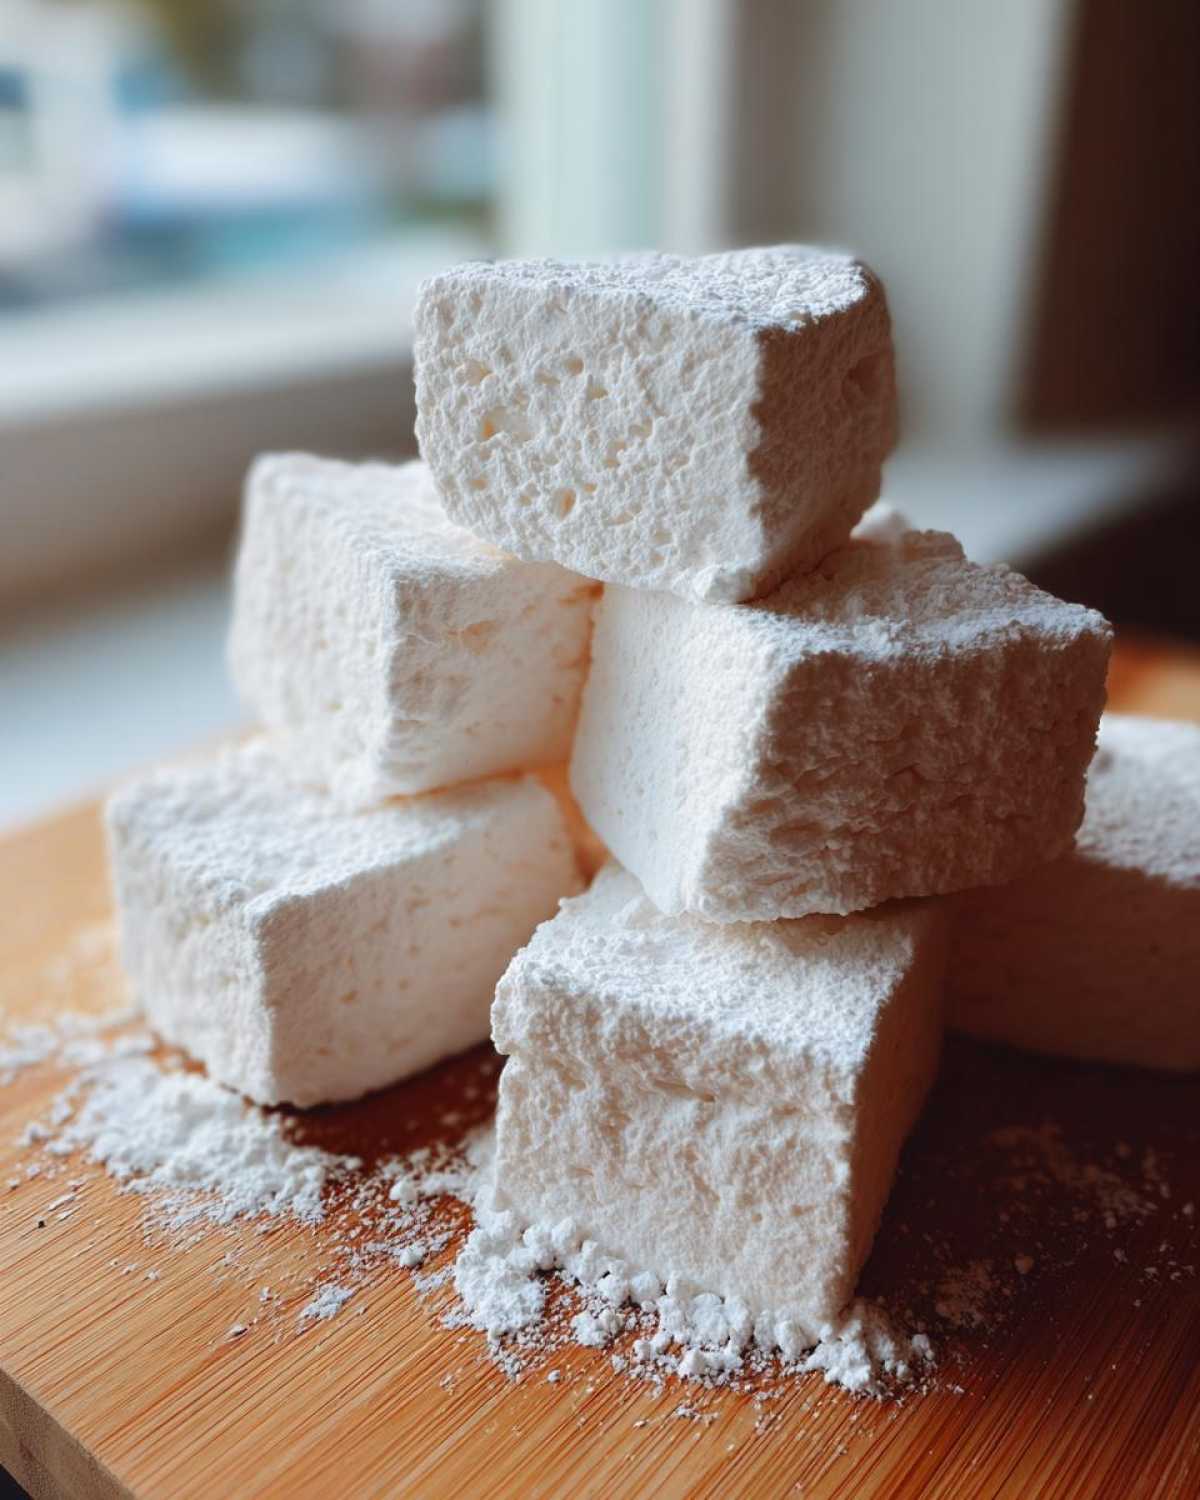
When it’s completely set, time for the fun part. Use those parchment paper handles to lift the entire slab onto your extra dusted cutting board. Remember those marshmallow cutting techniques? Oiling your sharp knife or pizza cutter is key. Slice it into squares, and don’t forget the final step: toss every single side of those fresh cubes in the remaining sugar mix. That seals the deal and keeps them from collapsing into one giant marshmallow blob. You’ll find more great recipe tips over on my blog!

Tips for Success When Making Homemade Marshmallows
I’ve had a few batches stick to the pan like they were glued there when perfecting this, so let me save you the headache! The biggest enemy here, besides skipping the sugar dusting, is high humidity. If it’s a rainy or super muggy day, your sugar syrup might weep a little bit later on, making the marshmallows gooey again. If it’s super humid, try to get them into the pan and set as quickly as possible.
Another pro tip relates to cooling: let them cool completely at room temperature untouched. Don’t put them near a draft or stick them in the fridge; rapid temperature changes encourage weeping. Rushing the setting time means you’ll likely end up with a beautiful, fluffy mess instead of neat squares! Patience is truly a candy maker’s best friend here, seriously.
Using Your Freshly Made Homemade Marshmallows
Now that you’ve conquered the whipping and cutting process, you’ve earned the best reward: eating them! Honestly, just eating these fluffy squares plain is a triumph, but they really shine when they’re added to other goodies. This is the fun part where you get to see how truly versatile these pillowy homemade sweets are.
Of course, the absolute classic move is dropping these right into a mug of dark, rich cocoa. Nothing beats the way these melt! They soften beautifully and create that lovely, sweet topping for your marshmallows for hot chocolate experience. Forget those hard little cylinders; ours dissolve into creamy pools of joy. I love adding a tiny sprinkle of cinnamon on top of the hot cocoa right before dropping them in.
If you’re planning on making the ultimate campfire treat, you need top-tier homemade s’mores ingredients. Trust me, toasting one of these freshly made squares between two graham crackers and a piece of good quality chocolate just elevates the entire experience. The soft, chewy nature of our marshmallows makes them toast up evenly and gorgeously.
And don’t forget about using them in your baking projects! If you make that classic, crispy treat that uses cereal and melted marshmallows, swapping in your homemade version makes those squares instantly spectacular. You can check out some of my favorite ideas for easy entertaining where I sometimes feature baked goods using these beauties on my Easy Entertaining page!
Storage and Shelf Life for Homemade Marshmallows
Okay, now that you’ve expertly cut your cloud-like squares, we need to keep them perfect! The absolute best way to store your finished homemade marshmallows is making sure they stay completely dry. Since we coated them in that cornstarch/powdered sugar mix, they are protected, but you still need to treat them right.
Do not refrigerate them! I know that sounds weird, but the cold pulls moisture, and that humidity in the fridge will make them weep and become sticky messes again. Keep them in an airtight container at room temperature. Seriously, an airtight container is essential to keep out stray kitchen humidity.
If you’ve made a big batch—and you probably have because they are addictive—they will stay perfectly fresh and soft for up to two weeks. If you happen to make them ahead for gifting, make sure they are fully set and well dusted before packaging them up. They are such wonderful gifting homemade treats because they look handmade but taste like they came from a fancy candy shop!
Frequently Asked Questions About Homemade Marshmallows
I get so many great questions come through my comments section—you guys are clearly already diving into making these! I picked a few of the most common ones about homemade marshmallows to tackle right here so you feel 100% ready to start whipping.
Can I make homemade marshmallows without gelatin?
That is a fantastic question that comes up often, especially if people have dietary restrictions. The short answer is that while you technically can try to make no gelatin marshmallows using alternatives like agar-agar, the result will be different. Gelatin is what gives us that classic, springy, incredibly soft texture that makes these such a joy to eat. Agar-agar tends to set much firmer, closer to a gummy candy texture. For this specific recipe, designed for that perfect fluff, I really recommend sticking to the gelatin. It’s the base of what makes this candy so special!
How do I make these into marshmallow fluff recipe?
This recipe is specifically geared toward cutting squares, which requires that long setting time—at least four hours, remember? If you want to pivot and make a delicious marshmallow fluff recipe that you can spread on cakes or swirl into hot chocolate immediately, the idea is exactly the same up until the setting stage! You whip it, you add your vanilla, and instead of scraping it into a pan, you use it right away while it’s still warm and fluffy directly from the bowl of the mixer. Easy peasy!
My homemade marshmallows are too sticky. What went wrong?
Ugh, that’s the worst feeling, isn’t it? Stickiness usually comes from one of two things, sometimes both. First, double-check your whipping time. If you stop the mixer too early, the structure hasn’t fully set, and it stays gooier. You need that full 12 to 15 minutes on high speed until those stiff peaks form! Second, and most commonly, you might not have used enough dusting powder, or the humidity got to them. Make sure you liberally toss every cut edge in the cornstarch/powdered sugar mix. If you find notes of stickiness later, you can always carefully toss them again! For more troubleshooting, feel free to click over to my Facebook page and ask!
Nutritional Estimates for Homemade Marshmallows
Now, I always like to be super upfront about what we’re eating, even when it’s something as pure and joyful as these fluffy clouds. When you’re making something completely from scratch like this, you have total control over what goes in—which is awesome—but it also means standard nutrition labels don’t really apply perfectly.
These estimates are based on the exact recipe I laid out, using standard light corn syrup and pure vanilla, divided into roughly 40 large squares. Remember, these are just estimates, so if you swap out the corn syrup for maple syrup, the numbers change slightly! But here’s a general idea of what you get in one small serving (about 4 squares):
- Serving Size: 4 squares
- Calories: Around 170
- Sugar: 35 grams (Yep, it’s candy, but it’s *our* candy!)
- Sodium: About 15 mg
- Fat: 0 grams
- Carbohydrates: 44 grams
- Protein: 2 grams
See? Zero fat, almost zero cholesterol—that’s how you know you’re dealing with a sweet treat that’s fundamentally simple at its core. It’s all about the sugar, but when it tastes this good, I can manage that!
Share Your Pillowy Homemade Sweets
Wow, we did it! We went from simple pantry items to making incredible, cloud-like homemade marshmallows. I honestly hope that as you were whipping that mixture and smelling that pure vanilla aroma, you felt that little spark of joy I talked about earlier—that feeling of creating something truly satisfying.
Now that you have these beautiful, soft squares, please don’t keep them all to yourself! I really want to see what you do with them. Did you toast them to perfection? Did you chop them up and fold them into a fresh batch of chocolate chip cookies? Snap a picture!
Please come back here, leave a star rating right below the recipe card, and let me know how your first batch turned out. If you have any burning questions left or want to tell me how they tasted dropped in your hot cocoa, leave a comment below—I read every single one. It truly helps this community grow! If you ever need to reach out directly about a recipe twist or just want to say hi, you can always use my Contact Page!
PrintEasy, Fluffy Homemade Vanilla Marshmallows

You can make soft, pillowy homemade marshmallows that taste much better than store-bought versions using simple ingredients. This recipe shows you how to get the perfect texture for hot chocolate or s’mores.
- Prep Time: 20 min
- Cook Time: 15 min
- Total Time: 4 hr 35 min
- Yield: About 40 large squares 1x
- Category: Dessert
- Method: Candy Making
- Cuisine: American
- Diet: Vegetarian
Ingredients
- 3 packets unflavored gelatin (about 7 grams each)
- 1 cup cold water, divided
- 1 cup granulated sugar
- 1 cup light corn syrup
- 1/4 cup water
- 1/4 teaspoon salt
- 1 tablespoon pure vanilla extract
- 1/2 cup powdered sugar, for dusting
- 1/2 cup cornstarch, for dusting
Instructions
- Lightly grease a 9×13 inch baking pan. Line the pan with parchment paper, leaving an overhang on the long sides. Mix the powdered sugar and cornstarch together in a small bowl. Dust the prepared pan generously with this mixture.
- In the bowl of a stand mixer fitted with the whisk attachment, sprinkle the gelatin over 1/2 cup of the cold water. Let it sit for 5 to 10 minutes to bloom.
- While the gelatin blooms, combine the granulated sugar, corn syrup, remaining 1/4 cup cold water, and salt in a medium saucepan. Stir over medium heat until the sugar dissolves. Stop stirring once it boils.
- Attach a candy thermometer to the side of the saucepan. Cook the syrup, without stirring, until it reaches 240 degrees Fahrenheit (soft-ball stage). This usually takes about 8 to 10 minutes.
- Once the syrup reaches 240 degrees F, carefully remove the pan from the heat. With the mixer running on low speed, slowly and carefully pour the hot syrup down the side of the mixing bowl into the bloomed gelatin. Avoid pouring directly onto the whisk.
- Increase the mixer speed to high. Beat the mixture for 12 to 15 minutes until it becomes very thick, glossy, white, and holds stiff peaks. The outside of the bowl should feel warm, not hot.
- Stop the mixer. Beat in the vanilla extract on low speed until just combined.
- Working quickly, scrape the sticky marshmallow mixture into your prepared pan. Use a lightly oiled spatula or oiled hands to gently spread the mixture evenly into the pan.
- Dust the top surface generously with the remaining powdered sugar and cornstarch mixture. Let the marshmallows set at room temperature, uncovered, for at least 4 hours, or preferably overnight.
- Once set, use the parchment paper overhang to lift the marshmallow slab out of the pan onto a cutting board dusted with the sugar/cornstarch mix. Dust the sides. Use a large, sharp, oiled knife or pizza cutter to cut the slab into squares. Toss the cut sides in the dusting mixture to prevent sticking.
Notes
- For a cleaner option, you can substitute the light corn syrup with an equal amount of liquid sweetener like brown rice syrup or pure maple syrup, though this may slightly alter the final texture.
- If you want vanilla bean marshmallows, scrape the seeds from one vanilla bean and add them along with the vanilla extract in step 6.
- Use these homemade marshmallows in your next batch of Rice Krispie treats or toast them over a campfire for homemade s’mores ingredients.
- Store your finished marshmallows in an airtight container at room temperature for up to two weeks.
Nutrition
- Serving Size: 4 squares
- Calories: 170
- Sugar: 35
- Sodium: 15
- Fat: 0
- Saturated Fat: 0
- Unsaturated Fat: 0
- Trans Fat: 0
- Carbohydrates: 44
- Fiber: 0
- Protein: 2
- Cholesterol: 0
