 Skip to content

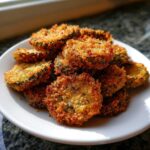
If you’re anything like me, sometimes you just need that perfect salty, tangy hit that only a good pickle can deliver. But when you want that pickle experience elevated to a whole new level? That’s where these incredible **Fried Pickles** come in! I always felt like truly crispy fried food was reserved for restaurants, but trust me, achieving that shatteringly crisp, golden crust at home is totally achievable. This recipe is my mission statement in snack form: simple ingredients, straightforward steps, and absolutely soul-satisfying flavor. It’s my go-to party food because nothing brings a crowd together faster than a bowl of crunchy, hot, tangy bites. If you’re looking for more amazing party ideas, check out my full collection of appetizers and snacks! Once you make these, you’ll find that pure joy in sharing them!

- Why This Crispy Fried Pickles Recipe Is Your New Go-To Appetizer
- Gathering Ingredients for Truly Crunchy Fried Pickles
- Step-by-Step Instructions: Making Crispy Fried Pickles
- Expert Tips for Achieving Next-Level Fried Pickles
- Variations: Air Fryer Fried Pickles and Copycat Options
- Serving Suggestions for Your Tangy Snack Ideas
- Storage and Reheating Instructions for Leftover Fried Pickles
- Frequently Asked Questions About Fried Pickles
- Share Your Perfect Fried Pickles Experience
Why This Crispy Fried Pickles Recipe Is Your New Go-To Appetizer
Listen, I get it—you want food that tastes amazing but doesn’t demand your entire evening. That’s why this Crispy Fried Pickles Recipe is truly special. It’s incredibly reliable; I’ve tested this batter dozens of times to guarantee that heavenly crunch you’re looking for. It’s the definition of an Easy Appetizer Recipe that always lands huge with whoever tastes it.
- Guaranteed Golden Crunch every single time.
- So fast, you’ll be snacking before you know it!
- Perfectly balanced tangy and salty flavor profile.
Quick Prep and Cook Times for Perfect Fried Pickles
We’re talking lightning fast here. The prep time is only about 15 minutes! You drain and dredge them while your oil gets hot. Then, they only cook for about 10 minutes total. That means you have delicious, hot, tangy snack bites ready in under 30 minutes total! If you need a Quick Appetizer for unexpected guests or a major game day spread, these are your lifesavers.
Gathering Ingredients for Truly Crunchy Fried Pickles
Okay, let’s talk ingredients because this is where we lock in that maximum crunch factor for our Fried Pickles. Forget complicated stuff—we’re using pantry staples, but one ingredient, in particular, makes all the difference for that audible snap!
First things first: grab 1 jar (16 ounces) of dill pickle chips or spears. Make sure you drain them super well before you start. Here’s what else you’ll need for that perfect coating:
- 1 cup all-purpose flour
- 1 teaspoon salt
- 1 teaspoon black pepper
- 1 teaspoon garlic powder
- 1/2 teaspoon cayenne pepper (Only if you want them spicy! It’s optional, but I love the little kick.)
- 2 large eggs
- 1/2 cup milk
- 1 cup panko breadcrumbs (Seriously, don’t skip the panko. That’s the secret to the best crunch.)
- Vegetable oil, for frying
The Best Fried Pickle Batter Components
We break our batter into three stations for perfect coverage. The first bowl holds your dry dredge—that’s the flour mixed with all the seasonings. This coats them first and helps the egg stick! The second bowl is your wet dip: the whisked eggs and milk. This acts like the glue. And finally, that third bowl with the panko is what gives us that gorgeous, chunky coating we know and love.
Step-by-Step Instructions: Making Crispy Fried Pickles
Alright, this is where the magic happens! You’ve got your ingredients ready, and now we’re going to build that beautiful crunch layer by layer. I think of this as setting up an assembly line in my kitchen. If you follow these steps exactly, those crunchy pickle bites are as good as done. Seriously, the secret to amazing fried food at home isn’t just the batter; it’s making sure everything stays dry until the second it hits that hot oil! If you’re looking for more appetizer inspiration, check out my guide on easy entertaining recipes!
Preparing the Pickles for Perfect Adhesion
First, and I mean first, take those drained pickles and pat them absolutely bone-dry with paper towels. I mean it—pat them until your fingers are tired! Any excess water means soggy batter, and we aren’t having that today. Next, set up your breading station. You need three shallow dishes. Dish one is your seasoned flour mix, dish two is your egg and milk wash, and dish three is that beautiful panko breadcrumbs you got. We’re going flour, then egg, then PANKO!
Frying Technique for Golden Fried Pickles
Get your oil heating in a heavy pot until it hits 375°F (190°C). You need that temperature consistent if you want maximum crispiness! Work in small batches—don’t crowd the pot, or the oil temperature drops immediately. Drop those breaded Fried Pickles in carefully and let them fry for just 2 to 3 quick minutes, turning once. As soon as they hit that glorious deep golden brown, pull them out with a slotted spoon and place them immediately on a wire rack. This lets air circulate, keeping those precious crunchy pickle bites from steaming themselves soggy underneath!

Expert Tips for Achieving Next-Level Fried Pickles
You know, I used to struggle with this! My first few batches of Fried Pickles were just… fine. They weren’t bad, but they were certainly never that shatteringly crisp texture I remember from restaurants. The game absolutely changed when I started respecting the Panko breadcrumbs and the temperature of the oil. Those two things alone pushed this from a ‘nice snack’ to the ultimate party food winner.
You must control that heat! If it’s too low, the coating soaks up oil and gets greasy fast. If it’s smoking, you’ll burn the beautiful crust before the inside warms up. Keep it steady at 375°F. And remember what I said about the panko? Use it! It creates those sharp, jagged edges that fry up perfectly golden and crunchy. Trust me on this one!
Making Homemade Ranch Dip Recipe for Dipping
Honestly, a fried pickle that isn’t dipped is only half the experience, right? The tartness of the dill needs something cool, creamy, and herbaceous to balance it out. I always make a big batch of my Homemade Ranch Dip Recipe whenever I’m frying these up. It takes five minutes and tastes a million times better than anything out of a jar. All you really need is some quality sour cream or Greek yogurt, dried herbs like dill and chives, a little garlic powder, and a squeeze of lemon juice. It’s the perfect companion for these crunchy bites!

Variations: Air Fryer Fried Pickles and Copycat Options
I know not everyone wants to break out the deep fryer, and that’s totally cool! We still want those amazing Fried Pickles, just maybe with a little less fuss. If you’re looking for a less oily method, the air fryer is your friend. Remember those notes in the recipe? If you use the air fryer, remember to spray those breaded pickles lightly with cooking spray—that fat is what helps them crisp up beautifully instead of drying out. Cook them at 400°F (200°C) for about 8 to 10 minutes, flipping them halfway through.
And hey, if you are craving that restaurant vibe, you can totally make these a Texas Roadhouse Copycat Recipe! The secret there is mostly in the spice blend and definitely serving them with a zesty sauce alongside the classic ranch. It’s all about taking this simple Crunchy Pickle Bites idea and turning it up for a crowd!
If an air fryer is your jam, I have a great guide on making zucchini pizza bites in the air fryer too, which might be up your alley next!
Serving Suggestions for Your Tangy Snack Ideas
When do you serve the best Fried Pickles? Honestly, any time you want to make people extremely happy! These are the ultimate Game Day Snacks. I love setting up a massive bowl right when guests arrive so they can dive in immediately, but they truly shine when they are piping hot and fresh out of the fryer. They are perfect Finger Foods for Parties because everyone grabs one, dips, and instantly asks, “Where did you get these?”
They look fantastic arranged on a big wooden board surrounding a generous bowl of that ranch dip we talked about. And don’t forget, if you’re hosting a bigger group, I have tons of ideas for easy entertaining spreads over on that page!

Storage and Reheating Instructions for Leftover Fried Pickles
Now, let’s be real: the absolute best experience for Fried Pickles is eating them immediately. That amazing crunch fades fast once they sit around, no matter how perfectly you fried them!
If you have leftovers, the goal is always to restore that crispness, so ditch the microwave entirely—it just makes things tough and sweaty. Instead, try reheating them on a wire rack set over a baking sheet in a regular oven or, even better, in your toaster oven at about 400°F for 5 to 7 minutes. This lets the heat circulate and draw out any residual steam. They won’t be *quite* as perfect as fresh, but it’s the very best way to salvage those delicious bites!
Frequently Asked Questions About Fried Pickles
Got questions swirling around about making the best Fried Pickles? That’s what I’m here for! I totally get it; when you’re trying to nail that perfect texture, you need some quick answers. Rest assured, this recipe is super flexible, but a few tricks really make the difference between good and legendary snacking.
Can I use sweet pickles instead of dill for this Fried Pickles Recipe?
That’s a great question about this Fried Pickles Recipe! You absolutely *can*, but you need to know that the flavor profile will shift completely. Dill pickles give you that perfect tangy, sour counterpoint to the savory breading. Sweet pickles will yield something much sweeter overall, leaning closer to a bread-and-butter flavor profile. For the classic, zesty snack everyone expects, stick to dill—especially the chips or spears!
What is the secret to making Fried Pickles super crispy?
If you take nothing else from this whole page, remember this: drying and breading technique! The number one secret to super crispy Fried Pickles is patting every single pickle piece absolutely dry with paper towels before you start coating them. Moisture is the enemy of crunch! Secondly, make sure you are pressing them firmly into the Panko breadcrumbs. That coarse texture of the Panko is what creates those golden, crisp peaks when they hit the hot oil.
Share Your Perfect Fried Pickles Experience
Well, that’s it—you are now officially armed with the secret to the crunchiest, best Fried Pickles! I truly hope you find pure joy serving these up. If you made them, please come back and leave a rating so others know how amazing they are! I’d love to see your golden creations; tag me over on Facebook at Facebook!
If you’re already craving another easy appetizer for your next gathering, be sure to check out my contact page for more delicious ideas!
PrintCrispy Fried Pickles Recipe: The Ultimate Crunchy Appetizer
Make perfectly crunchy, tangy fried pickles at home. This easy recipe delivers a golden crust and juicy dill pickle center, perfect for game day or your next party spread. Serve hot with ranch dip.
- Prep Time: 15 min
- Cook Time: 10 min
- Total Time: 25 min
- Yield: 4 servings 1x
- Category: Appetizer
- Method: Deep Frying
- Cuisine: American
- Diet: Vegetarian
Ingredients
- 1 jar (16 ounces) dill pickle chips or spears, drained well
- 1 cup all-purpose flour
- 1 teaspoon salt
- 1 teaspoon black pepper
- 1 teaspoon garlic powder
- 1/2 teaspoon cayenne pepper (optional, for a little heat)
- 2 large eggs
- 1/2 cup milk
- 1 cup panko breadcrumbs (for extra crunch)
- Vegetable oil, for frying
Instructions
- Pat the drained pickles very dry using paper towels. This step is key for crispiness.
- Set up a standard breading station with three shallow dishes. In the first dish, combine the flour, salt, pepper, garlic powder, and cayenne pepper. Mix well.
- In the second dish, whisk together the eggs and milk until combined.
- In the third dish, place the panko breadcrumbs.
- Working in small batches, dredge the dry pickles first in the flour mixture, shaking off any excess.
- Next, dip the floured pickles into the egg mixture, allowing excess to drip off.
- Finally, press the pickles firmly into the panko breadcrumbs, coating them completely. Place the breaded pickles on a clean plate or baking sheet.
- Heat about 2 inches of vegetable oil in a deep, heavy-bottomed pot or Dutch oven to 375°F (190°C). Use a thermometer to monitor the temperature.
- Carefully add the breaded pickles to the hot oil in a single layer, ensuring you do not overcrowd the pot. Fry for 2 to 3 minutes, turning once, until they are deep golden brown and crispy.
- Use a slotted spoon to remove the fried pickles and place them on a wire rack set over a paper towel-lined baking sheet to drain excess oil.
- Serve immediately with your favorite dipping sauce, like homemade ranch dip.
Notes
- For the best crunch, make sure your pickles are completely dry before breading.
- If you want to try an Air Fryer Fried Pickles method, spray the breaded pickles lightly with cooking spray and air fry at 400°F (200°C) for 8-10 minutes, flipping halfway through.
- This recipe works well as a Texas Roadhouse Copycat Recipe when served with a zesty dipping sauce.
Nutrition
- Serving Size: 1 serving (approx. 8 pieces)
- Calories: 350
- Sugar: 3
- Sodium: 850
- Fat: 22
- Saturated Fat: 4
- Unsaturated Fat: 18
- Trans Fat: 0
- Carbohydrates: 30
- Fiber: 2
- Protein: 8
- Cholesterol: 75
