 Skip to content

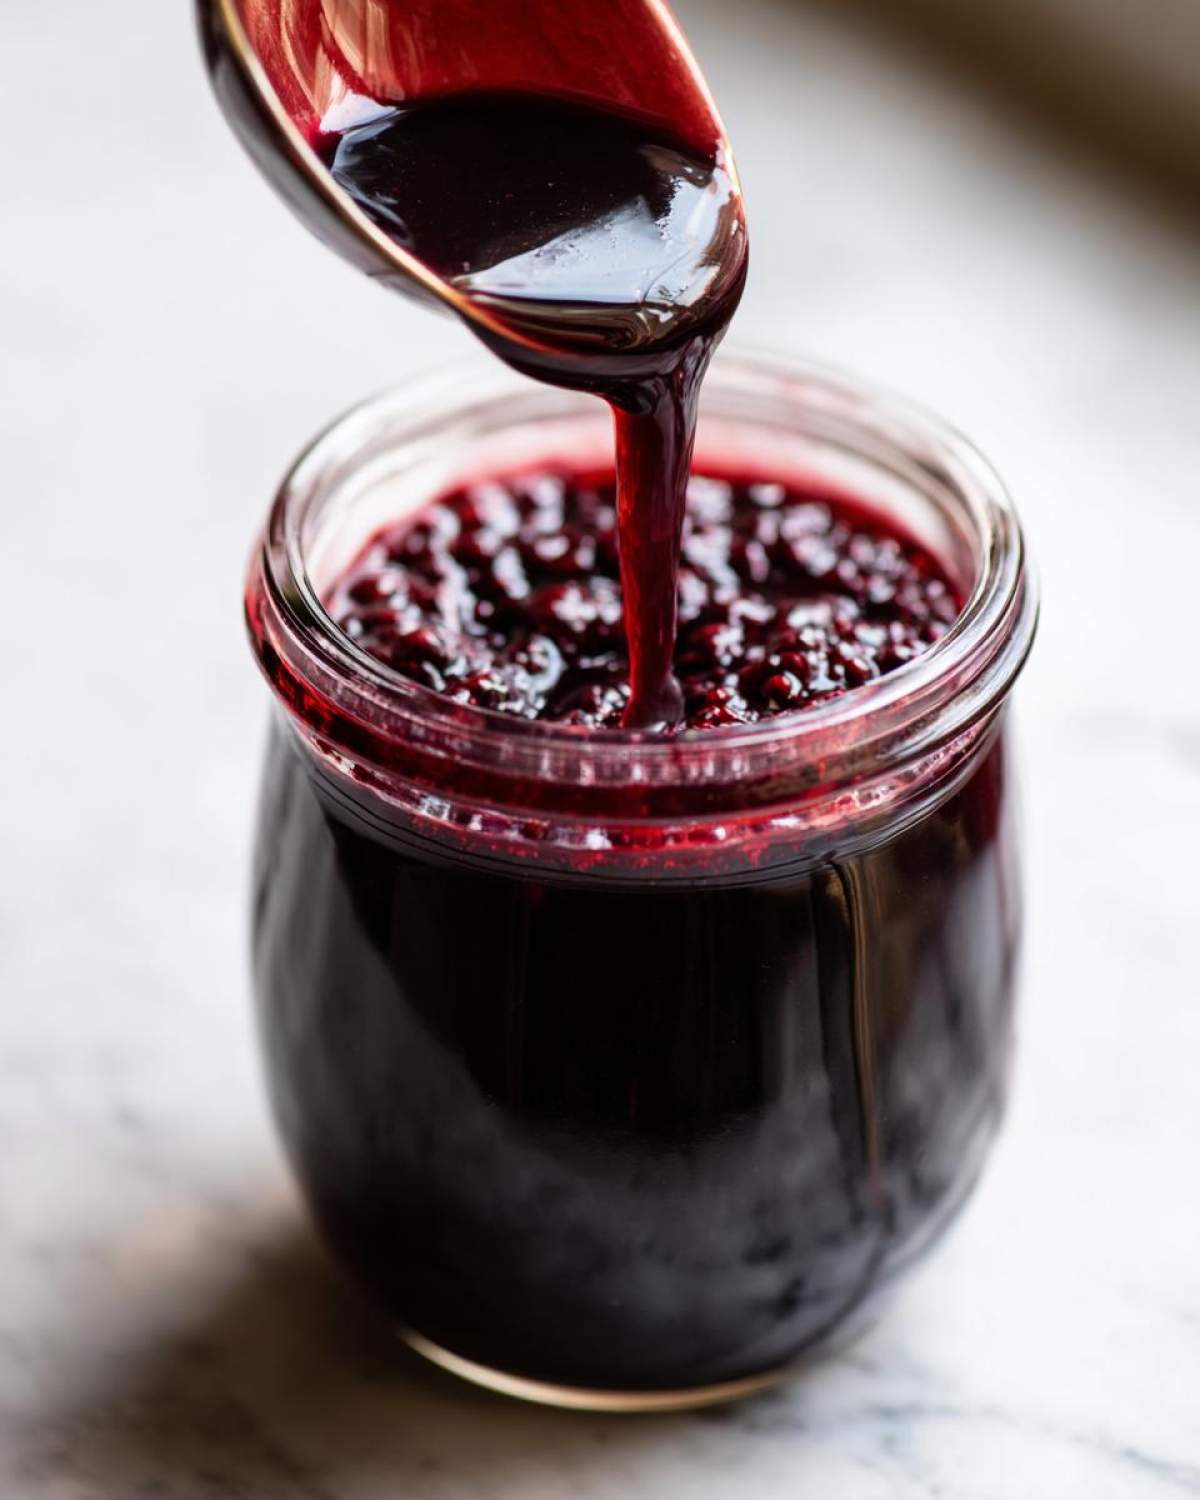
You know, there are some things in the kitchen that just feel *right*. Like that moment you pull a perfectly baked loaf of bread from the oven, or when a simple soup just warms you from the inside out. For me, making homemade elderberry syrup has become one of those little kitchen joys. It’s not complicated at all, and it fits so perfectly with my belief that incredible, soul-satisfying food doesn’t have to be a big production.
This elderberry syrup recipe is all about keeping things simple and pure. We’re talking small-batch, naturally sweetened with honey, and made with ingredients you can actually pronounce. Think of it as a little hug in a bottle for your immune system, especially when those sniffles start lurking around. It’s amazing what a little bit of simmering and a lot of love can create!
- Why You'll Love This Elderberry Syrup Recipe
- Gather Your Ingredients for This Elderberry Syrup Recipe
- Crafting Your Homemade Elderberry Tonic: Step-by-Step
- Tips for Success with Your Elderberry Syrup Recipe
- Understanding Dosage for Your Homemade Immune Syrup
- Frequently Asked Questions About This Elderberry Syrup Recipe
- Storage and Reheating Instructions for Your Honey Elderberry Tonic
- Nutritional Snapshot of Our Elderberry Syrup
- Share Your Homemade Elderberry Syrup Creations!
Why You’ll Love This Elderberry Syrup Recipe
Seriously, this elderberry syrup recipe is a winner! It’s one of those things that just makes you feel good about what you’re putting into your body. Here’s why it’s become a staple in my kitchen:
- Super Simple to Make: You really don’t need to be a pro chef for this one. We’re talking a few basic steps and you’ve got gold.
- Naturally Sweetened: I love using honey because it adds this lovely, subtle sweetness without any refined sugars. Plus, it just feels wholesome.
- Your Daily Immune Boost: It’s become my go-to when I feel a little run down. Knowing it’s packed with elderberries and honey makes me feel proactive about staying healthy.
- Kid-Friendly Flavor: With a little trick we’ll get to, even the pickiest eaters will happily take their daily dose. It’s a game-changer!
- Versatile Goodness: Beyond just taking it by the spoonful, you can use it in so many ways – drizzled on yogurt, in smoothies, or even mixed into warm water.
- Small Batch, Big Impact: Making it in smaller batches means you always have fresh syrup without a ton of fuss. Perfect if you’re just starting out or have limited space.
Gather Your Ingredients for This Elderberry Syrup Recipe
Alright, let’s get our ingredients lined up! For this simple, homemade elderberry syrup, you really don’t need much. It’s all about keeping things pure and effective. Grab these things and you’ll be well on your way to having your own little bottle of immune support goodness.
- 2 cups dried elderberries: These are the stars of the show! Make sure they’re good quality.
- 3 cups water: Plain old water is perfect.
- 1 cup honey: Honey adds that lovely sweetness and its own health perks. Use a good local honey if you can find it!
- 1 tablespoon fresh ginger, thinly sliced (optional): If you like a little zing, ginger is fantastic.
- 1 cinnamon stick (optional): For a warm, cozy flavor.
- 3 whole cloves (optional): These add a subtle depth.
Crafting Your Homemade Elderberry Tonic: Step-by-Step
Okay, now for the fun part – actually making this lovely elderberry syrup recipe! It’s really not hard at all, and honestly, the smell that fills your kitchen while it’s simmering is just wonderful. It feels like you’re brewing up pure goodness, and you basically are!
Simmering the Elderberries
First things first, we’re going to get those elderberries happy. Just pop your dried elderberries and the water into a saucepan. Bring it up to a boil, then immediately turn the heat down nice and low so it’s just gently simmering. Let it do its thing for about 45 minutes.
Straining and Sweetening
After simmering, carefully strain the elderberry mixture through a fine-mesh sieve. Give those solids a little gentle press with the back of your spoon to get every last drop of that potent liquid. Discard the solids. Now, pour that liquid back into the clean saucepan. If you’re using honey and any of the optional spices like ginger, cinnamon, or cloves, add them now. Heat it all gently, just until the honey melts in. Please, please don’t let it boil again – we want to keep all those good qualities intact!
Steeping and Final Strain
Take the pot off the heat and let everything steep for about 10 minutes. This is where all those lovely flavors really meld together. Then, give it another quick strain through the sieve. This just makes sure you get a really smooth, lovely syrup with nothing gritty in it.
Cooling and Storing Your Elderberry Syrup
Now comes the hardest part: waiting for it to cool! Let your homemade elderberry syrup cool completely. Once it’s cooled, you can pour it into an airtight container. Keep it in the fridge, and it’ll last you about 3 months. If you want it to last even longer, you can can water-bath can it, which is awesome for having it on hand all the time!
Tips for Success with Your Elderberry Syrup Recipe
You know, a few little tricks can really make this elderberry syrup recipe sing! It’s all about those small touches that make a big difference. Don’t worry if things aren’t perfect the first time, but these tips should help you get a lovely, potent syrup every time.
Using Fresh vs. Dried Elderberries
If you happen to find fresh elderberries, they’re totally usable! Just know you’ll need about 3 cups of fresh ones, and they only need to simmer for about 30 minutes instead of 45. Easy peasy!
Kid-Friendly Flavor Adjustments
My little ones aren’t always the biggest fans of new flavors, but a tiny splash of vanilla extract stirred in *after* you take it off the heat works wonders! It really smooths out the flavor and makes it way more appealing for them.
Understanding Dosage for Your Homemade Immune Syrup
Now, let’s talk about how much to take of this wonderful homemade immune syrup. It’s pretty straightforward and designed to be safe and effective for most. For adults, a good daily dose is 1 tablespoon. For the little ones, over the age of 1, a teaspoon daily is usually just right. If you feel a cold or flu coming on, don’t be afraid to increase that a bit for a few days when you really need that extra support!
Frequently Asked Questions About This Elderberry Syrup Recipe
Sometimes you just have those little questions pop up, right? Don’t worry, I’ve got you covered! Making thiselderberry syrup recipe should be easy and fun. Here are a few things people often ask:
Can I use fresh elderberries instead of dried?
You sure can! If you find fresh elderberries, just use 3 cups instead of 2 cups of dried ones. They’ll also need a bit less simmering time, only about 30 minutes. Easy swap!
How long does this homemade elderberry syrup last?
In the fridge, thishoney elderberry tonic is good for up to 3 months. It stores so well in a nice airtight jar! If you want it to last even longer, you can totally water-bath can it for longer storage, which is a lifesaver if you make a big batch.
Is this elderberry syrup recipe good for colds and the flu?
Absolutely! That’s one of the main reasons I love making thiscold-and-flu remedy. Elderberries have been used for ages to help support the immune system, and taking it daily can be a great way to stay ahead of those pesky seasonal bugs.
What’s the best way to store my elderberry tonic?
For the best quality, keep your preparedsmall batch elderberry syrup nice and cool in an airtight container in the refrigerator. This really helps maintain its potency and flavor for those 3 months. Just pop it out when you need it!
Storage and Reheating Instructions for Your Honey Elderberry Tonic
Proper storage is key to keeping your homemade honey elderberry tonic fresh and potent. Once it’s cooled down completely, just pour it into a clean, airtight jar or bottle. Pop it in the refrigerator, and it should stay lovely for up to 3 months! Honestly, it usually gets used up way before then in my house. It’s best served at room temperature or chilled, so there’s no need to worry about reheating it!
Nutritional Snapshot of Our Elderberry Syrup
When we’re whipping up this simple elderberry syrup recipe, it’s nice to have a general idea of what’s in it. Think of this as a little peek into the goodness! For a standard serving, which is about 1 tablespoon, you’re looking at roughly 60 calories. It’s mostly coming from the natural sugars in the honey, so you’ll have about 15g of carbs and sugar. This recipe doesn’t really have any fat or protein to speak of! Just remember, these numbers are estimates, as the exact values can shift a bit depending on the honey you use and how much you decide to make.
Share Your Homemade Elderberry Syrup Creations!
I’d absolutely love to hear how your elderberry syrup recipe turns out! Did you try adding ginger? How did the kids like it? Drop a comment below, or better yet, tag me on social media with your pictures! Seeing your creations always brings me so much joy!
PrintHomemade Elderberry Syrup
A simple recipe for small-batch elderberry syrup, naturally sweetened with honey, perfect for immune support.
- Prep Time: 10 min
- Cook Time: 55 min
- Total Time: 1 hour 5 min
- Yield: Approximately 3 cups 1x
- Category: Health Tonic
- Method: Stovetop
- Cuisine: American
- Diet: Vegetarian
Ingredients
- 2 cups dried elderberries
- 3 cups water
- 1 cup honey
- 1 tablespoon fresh ginger, sliced (optional)
- 1 cinnamon stick (optional)
- 3 whole cloves (optional)
Instructions
- Combine elderberries and water in a saucepan. Bring to a boil, then reduce heat and simmer for 45 minutes.
- Strain the elderberry mixture through a fine-mesh sieve, pressing gently to extract as much liquid as possible. Discard the solids.
- Return the liquid to the saucepan. Add honey, ginger, cinnamon stick, and cloves if using.
- Heat gently over low heat until honey is dissolved and ingredients are combined. Do not boil.
- Remove from heat and let steep for 10 minutes. Strain again to remove any solids.
- Allow the syrup to cool completely.
- Store in an airtight container in the refrigerator for up to 3 months, or water-bath can for longer storage.
Notes
- For a kid-friendly flavor, add a teaspoon of vanilla extract after removing from heat.
- Dosage: Adults take 1 tablespoon daily. Children over 1 year take 1 teaspoon daily. Increase dosage during cold and flu season.
- If using fresh elderberries, use 3 cups and simmer for 30 minutes.
Nutrition
- Serving Size: 1 tablespoon
- Calories: 60
- Sugar: 15g
- Sodium: 0mg
- Fat: 0g
- Saturated Fat: 0g
- Unsaturated Fat: 0g
- Trans Fat: 0g
- Carbohydrates: 15g
- Fiber: 1g
- Protein: 0g
- Cholesterol: 0mg
