 Skip to content

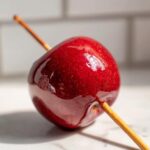
There’s something pure, something joyful, about biting into a truly perfect candy apple. Right? That satisfying crack followed by the crisp sweetness of cold fruit—it just screams fall festivals and fun nights. For years, I thought making that famously glossy, crunchy shell was something only the pros at the fair could manage, but I was wrong! I am so thrilled to share what I genuinely believe is the best, easy homemade candy apple recipe you’ll ever find. We’re cutting through the confusion to deliver shells that are beautifully shiny and wonderfully crunchy, every single time. It’s moments like these, making a simple, classic treat shine, that remind me why I fell in love with this kitchen life.

- Why This is the Best Easy Candy Apple Recipe (EEAT Focus)
- Ingredients Needed for Classic Red Candy Apples
- Step by Step Candy Apples: Preparing the Apples
- How to Make Candy Apples Stop Bubbling: Syrup Cooking Instructions
- Dipping Technique for a Perfect Candy Apple Coating
- Tips for Crunchy Candy Apples and Setting the Shell
- Storage & Serving Suggestions for Homemade Candy Apples
- Frequently Asked Questions About Making Candy Apples
- Nutritional Estimate for This Sweet Apple Dessert Recipe
Why This is the Best Easy Candy Apple Recipe (EEAT Focus)
I’ve tried every shortcut out there, and honestly, they just lead to sticky messes. This recipe cuts the guesswork. What you get is my absolute favorite, Best Candy Apple Recipe, because it focuses on technique, not complicated ingredients. Forget those soft, chewy coatings; we are going for that classic, eye-catching, hard candy shell!
- It’s a non-fail method thanks to precise temperature control.
- The result is always that desirable, super-shiny finish.
- We achieve that satisfying, perfect snap with every bite.
Remember, we are talking about true candy apples here—that clear, hard coating you love—not gooey caramel! If you’re worried about cloudiness, stick with me to the next section.
Achieving the Perfect Glossy Apple Coating
The secret to that glass-like shine absolutely hinges on hitting the ‘Hard Crack Stage’ on your thermometer—that magic 300 degrees Fahrenheit. If you undercook it even a little, the coating will be sticky. If you go way over, you risk burning the sugar, which makes it cloudy and bitter.
When the sugar crosses into that hard crack territory, it sets up instantly when it hits the cool apple. That rapid setting is what locks in the light—that’s your gloss, folks! It’s just simple science pushing that Glossy Apple Coating into place.
Ingredients Needed for Classic Red Candy Apples
Okay, let’s gather our simple supplies! You don’t need a pantry full of fancy stuff here, just high-quality basics. Getting these right means half the battle is already won. I always make sure to use a heavy-bottomed saucepan; trust me, it spreads the heat better and prevents scorching at the bottom, which is a disaster for clear candy.
For the color, please grab some gel food coloring if you can. It’s much more concentrated, so you get vibrant red without having to add extra liquid that might mess up our perfect syrup ratio. And before you start, don’t forget to peep my recipe for homemade crispy fried apple pies—it uses a similar stovetop technique!
- 12 medium apples (Granny Smith or Fuji work well—we need crispness!)
- 12 wooden skewers or sticks
- 2 cups granulated sugar
- 1 cup light corn syrup (This is non-negotiable, it keeps it from crystallizing!)
- 3/4 cup water
- 1 teaspoon red food coloring (Gel coloring works best for that deep color)
- 1/2 teaspoon cinnamon extract (optional, but it gives it that classic fair flavor)
Step by Step Candy Apples: Preparing the Apples
Alright, let’s get those apples ready for their colorful coating! This might seem redundant, but trust me, you absolutely must wash them well. We’re trying to get rid of any waxy layer the store might have put on them because the candy won’t stick to wax. After washing, dry each apple completely—I mean bone dry. Any water clinging to the skin will cause sizzling and bubbles when it hits the hot syrup!
Once they are dry, pop those wooden skewers right into the top where the stem was. Make them go in deep so they feel secure. We don’t want any wobbly apples when we start dipping! This quick setup is the first real step in our Step by Step Candy Apples tutorial.

How to Make Candy Apples Stop Bubbling: Syrup Cooking Instructions
This is the critical moment, folks! If you’re wondering how to make candy apples stop bubbling, this is where you pay attention. First, you combine the sugar, corn syrup, and water in a heavy pan. Stir it gently over medium heat until the sugar is completely gone—it won’t look clear until the heat gets going, so don’t panic. The moment it hits a rolling boil, stop stirring. I mean it! Stirring after boiling introduces air, and air means bubbles!
Now, you need a dependable candy thermometer. Seriously, don’t guess! I trust digital ones over the older glass types because they react faster. Clip it securely to the side, making sure the tip isn’t touching the bottom of the pan. Cook until it hits exactly 300°F—that’s the Hard Crack Stage. When it hits 300°F, pull that pan OFF the heat immediately. Let it sit, completely undisturbed, for a full minute. That rest is like magic; it lets the trapped air escape before you dip. Trust me on this resting step; this is your secret weapon for avoiding bubbles.
Coloring Your Candy Apple Coating for Any Color
Once you’ve let the syrup rest for that precious minute, it’s time for color! If you want those vibrant, almost glowing classic red candy apples, you’ll add your red gel coloring now. If you want to make candy apples any color, this is your chance to experiment! You could use deep purple, vibrant blue, or even a lovely spring green. But here’s the thing: work fast once you add that color!
Since the heat is off, the syrup is going to seize up quickly. Stir the color in vigorously for just a few seconds to blend it through, and immediately start dipping. If you hesitate, you’ll find your beautiful syrup has turned into hardened sugar clumps in the pan, and then you’ll be back to square one!
Dipping Technique for a Perfect Candy Apple Coating
Okay, the syrup is perfect—it’s still hot, glossy, and bubble-minimized. Now for the fun part: dipping! Don’t try to dunk the whole apple straight down into the pan; that usually results in a messy pile on the bottom. Instead, tilt your saucepan slightly so the hot candy mixture pools up on one side. This pooling action is crucial because it lets you work that Perfect Candy Apple Coating evenly around the fruit.
Take your skewered apple and dip it quickly, rotating it as you go. You want to make sure the candy just comes to meet the stick, but not too far up that gooey mess might start tracking down the apple later. As you pull the apple out, let the excess syrup drip right back into the tilted pan. A slow drip takes the coating down with it, leaving you with a thin, hard shell. Aim for quick, confident movements here!

Tips for Crunchy Candy Apples and Setting the Shell
Once those beauties are coated, they need a place to chill out and harden up properly! Laying them on parchment paper is non-negotiable, seriously. If you try to set them on wax paper or, worse, just a plate, they will stick horribly, and you’ll lose that beautiful shell you just perfected. The parchment paper lets the excess drip slightly and then sets hard without adhering.
Let them sit undisturbed at room temperature for at least 30 minutes until they are totally cool and you can tap them with a fingernail and hear a satisfying *tink*. If your coating seems soft or slightly sticky after an hour, that means your temperature wasn’t quite right, or maybe there was too much humidity in the air. Don’t stress! You can carefully reheat the syrup (just until it flows, don’t boil!) and re-dip them. Granny Smith apples are my go-to because their tartness cuts through the intense sweetness of the shell, giving you that amazing flavor contrast you want in Crunchy Candy Apples.
Storage & Serving Suggestions for Homemade Candy Apples
You’ve done the hard work, now let’s keep these beauties perfect until it’s time to eat! The number one enemy of a crunchy shell is humidity. Keep your finished candy apple creations in a cool, dry spot, ideally wrapped loosely in plastic wrap or in an airtight container if you have space. Don’t try to refrigerate them; the moisture in the fridge will make that gorgeous shell turn sticky, and nobody wants that!
These are absolutely stellar for seasonal fun—think backyard bonfires or as big, bold Halloween Dessert Ideas. Nothing says autumn like a classic red treat. For quick serving, sometimes I’ll even just set them up like festive decorations before everyone digs in. They look so gorgeous!

Frequently Asked Questions About Making Candy Apples
I totally get it—when you put this much effort into getting that perfect coating, you have questions! Here are the answers to the ones I hear most often about making these shiny treats. Hopefully, this clears everything up so you can confidently store and enjoy your Sweet Apple Dessert Recipe!
Why is my candy coating cloudy instead of clear and glossy?
Ah, the cloudy disaster! This almost always happens for two reasons. First, you either didn’t cook the syrup quite long enough to reach the Hard Crack Stage (300°F), or you stirred the mixture after it started boiling. Stirring introduces air pockets, and when that syrup hardens, those air pockets make it look cloudy or gritty instead of shiny. Also, sometimes splashing water droplets into the hot sugar mixture can cause crystallization, which looks dull.
Is light corn syrup really necessary for this Easy Candy Apple Recipe?
Yes, it really is for the No Fail Candy Apple Recipe! Corn syrup is an inverse sugar, which means it stops the granulated sugar from crystallizing when it cools. If you skip it, you are likely to end up with a grainy, sugar-crusted apple rather than a smooth candy shell. You can’t really substitute it successfully here, so grab a bottle!
How long do these Homemade Candy Apples last?
If you’ve managed to keep them away from humidity, they last pretty well! Store your fully cooled, hard candy apple treats in an airtight container in a cool, dark cupboard for up to a week. I advise against the fridge because the cold moisture will absolutely start dissolving that beautiful shell. Don’t make them if you know you won’t eat them within a week, though; fresh is always best!
Can I use any type of apple? Which are best for this recipe?
You can use different types, but I highly recommend tart, firm apples for the best flavor balance. Granny Smith apples are my top pick because their acidity cuts through the extreme sweetness of the candy perfectly. Fuji apples are a great second choice if you want something a little sweeter but still firm. Softer apples, like Red Delicious, tend to get mushy underneath the hard shell, which is never fun. You can check out some other great apple uses here if you have extras!
Nutritional Estimate for This Sweet Apple Dessert Recipe
Now, I know when we’re making treats like this, we aren’t exactly doing it for health reasons, right? Cooking should bring joy, and sometimes that means enjoying the sweetness! Here is a general nutritional estimate per apple, based on our recipe breakdown. Please remember these are just estimates!
- Calories: 350
- Sugar: 85g
- Carbohydrates: 90g
- Protein: 0g
- Fat: 0g
It’s a sugar bomb, but wow, is it worth it for those festive moments!
PrintThe Best Easy Homemade Candy Apples
Make classic, shiny red candy apples at home with this simple recipe. You will achieve a perfect, crunchy, non-bubbling candy shell ideal for Fall or Halloween treats.
- Prep Time: 15 min
- Cook Time: 25 min
- Total Time: 40 min
- Yield: 12 servings 1x
- Category: Dessert
- Method: Stovetop Cooking
- Cuisine: American
- Diet: Vegetarian
Ingredients
- 12 medium apples (Granny Smith or Fuji work well)
- 12 wooden skewers or sticks
- 2 cups granulated sugar
- 1 cup light corn syrup
- 3/4 cup water
- 1 teaspoon red food coloring (gel coloring works best)
- 1/2 teaspoon cinnamon extract (optional, for flavor)
Instructions
- Wash the apples thoroughly. Remove the stems and insert a wooden skewer firmly into the top of each apple.
- In a medium, heavy-bottomed saucepan, combine the sugar, corn syrup, and water. Stir the mixture over medium heat until the sugar dissolves completely.
- Stop stirring once the mixture boils. Insert a candy thermometer into the side of the pan, making sure it does not touch the bottom.
- Cook the syrup without stirring until it reaches 300 degrees Fahrenheit (Hard Crack Stage). This usually takes about 15 to 20 minutes.
- Remove the saucepan from the heat immediately when it reaches 300 degrees Fahrenheit. Let the bubbling subside for about one minute. This step helps prevent bubbles in the coating.
- Quickly stir in the red food coloring and the cinnamon extract, if using. Work fast, as the mixture will begin to set.
- Tilt the saucepan slightly. Dip one apple at a time into the hot syrup, rotating it to coat completely. Lift the apple out and allow excess syrup to drip back into the pan.
- Place the coated apples onto a baking sheet lined with parchment paper or a silicone mat. Let them cool completely, about 30 minutes, until the candy shell is hard and crunchy.
Notes
- For a bubble-free coating, do not stir the syrup after it begins to boil. Also, letting the syrup rest for one minute off the heat before dipping helps release trapped air.
- If you want to make candy apples any color, substitute the red food coloring with your desired gel color.
- If the candy coating becomes too thick while dipping, return the pan to low heat briefly to soften it, but do not let it boil again.
Nutrition
- Serving Size: 1 apple
- Calories: 350
- Sugar: 85g
- Sodium: 1mg
- Fat: 0g
- Saturated Fat: 0g
- Unsaturated Fat: 0g
- Trans Fat: 0g
- Carbohydrates: 90g
- Fiber: 1g
- Protein: 0g
- Cholesterol: 0mg
