 Skip to content

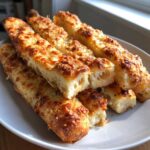
If you’re like me, sometimes you just desperately need that soft, pillowy breadstick experience, right? Forget dry dinner rolls—we’re talking about that recognizable, slightly sweet, incredibly garlicky goodness that sticks to your fingers. That’s why I developed these Copycat Soft & Fluffy Garlic Butter Breadsticks. When I finally traded my demanding corporate life for the peace of the kitchen, recipes like this became my therapy. These homemade breadsticks are pure comfort, built from simple steps that bring that same undeniable joy to your dinner table. Trust me, you won’t be ordering takeout anymore!

- Why You Will Love These Copycat Restaurant Breadsticks
- Ingredients for the Best Homemade Breadsticks
- Step-by-Step Instructions for Fluffy Breadsticks
- Tips for Perfect Soft Breadsticks Every Time
- Variations: Customizing Your Homemade Breadsticks
- Storage and Reheating Instructions for Leftover Breadsticks
- Serving Suggestions for Your Buttery Breadsticks
- Frequently Asked Questions About Making Breadsticks
- Nutritional Estimates for These Classic Breadsticks
Why You Will Love These Copycat Restaurant Breadsticks
Seriously, why wouldn’t you love these? Once you make these from scratch, you’ll see why they’re the very definition of simple entertaining. They really nail that restaurant vibe without needing any fancy equipment. These are definitely the best breadsticks recipe you’ll try this year.
- They are impossibly Soft Breadsticks—tender and fluffy inside, never tough!
- The golden exterior gets soaked in our signature Garlic Butter Breadsticks topping.
- They are such an Easy Breadsticks Recipe; they come together fast!
- Perfect as an appetizer or the ultimate side dish.
Ingredients for the Best Homemade Breadsticks
I love that the magic for these super soft breadsticks comes from ingredients you probably already have sitting on your counter. Forget complicated mixes; these are from scratch breadsticks that deliver that perfect tender crumb, which is all down to the yeast activation and the melted butter in the dough.
- 1 cup warm water (105°F to 115°F)
- 2 1/4 teaspoons active dry yeast
- 1 tablespoon granulated sugar
- 3 cups all-purpose flour, plus more for dusting
- 1 teaspoon salt
- 2 tablespoons unsalted butter, melted
Garlic Butter Topping Ingredients
This is where we hit that classic, irresistible flavor profile! Don’t skip the Parmesan here; it toasts up beautifully.
- 4 tablespoons unsalted butter, melted
- 2 cloves garlic, minced
- 1 teaspoon dried Italian seasoning
- 1/4 cup grated Parmesan cheese
Step-by-Step Instructions for Fluffy Breadsticks
Okay, let’s get these amazing breadsticks into the oven! Baking yeast dough can seem intimidating, but making these homemade breadsticks is actually super straightforward once you nail the first few steps. We want fluffy, not flat, so pay attention to that yeast bloom!
Activating the Yeast and Mixing the Breadsticks Dough
First things first: wake up that yeast! In a big bowl, mix the warm water, yeast, and sugar. You need that water to be warm—about 105 to 115°F—otherwise, the yeast will get grumpy and won’t foam up. Give it about 5 to 10 minutes so it gets foamy and bubbly. If it doesn’t foam, your yeast is dead, and you need to start over, but usually, it works! Once it looks like the top of a good latte, dump in the flour and salt and mix until it’s just shaggy.
Kneading and Rising Your Soft Breadsticks
Now we add the first bit of butter—just the initial 2 tablespoons melted, mixed right in. Once that’s combined, it’s time to knead! Turn the dough out onto a lightly floured counter and work it for a solid 5 to 7 minutes until it feels smooth and elastic. Put it in an oiled bowl, flip it over so it’s coated, cover it up, and let it rise for 45 to 60 minutes until it’s doubled. If your kitchen is chilly, try putting it in the oven with just the light on—that little bit of warmth does the trick!
Shaping, Baking, and Finishing Your Garlic Butter Breadsticks
Preheat that oven to 400°F and get a sheet pan ready with parchment paper. Gently punch down your dough and pull off 12 equal pieces. Roll each one out to be nice and long, about 8 to 10 inches, and give them room on the pan. They only bake for about 10 to 12 minutes until they’re just lightly golden. While they’re baking, whip up that amazing topping: melt the last 4 tablespoons of butter and toss in your minced garlic, Italian seasoning, and Parmesan. The crucial part? Brush that garlic butter breadsticks mix all over them the second they come out of the oven so they soak it all up!

Tips for Perfect Soft Breadsticks Every Time
Even though this is an easy breadsticks recipe, getting that next-level, almost melt-in-your-mouth texture takes just a tiny bit of precision. I learned these little tricks over my many failed batches before I nailed this method, so you don’t have to stress!
Achieving Maximum Fluffiness in Your Breadsticks
The key to fluffiness starts with hydration! Don’t be tempted to add tons of extra flour when kneading, even if the dough seems sticky at first. Stick to the recipe! Over-flouring is the number one way you end up baking hockey pucks instead of soft dinner rolls. Make sure your ingredients aren’t too cold; room temperature water and slightly softened butter really help the yeast get active faster.
Making the Garlic Butter Breadsticks Topping Extra Flavorful
For the absolute best garlic butter breadsticks topping, I have a tiny secret. After you mince your garlic and mix it with the butter and herbs, let it sit on the counter while the breadsticks are baking. Seriously, just let that minced garlic steep in the warm butter mixture for about 10 minutes before painting it on. That infusion time draws out so much more garlic flavor. It really ups the game on these buttery breadsticks!
Variations: Customizing Your Homemade Breadsticks
Part of the fun of making your own dough is messing around with the flavors, right? These basic buttery breadsticks are fantastic plain, but we can definitely step it up if you’re trying to impress people at your next gathering. If you’re looking for a guaranteed crowd-pleaser, you absolutely need to try a basic cheesy breadsticks recipe. I put all my favorite show-stopping appetizer ideas over on my easy entertaining page!

When you pull the breadsticks out for that first butter brush, just sprinkle on some extra mozzarella along with the Parm. For a pure Parmesan breadsticks flavor bomb that’s less messy than mozzarella, just double the Parmesan in the topping mix. And hey, if you’re feeling ambitious, you can always slice the dough open halfway through the rise and stuff them with cream cheese or pepperoni before baking. It’s easy entertaining, and people absolutely love it!
Storage and Reheating Instructions for Leftover Breadsticks
If you manage to have any of these garlic butter breadsticks left over—which is a miracle in my house—you need to store them correctly! Keep them in an airtight container at room temperature for up to three days. Don’t put them in the fridge; the cold is the enemy of soft bread; it makes them stale fast.
When it’s time to reheat and enjoy these warm bread recipes again, skip the microwave, please! That just makes them rubbery. Pop them onto a baking sheet in a 350°F oven for about five minutes. They come out perfectly soft again, ready for dipping!
Serving Suggestions for Your Buttery Breadsticks
Look, these garlic butter breadsticks are fantastic just dipped in warm marinara, I won’t lie. But they are so much more than that! They make stellar appetizer breadsticks for any party. If you’re serving them with dinner, they are the perfect counterpart to anything saucy, like my creamy chicken and rice soup. You can find that recipe right here! Honestly, they’re good enough to eat plain, standing over the counter!

Frequently Asked Questions About Making Breadsticks
I know when you’re diving into a new yeast recipe, questions pop up about substitutions and storage. Don’t worry about it! I’ve tried just about every variation on these homemade breadsticks, so I’ve answered the most common things I get asked over on my blog and my Facebook page. Hopefully, this helps you get perfect fluffy dinner rolls on your first try!
Can I use milk instead of water in this easy breadsticks recipe?
Yes, you absolutely can! Substituting the water for milk is a great way to boost the richness of the dough. Milk contains fat and protein, which makes your final soft breadsticks even softer and gives them a slightly richer color. Just make sure the milk is warm—the same temperature range applies, around 105°F to 115°F. It really makes a lovely change for these buttery breadsticks!
Can I freeze the dough for these breadsticks?
Oh, that’s a smart question for batch baking! You certainly can freeze the dough. After you knead it but *before* the first rise (Step 3), you can freeze it. You need to punch the dough down, coat it lightly in oil, wrap it tightly in a double layer of plastic wrap, and pop it in the freezer. When you’re ready to bake, just thaw it overnight in the fridge, then let it warm up on the counter for about 30 minutes before punching it down a second time and shaping into appetizer breadsticks.
How do I make these crispy instead of soft?
If you happen to prefer something closer to crispy Italian breadsticks rather than our copycat version? That’s easy, but it changes the whole vibe! To make them crispier, you need two changes. First, roll the dough significantly thinner—almost like a cracker. Second, reduce the fat in the topping, skip the extra brushing after baking, and bake them for a minute or two longer until they look deeply golden brown. They won’t have that classic soft, fluffy texture anymore, but they’ll be satisfyingly crunchy!
I only have instant yeast. Can I use that instead of active dry yeast?
Yes, you can, and it definitely cuts down on a little time! If you are using instant yeast, you don’t need to proof it first in the warm water. You can just skip that first section of Step 1 and add the instant yeast directly along with the flour and salt in Step 2. Just make sure your liquid is still warm! It’s a great way to speed up the process when you need quick breadsticks on the table faster.
Nutritional Estimates for These Classic Breadsticks
Now, I know some of you are watching your macros, and some folks just want to know exactly what they are digging into! I want to be super clear: these numbers are my best educated guess based on the standard ingredients list. Since everyone’s kitchen is a little different—maybe you used slightly more butter or a heavier hand with the Parmesan—please treat this as a general guide. It helps you keep track of these incredible homemade breadsticks, but it isn’t a certified lab report!
Here is the estimate for one of these glorious, garlicky **breadsticks**:
- Serving Size: 1 breadstick
- Calories: 185
- Fat: 7g
- Saturated Fat: 4g
- Carbohydrates: 26g
- Protein: 4g
- Sodium: 280mg
- Sugar: 1g
See? Even loaded with that marvelous garlic butter, they aren’t too heavy! They are the perfect side dish that satisfies that craving for something warm and savory.
PrintCopycat Soft & Fluffy Garlic Butter Breadsticks
I’m Alex, and I’m glad you are here. These homemade breadsticks deliver the soft, buttery, garlicky flavor you crave from your favorite restaurants. This recipe uses simple steps to create fluffy breadsticks perfect for any dinner.
- Prep Time: 20 min
- Cook Time: 12 min
- Total Time: 77 min
- Yield: 12 breadsticks 1x
- Category: Appetizer
- Method: Baking
- Cuisine: American
- Diet: Vegetarian
Ingredients
- 1 cup warm water (105°F to 115°F)
- 2 1/4 teaspoons active dry yeast
- 1 tablespoon granulated sugar
- 3 cups all-purpose flour, plus more for dusting
- 1 teaspoon salt
- 2 tablespoons unsalted butter, melted, plus 4 tablespoons for topping
- 1/4 cup grated Parmesan cheese
- 2 cloves garlic, minced
- 1 teaspoon dried Italian seasoning
Instructions
- In a large bowl, combine the warm water, yeast, and sugar. Let this mixture sit for 5 to 10 minutes until it becomes foamy. This shows the yeast is active.
- Add the flour and salt to the yeast mixture. Mix until a shaggy dough forms.
- Add the 2 tablespoons of melted butter. Knead the dough on a lightly floured surface for 5 to 7 minutes until it becomes smooth and elastic.
- Place the dough in a lightly oiled bowl, turning to coat. Cover the bowl with plastic wrap or a clean kitchen towel. Let the dough rise in a warm place for 45 to 60 minutes, or until it doubles in size.
- Preheat your oven to 400°F (200°C). Line a large baking sheet with parchment paper.
- Punch down the risen dough gently. Divide the dough into 12 equal pieces. Roll each piece into a long, thin breadstick shape, about 8 to 10 inches long. Place the breadsticks on the prepared baking sheet, leaving a small space between them.
- Bake for 10 to 12 minutes, or until the breadsticks are lightly golden brown.
- While the breadsticks bake, prepare the garlic butter topping: In a small bowl, melt the remaining 4 tablespoons of butter. Stir in the minced garlic, Italian seasoning, and Parmesan cheese.
- Immediately after removing the breadsticks from the oven, brush the garlic butter mixture generously over the warm breadsticks.
- Serve these warm, fluffy dinner rolls immediately for the best flavor.
Notes
- If you want an extra cheesy breadsticks recipe, sprinkle a little extra Parmesan cheese over the butter topping right after they come out of the oven.
- For a quicker rise time, place the covered bowl in an oven that is turned off but has the light on.
- These homemade breadsticks pair perfectly with marinara sauce for dipping.
Nutrition
- Serving Size: 1 breadstick
- Calories: 185
- Sugar: 1
- Sodium: 280
- Fat: 7
- Saturated Fat: 4
- Unsaturated Fat: 3
- Trans Fat: 0
- Carbohydrates: 26
- Fiber: 1
- Protein: 4
- Cholesterol: 15
