 Skip to content

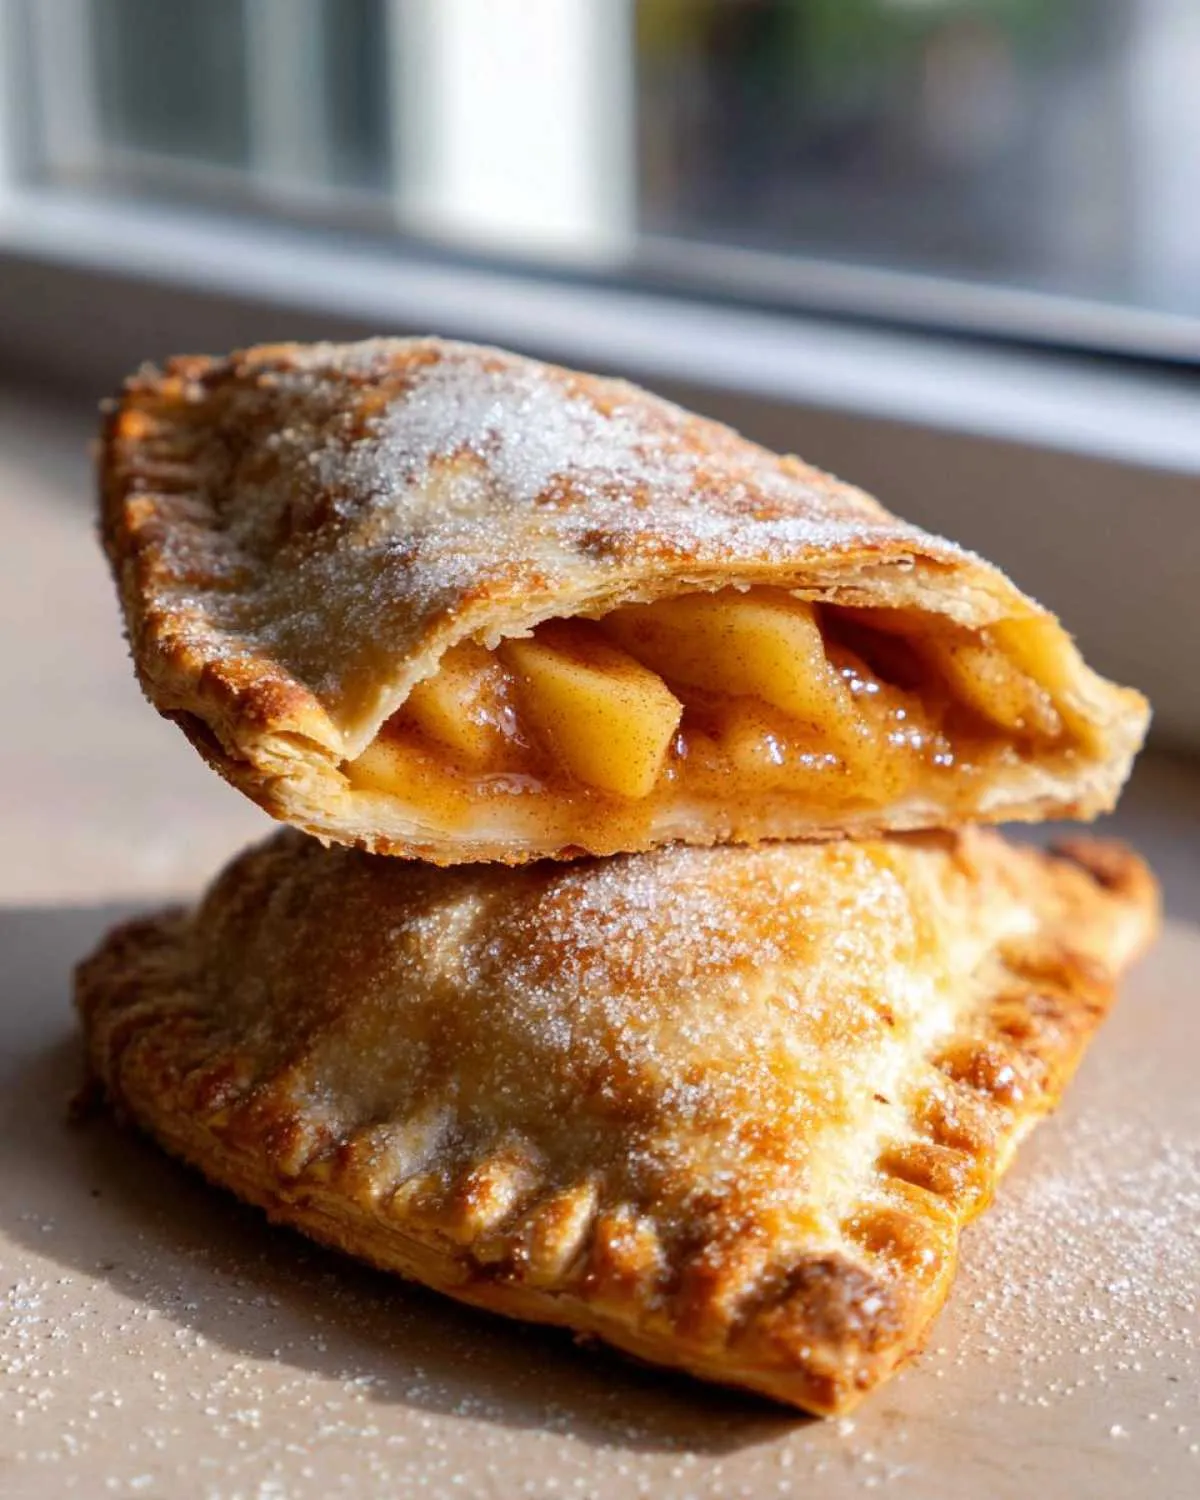
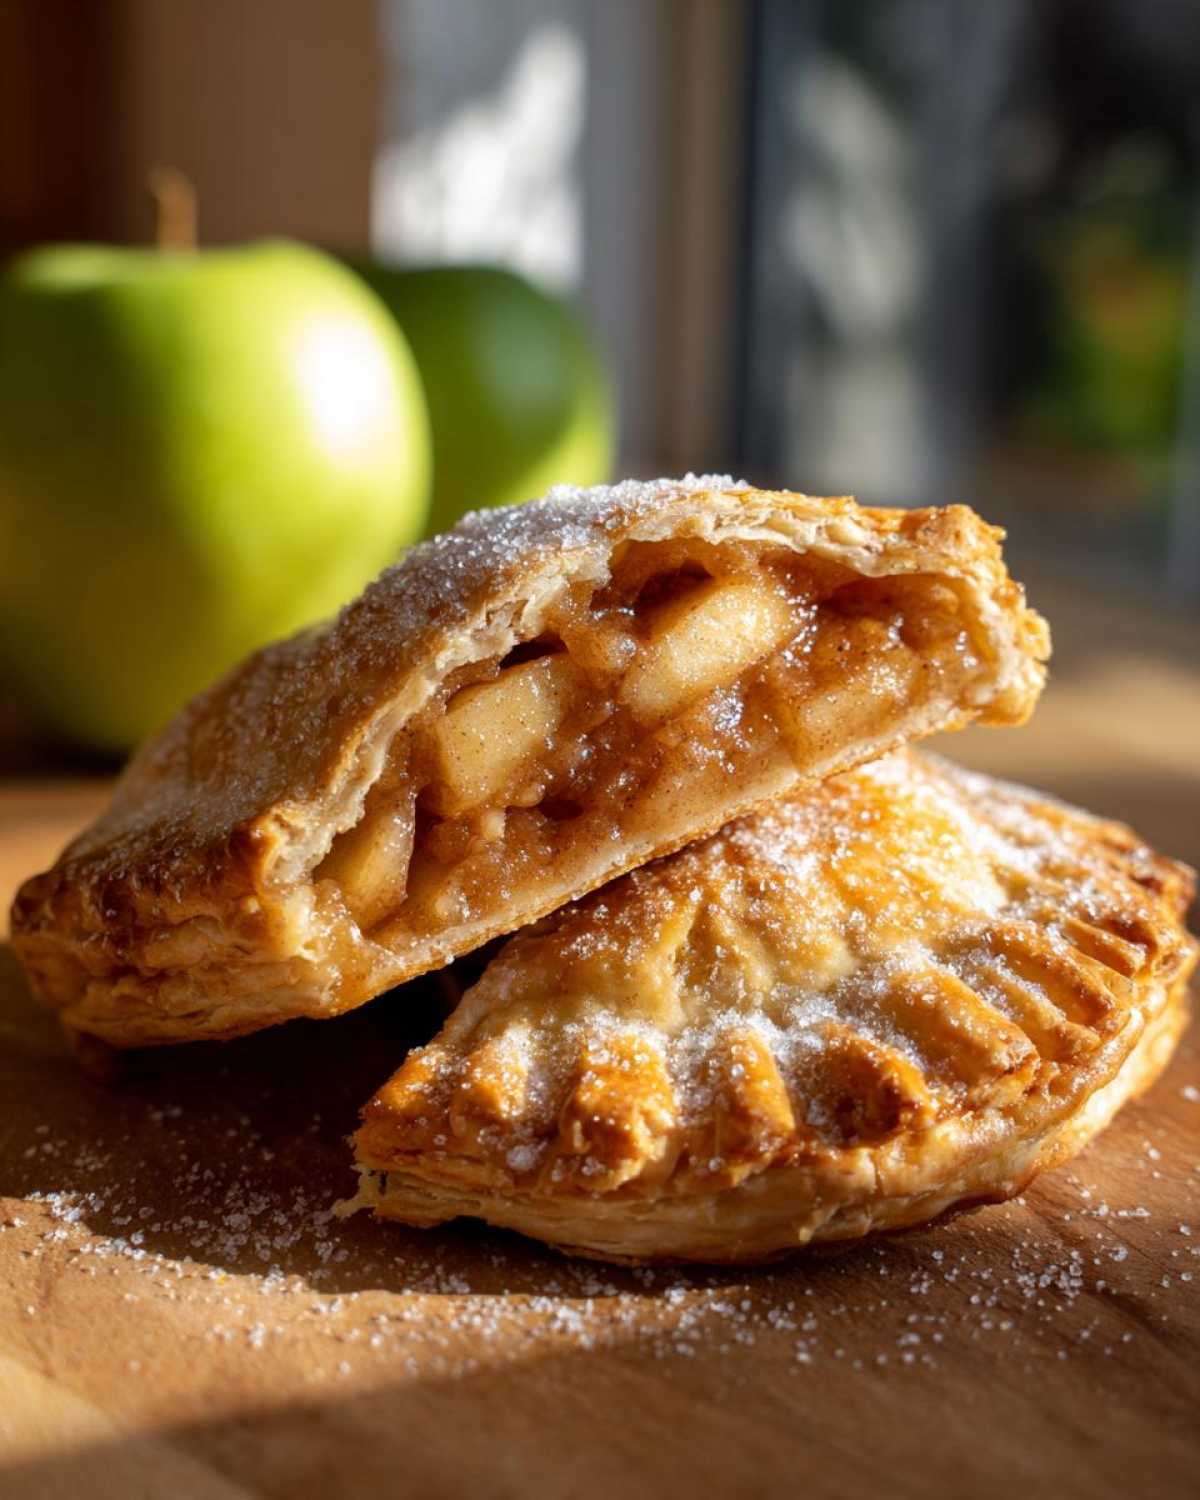
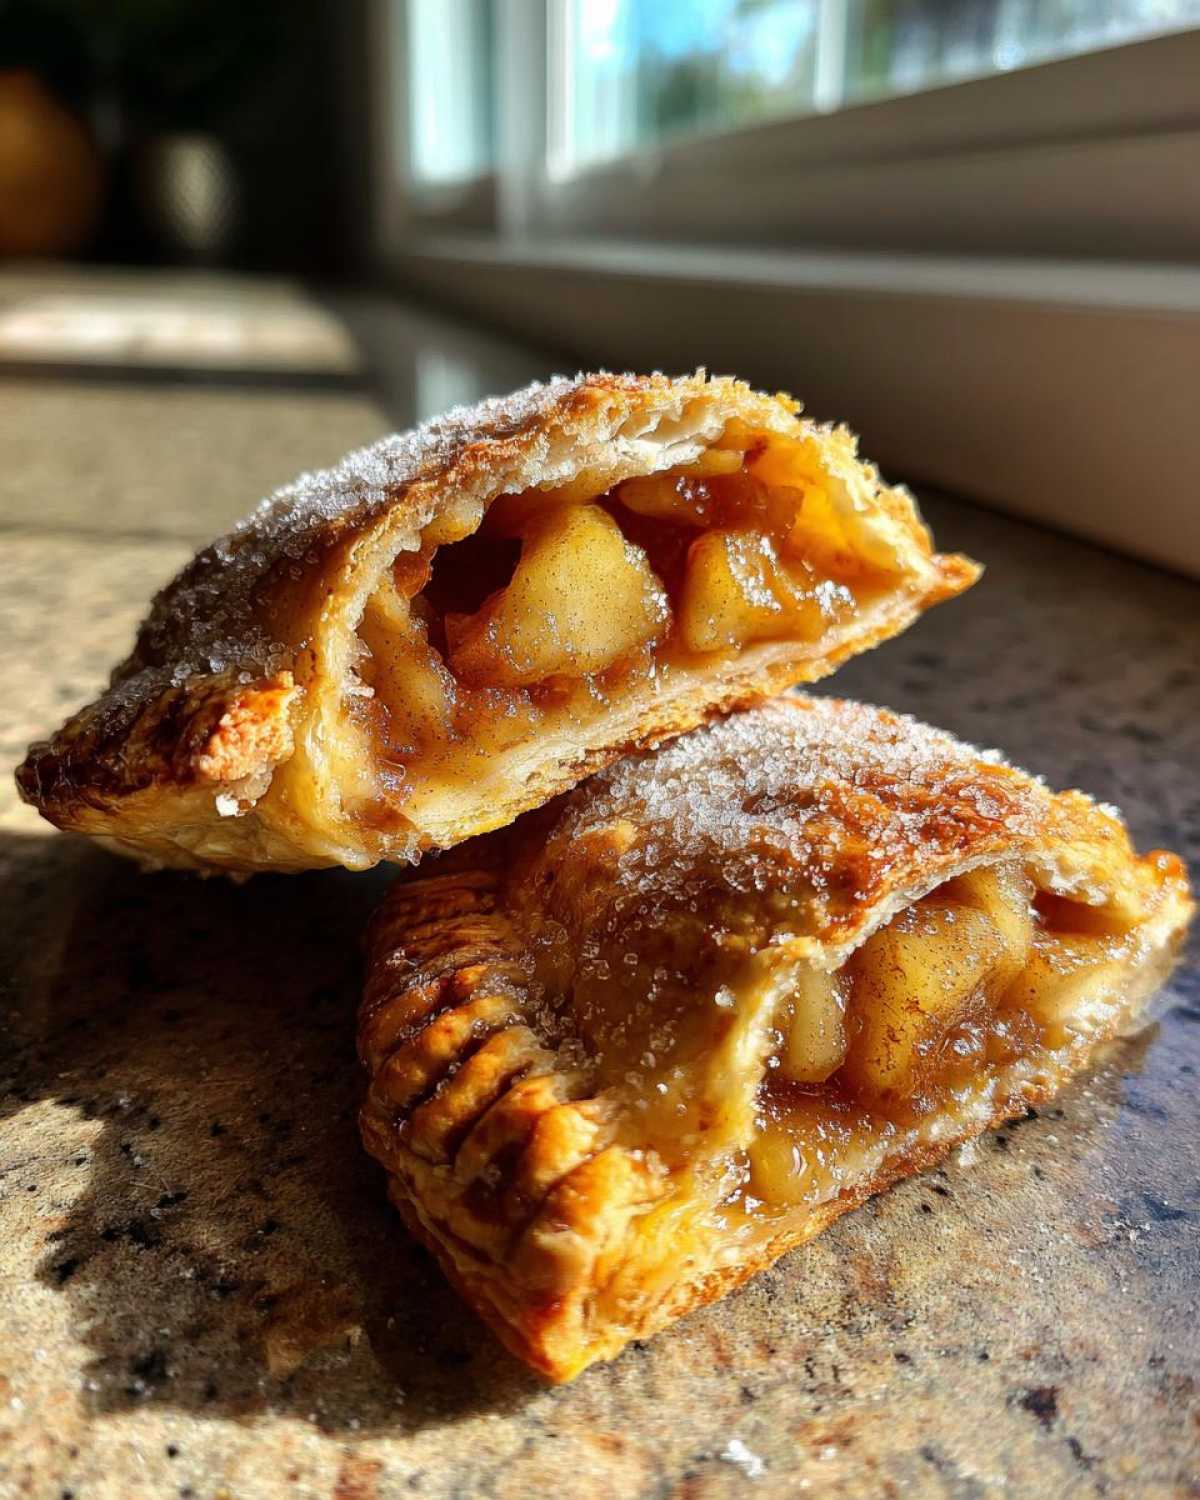
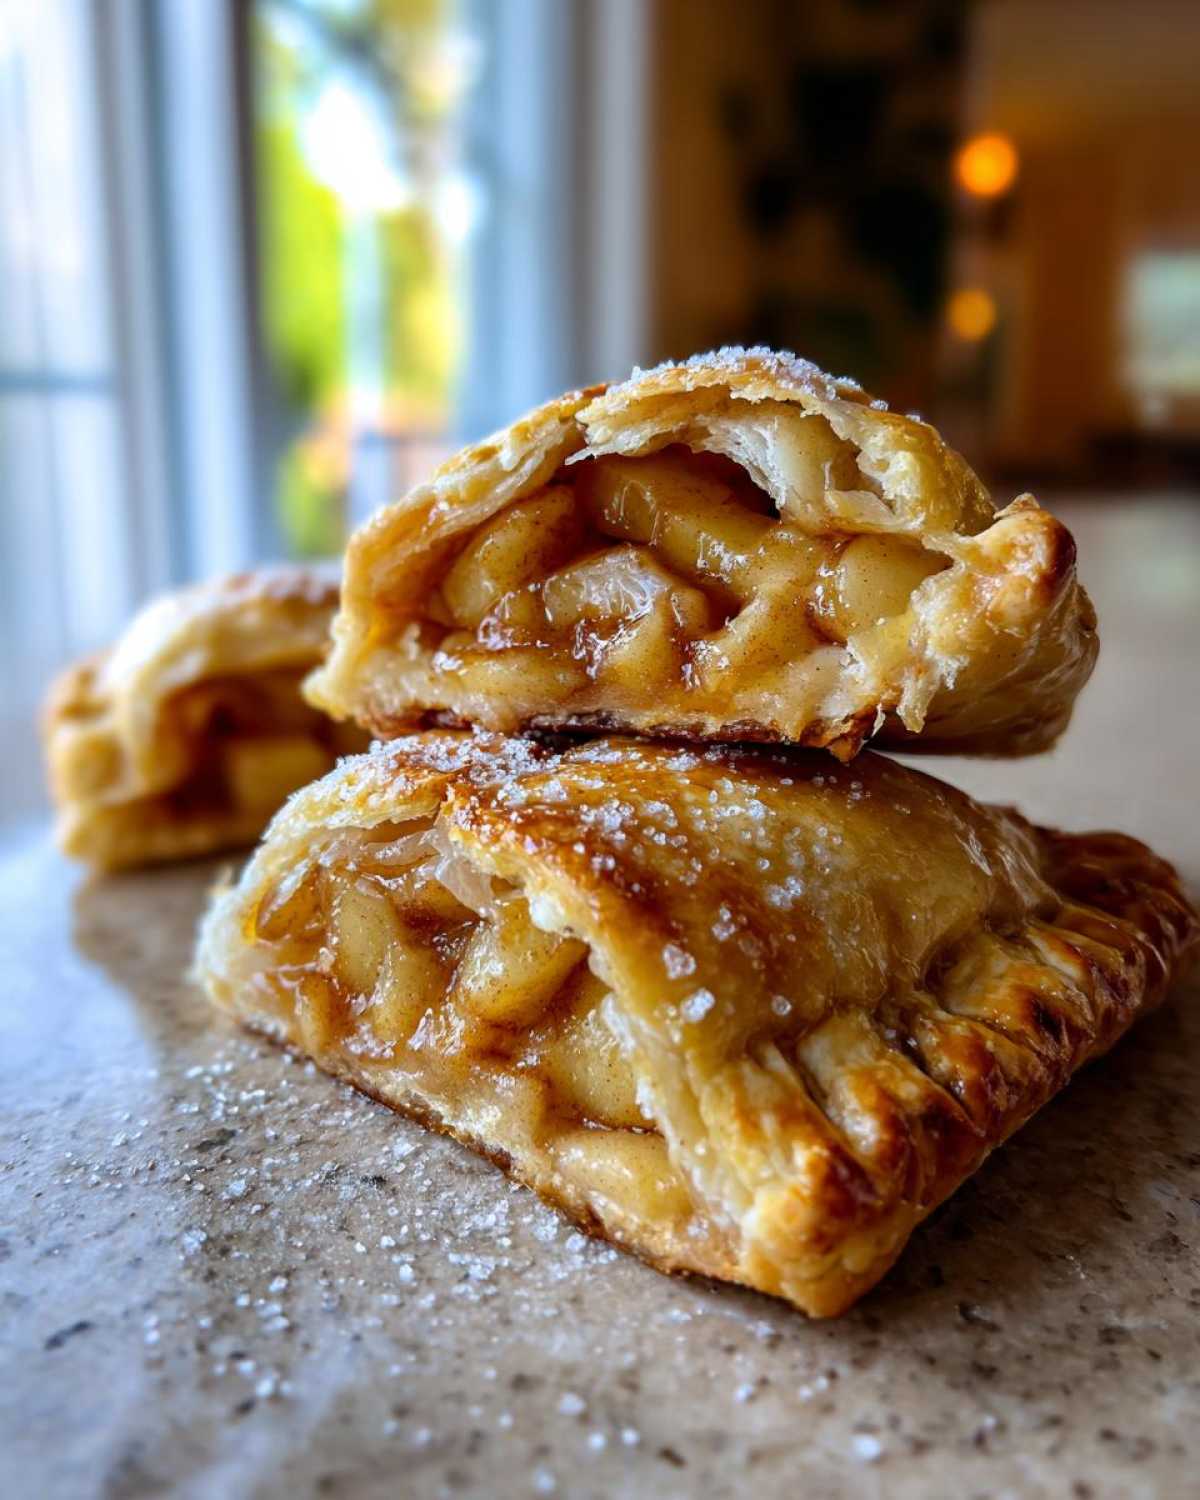
You know, sometimes the simplest things bring the biggest smiles. And that’s exactly how I feel about these apple hand pies! If you’re anything like I used to be, juggling a busy life might make you think cooking is just another chore. But honestly, finding joy in the kitchen isn’t about fancy gadgets or hours spent prepping; it’s about creating something delicious that feels good, both to make and to share. That’s the heart of Pure Cooking Joy! These aren’t just any apple pies; they’re little pockets of happiness, perfectly portable and packed with warm, spiced apple goodness. They’re super easy to whip up, making them ideal for those moments you want a special treat without the fuss. Trust me, pulling these golden beauties out of the oven is a pure moment of delight!
- Gather Your Ingredients for Perfect Apple Hand Pies
- Crafting Your Delicious Apple Hand Pies: Step-by-Step
- Why You'll Love These Easy Apple Hand Pies
- Tips for Baking Perfect Apple Hand Pies Every Time
- Variations for Your Homemade Apple Hand Pies
- Serving and Storing Your Delicious Apple Hand Pies
- Frequently Asked Questions About Apple Hand Pies
- Enjoying Your Portable Apple Pie Creations
Gather Your Ingredients for Perfect Apple Hand Pies
Okay, so let’s get our mise en place ready! To make these delightful apple hand pies, you won’t need anything too exotic. We’re starting with the magic of 2 refrigerated pie crusts – because who has time to make pastry from scratch every single time? Nah, we’re all about convenience and joy here! You’ll grab about 6 medium apples, peel ’em, core ’em, and dice ’em up small. Then we’ve got your simple, flavorful filling helpers: granulated sugar, a little all-purpose flour to thicken things up nicely, cinnamon and nutmeg for that cozy spice hug, and just a pinch of salt to make all those flavors sing. A splash of lemon juice brightens everything up, and a few little pats of butter dotted over the filling before sealing makes them extra luscious. Oh, and don’t forget one large egg for a gorgeous egg wash and some coarse turbinado sugar for that beautiful, crunchy sparkle!
Crafting Your Delicious Apple Hand Pies: Step-by-Step
Prepping Your Oven and Baking Sheets for Apple Hand Pies
First things first, let’s get our oven fired up! We want it nice and toasty at 375°F (190°C). While that’s heating, grab a couple of baking sheets and line them with parchment paper. This simple step is a game-changer, friends – it stops these lovely apple hand pies from sticking and makes cleanup a breeze!
Creating the Perfect Spiced Apple Filling
Now for the heart of our pies! Grab a nice big bowl and whisk together your granulated sugar, that little bit of flour, cinnamon, nutmeg, and salt. This is where all the cozy flavor magic happens. Next, toss in your diced apples and that splash of lemon juice. Give it all a good stir until every apple piece is beautifully coated. You want to make sure all those wonderfully spiced sugars and spices cling to the apples, promising a burst of deliciousness in every bite.
Assembling Your Portable Apple Pie Pockets
Okay, time to build these little beauties! Gently lay out one of your pie crusts on a lightly floured surface. I like to use a 4-inch round cutter – it makes the most adorable, perfectly sized hand pies. Don’t let those scraps go to waste either; gather them up and reroll to get every last bit of pastry goodness. Now, spoon about 2 tablespoons of your glorious apple filling onto one half of each circle. Leave a little border around the edge, about half an inch. Dot a few tiny pieces of butter right on top of the apples – trust me, it adds such a wonderful richness! To seal them up, brush the edges of the dough with your beaten egg wash. Then, simply fold the other half of the dough over the filling, making a cute half-moon shape. Press those edges down really well with your fingers to make sure no filling escapes. For extra security and a pretty touch, crimp the edges with the tines of a fork. It’s like giving your pies a little hug!
The Finishing Touches for Golden Apple Hand Pies
Almost there! Place your assembled apple hand pies onto those prepared baking sheets. To help the steam escape and prevent any puffing disasters, carefully cut a few small slits on the top of each pie. Now, take that remaining egg wash and brush it all over the tops – this is what gives them that gorgeous golden-brown shine. And for a little extra sparkle and crunch? Sprinkle them generously with turbinado sugar. It’s those little details that really make them feel special!
Baking and Cooling Your Delicious Apple Hand Pies
Into the oven they go! Bake them for about 20 to 25 minutes. You’re looking for a beautiful golden-brown crust and to see that apple filling starting to bubble happily through the vents. Once they’re done, let them cool on the baking sheets for just a few minutes – they’re super delicate when they first come out. Then, carefully transfer them to a wire rack to cool completely. Patience here is key, even though the smell is absolutely intoxicating!
Why You’ll Love These Easy Apple Hand Pies
Honestly, these little pockets of joy are just fantastic for so many reasons! They’re incredibly easy to make, even if you’re new to baking, and that’s exactly what Pure Cooking Joy is all about – simple happiness in the kitchen. Plus, they’re perfectly portable, making them the ultimate easy hand pies for snacks, picnics, or just because. You get all that warm, spiced apple flavor you love in a convenient portable apple pie format. It’s just pure, uncomplicated deliciousness that’s guaranteed to make you smile!
Tips for Baking Perfect Apple Hand Pies Every Time
Okay, friends, let’s talk about making these apple hand pies absolutely knock your socks off! My biggest tip? Use apples that hold their shape when baked. Think Honeycrisp, Granny Smith, or Braeburn – they give you that perfect tender-bite without turning into applesauce. If you’re worried about a soggy bottom (totally happened to me in my early baking days!), make sure your filling isn’t too wet. And when you’re sealing those pies, really press down those edges and crimp firmly with a fork. It’s not just for looks; it ensures your delicious apple filling stays right where it belongs during baking. Also, don’t skip those steam vents! They’re crucial for letting the steam escape so your pretty pies don’t puff up too much and burst. It’s all about simple steps for pure joy!
Variations for Your Homemade Apple Hand Pies
You know, one of the best things about making your own treats is how easy it is to make them your own! If you’re feeling adventurous, try jazzing up your apple hand pies. You could add a handful of chopped pecans or walnuts to the apple filling for a nice crunch, or maybe swap out some of the cinnamon for a pinch of cardamom or allspice for a different kind of cozy. And for something really special? That cheddar crust variation mentioned in the notes is a total game-changer! Just adding some shredded sharp cheddar cheese to the pie dough before you bake it gives these cheddar crust hand pies a delicious savory-sweet punch that’s totally unexpected and utterly addictive.
Serving and Storing Your Delicious Apple Hand Pies
These apple hand pies are just delightful and pretty flexible, which I love! You can totally enjoy them warm, fresh from the oven – that’s probably my favorite way, with the filling all melty and the crust super flaky. But honestly, they’re just as yummy at room temperature if you’re taking them on the go. If you happen to have any leftovers (which is rare in my house!), just pop them into an airtight container. They’ll stay good on the counter for a day or two, or you can pop them in the fridge for up to 4 days. To reheat, a quick warm-up in the oven or even a toaster oven brings back that lovely crispness!
Frequently Asked Questions About Apple Hand Pies
Got questions about whipping up these sweet little apple hand pies? I totally get it! Cooking should be fun, not frustrating. Here are a few things people often ask me:
What kind of apples are best for making hand pies?
This is such a great question! For the absolute best texture, you want apples that hold their shape when they bake. Think firm, slightly tart apples like Honeycrisp, Granny Smith, Fuji, or Braeburn. They give you that wonderful tender bite without turning into mush. While you *can* use softer apples, you might end up with a mushier filling, so the firmer ones are really the way to go for perfect portable apple pie pockets!
Can I use homemade pie crust instead of store-bought?
Absolutely, yes! If you love making your own pie dough, go for it! The recipe works beautifully with homemade crust. Just make sure your dough is well-chilled, as that’s key to a flaky crust. Whether you use homemade or store-bought, the important thing is that it’s easy for you to work with, keeping that “pure joy” part front and center!
Can you freeze apple hand pies before baking?
You sure can! These little guys freeze really well before you bake them. Assemble them completely, place them on a baking sheet until they’re firm in the freezer, then transfer them to a freezer bag or container. When you’re ready to bake, just pop them onto a baking sheet (no need to thaw!) and bake them, adding a few extra minutes to the baking time until they’re golden and bubbly. It’s a fantastic way to have easy hand pies ready whenever the craving strikes!
How do I make cheddar crust hand pies?
Oh, this is a fun one! For those tasty cheddar crust hand pies, it’s super simple. When you’re getting ready to roll out your pie crust dough (whether it’s store-bought or homemade), just add about 1/2 cup of shredded sharp cheddar cheese directly into the dough. Gently knead it in until it’s combined, then roll it out and use it just like the regular pie crust in the recipe. The cheese adds this amazing savory note that pairs so well with the sweet apple filling!
Enjoying Your Portable Apple Pie Creations
I really hope you give these sweet little apple hand pies a try! It’s such a joy to create something delicious together, and I’d love to hear how yours turn out. If you make them, feel free to share a picture – it always makes my day! Cooking should be about happiness, and I hope these pies bring a little extra sparkle to yours.
PrintEasy Apple Hand Pies

Bake these simple apple hand pies for a portable, delicious dessert. Flaky pastry filled with spiced apples, perfect for on-the-go enjoyment.
- Prep Time: 25 min
- Cook Time: 25 min
- Total Time: 50 min
- Yield: 8 servings 1x
- Category: Dessert
- Method: Baking
- Cuisine: American
- Diet: Vegetarian
Ingredients
- 2 refrigerated pie crusts
- 1/2 cup granulated sugar
- 1/4 cup all-purpose flour
- 1 teaspoon ground cinnamon
- 1/4 teaspoon ground nutmeg
- 1/4 teaspoon salt
- 6 cups peeled, cored, and diced apples (about 6 medium apples)
- 2 tablespoons lemon juice
- 1 tablespoon butter, cut into small pieces
- 1 large egg, beaten (for egg wash)
- 2 tablespoons turbinado sugar (for sprinkling)
Instructions
- Preheat your oven to 375°F (190°C). Line baking sheets with parchment paper.
- In a large bowl, whisk together granulated sugar, flour, cinnamon, nutmeg, and salt.
- Add the diced apples and lemon juice to the bowl. Toss to coat the apples evenly with the sugar mixture.
- Lay out one pie crust on a lightly floured surface. Use a 4-inch round cutter to cut out circles. Reroll scraps as needed.
- Place about 2 tablespoons of the apple filling onto one half of each circle, leaving a small border. Dot with a few small pieces of butter.
- Brush the edges of the dough with the beaten egg wash. Fold the other half of the dough over the filling to create a half-moon shape. Press the edges firmly to seal, then crimp with a fork.
- Place the hand pies on the prepared baking sheets. Cut a few small slits in the top of each pie to allow steam to escape.
- Brush the tops of the hand pies with the remaining egg wash and sprinkle with turbinado sugar.
- Bake for 20-25 minutes, or until the crust is golden brown and the filling is bubbly.
- Let the hand pies cool on the baking sheets for a few minutes before transferring them to a wire rack to cool completely.
Notes
- For a cheddar crust variation, add 1/2 cup shredded cheddar cheese to your pie dough before rolling.
- These hand pies are great for meal planning and can be made ahead of time.
- Serve warm or at room temperature.
Nutrition
- Serving Size: 1 hand pie
- Calories: 350
- Sugar: 25g
- Sodium: 200mg
- Fat: 18g
- Saturated Fat: 7g
- Unsaturated Fat: 11g
- Trans Fat: 0g
- Carbohydrates: 45g
- Fiber: 3g
- Protein: 4g
- Cholesterol: 30mg
