 Skip to content

I’m Alex, and I am so excited you’re here checking out this recipe! For years, my morning coffee was just fuel—something to get me through the corporate grind. But once I discovered the pure joy in creating things from scratch, I realized my entire routine needed an overhaul, starting with the coffee itself. Trust me when I say that learning how to make homemade coffee creamer is the ultimate upgrade. It sounds fancy, but this is easily one of the simplest things you’ll ever whip up. We’re talking about achieving that rich, velvety texture with just five natural ingredients. If you want more simple, flavor-packed ideas, be sure to explore the rest of my thoughts over at the Pure Cooking Joy blog. Isn’t it wonderful when the best things in life are also the easiest?
- Why This Homemade Vanilla Coffee Creamer is Better Than Store Bought
- Ingredients for the Ultimate Easy 5-Ingredient Homemade Coffee Creamer
- Step-by-Step Instructions: How to Make Homemade Coffee Creamer
- Tips for the Best Creamy Homemade Coffee Creamer Texture
- Flavor Variations for Your DIY Coffee Creamer
- Storage and Shelf Life of Homemade Coffee Creamer
- Frequently Asked Questions About Making Coffee Creamer
- Estimated Nutritional Data for This Homemade Coffee Creamer
- Share Your Morning Coffee Routine Upgrade
Why This Homemade Vanilla Coffee Creamer is Better Than Store Bought
Honestly, once you see how quickly you can make a batch of homemade coffee creamer—we’re talking maybe eight minutes total—you’ll never go back to the plastic jug in your fridge. The main reason I push everyone to try this DIY coffee creamer is the ingredient list. Store-bought versions are packed with things I can barely pronounce, but here, you’re using just real, whole ingredients. That freedom means you truly create the best homemade coffee creamer for *your* tastes. If you’re interested in other simple, whole-food creations, check out my thoughts on easy chia seed pudding!

This natural coffee creamer delivers that incredibly creamy coffee additive texture you crave without the stabilizers. Plus, it acts as a phenomenal quick coffee mixer. It’s genuinely better than store bought creamer because it’s fresh and you know exactly what’s going into your cup every single morning. Stop settling for anything less! We share more joy over on Facebook too, if you want to see what’s cooking in my kitchen; you can follow along at my Facebook page.
Control Sweetness and Fat Content in Your Homemade Coffee Creamer
This is where the real magic happens, friends. When you make your homemade vanilla creamer, you are the boss! Do you want it lighter for daily use? Use whole milk instead of half and half. Want that super rich, decadent feel? Swap in heavy cream.
And the sugar? You control it completely. If you usually spoon in one teaspoon of sugar, start with that amount in the simple syrup. This recipe is the base for the perfect sweet cream coffee recipe; you just adjust the richness dial to your preference. It’s so empowering!
Ingredients for the Ultimate Easy 5-Ingredient Homemade Coffee Creamer
When we talk about making a truly phenomenal homemade coffee creamer, the beauty lies in simplicity. I don’t want you reaching for specialty items or digging through your pantry for ten different things. For this Ultimate Easy Vanilla version, we are sticking to just five core components. This honesty builds trust, and when you see this list, you’ll realize you probably have everything on hand right now!
Here’s exactly what you need for about 1.5 cups of pure liquid gold:
- 1 cup Half and Half (or your preferred milk/cream combination for richness)
- 1/2 cup Granulated Sugar
- 1 tablespoon Vanilla Extract (use the good stuff here—it makes a difference!)
- 1/4 teaspoon Salt (don’t skip this, it balances the sweetness wonderfully)
- 1/4 cup Water

If you’re looking to kick off your baking adventures with something warm and comforting, this recipe is a great starting point, much like my easy pumpkin bread.
Ingredient Notes and Substitutions for Homemade Coffee Creamer
Because I want everyone to enjoy this fresh, natural coffee creamer, we have to talk substitutions. This is crucial for dietary needs!
For those avoiding dairy, you can absolutely make a fantastic dairy free coffee creamer. I’ve had great success using full-fat canned coconut milk—that gives you a lovely richness—or a blend of oat milk mixed with thick cashew cream. It makes a wonderful vegan coffee creamer base.
Trying to cut back on cane sugar? No problem! You can switch to a sugar free coffee creamer by swapping the granulated sugar for your favorite granular sweetener, like monk fruit or erythritol. Just remember to taste as you go, as different sweeteners have different levels of perceived taste.
Step-by-Step Instructions: How to Make Homemade Coffee Creamer
Alright, let’s get mixing! I know you’re eager to taste this homemade coffee creamer because you can probably already smell that vanilla. The first step is making a tiny bit of simple syrup. Grab a small saucepan and toss in the sugar and the water. Heat this over medium heat, but listen closely: you need to stir it constantly!
We aren’t trying to caramelize it; we just want every single grain of sugar to disappear. When the liquid turns completely clear, that means the syrup is ready. Take the pan right off the heat immediately. This is important!
Now, let that little bit of simple syrup cool down on its own for about five minutes. We don’t want to add hot liquid to the dairy ingredients right away. This cooling step keeps everything perfect.
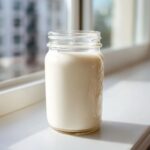
Next, grab your storage jar—a clean mason jar works perfectly for this DIY coffee creamer. Pour in that slightly cooled syrup. Then, add your half and half, your vanilla extract, and that tiny pinch of salt we talked about. Seal that lid on tight, because this is where the real work happens for a smooth, creamy coffee additive!

Shake it like you mean it! Shake until everything looks unified and smooth. Store your finished homemade coffee creamer right in the fridge. Remember to give it a good shake every time you refill that mug because, since it’s natural, things might settle a bit. That’s just part of making life amazing, and sometimes the simplest steps, like shaking up this recipe found over at my hibachi steak recipe, make the biggest difference!
Tips for the Best Creamy Homemade Coffee Creamer Texture
Listen, if you want that luxurious mouthfeel that screams better than store bought creamer, texture is everything with homemade coffee creamer. It’s not just about the liquids you choose; it’s about how you bring them together!
First tip for ensuring that super creamy coffee additive result: make sure your dairy base (the half and half or cream you choose) isn’t ice-cold when you mix it. If it’s straight from the back of the fridge, it takes forever to incorporate the syrup and might even feel a little thin at first.
Second, don’t underestimate the power of the shake! When you combine everything in that jar, seal it tightly, and shake vigorously for a full 30 seconds. You need to create some emulsification to keep the fat suspended evenly. Think high-energy! This is just as important as getting the sugar syrup right, and it guarantees a smooth texture in your mug every time. It’s similar to how I make sure my garlic mashed potatoes stay perfectly creamy.
If you are struggling with consistency, try using heavy cream instead of just half and half. That little boost of fat takes this easy coffee creamer recipe right over the top!
Flavor Variations for Your DIY Coffee Creamer
Now that you’ve mastered The Ultimate Easy homemade coffee creamer, you’re probably wondering what else you can do! The beauty of this base recipe is that it’s a launchpad for so many incredible flavored coffee creamer ideas. Once you have that simple syrup made, you can pivot into nearly any flavor profile you crave. This recipe format really lets you create those coffee shop drinks at home!
We’ve seen dozens of ideas floating around for things like mocha, peppermint, and hazelnut, but let’s stick to a few easy swaps that really shine using the foundation of our easy coffee creamer recipe. You can find some other lovely recipe transformations, like my cinnamon roll cookies, for when you need a sweet baked treat!
Making Brown Sugar Coffee Creamer
If you love that deep, cozy sweetness, switching to a brown sugar coffee creamer is a must! You’ll follow all the same steps for creating the syrup (water and sugar), but instead of using granulated sugar, you’ll swap it out one-for-one with light brown sugar.
The only real difference, according to my notes, is that you might need your heat just a *tiny* bit longer—maybe an extra minute—to ensure that molasses flavor fully dissolves into the water. Once combined, let it cool, add the milk and vanilla, shake, and boom. That’s your perfect homemade coffee creamer upgrade!
Creating Salted Caramel Coffee Creamer
This one always feels ultra-indulgent, and you’ll be shocked how easy it is. To make a salted caramel coffee creamer, stick to the original base recipe for vanilla. Once you have that shaker jar full of ready-to-go vanilla creamer, you’re going to sneak in a little extra something special.
After you’ve already shaken everything together, add just one hefty teaspoon of high-quality caramel sauce—the kind you’d drizzle on ice cream. Add an extra whisper of salt, too, maybe 1/8th of a teaspoon more than the original recipe. Shake it well again and give it a taste test. That touch of extra salt and rich caramel turns your basic batch into a decadent treat!
Storage and Shelf Life of Homemade Coffee Creamer
Because we are keeping things natural here, you don’t have to worry about odd preservatives when storing your wonderful batch of homemade coffee creamer. It’s simple: everything goes into the fridge!
The half and half (or your alternative milk choice) dictates the shelf life, just like a carton you buy at the store. Generally, this DIY coffee creamer lasts about 7 to 10 days when kept sealed and refrigerated. My rule of thumb is to use it up before the expiration date of the dairy component you started with.

Always remember to keep that lid tight! Air is not our friend when keeping things fresh. And just watch for changes in smell or texture, though that rarely happens when you plan to use it up quickly. It’s easy to start a morning coffee routine upgrade when you know your mixer is fresh. For more fresh meal prepping ideas, take a look at how I handle chia seed pudding!
Frequently Asked Questions About Making Coffee Creamer
I know you might still have a few burning questions about ditching the store-bought stuff for our amazing homemade coffee creamer. That’s totally normal when trying a new easy coffee creamer recipe! I want you to feel 100% confident, so let’s tackle a few things people often ask me.
Do I have to heat the sugar and water mixture?
Yes, you absolutely must heat them! That quick three-minute heating process is essential. We aren’t cooking the mixture, but we need the heat to turn the granulated sugar into a true simple syrup. If you skip heating, you’ll end up with grainy, undissolved sugar sitting at the bottom of your jar instead of a smooth, creamy final product. It’s a non-negotiable step for a smooth creamy coffee additive.
What’s the best liquid if I want a vegan coffee creamer?
That’s a fantastic question, especially since making a vegan coffee creamer is so popular now! If you’re avoiding all dairy, I highly recommend using full-fat canned coconut milk. It has a high fat content, which mimics the richness of half and half beautifully and keeps the texture thick. Oat milk alone can sometimes be a little too thin, so if you use that, try mixing in a tablespoon of cashew cream or a thickener to help achieve that sweet cream texture.
How thick will this homemade coffee creamer be?
It will be thicker than skim milk, but it won’t be as thick as condensed milk or a pudding! Think of it as being very similar in consistency to the liquid poured from a carton of half and half. If you want yours significantly thicker—closer to a heavy cream—you just need to cut back on the water used for the simple syrup, or, as I mentioned, use heavy cream or coconut milk as your base liquid. Remember, you can always thicken it slightly by shaking it really hard before pouring.
Can I make this recipe ahead of time?
Yes! That’s one of the best parts of an easy coffee creamer recipe. You can whip up a batch on Sunday, and it’s ready to go all week long. I usually prep mine to last about 7 to 10 days in the fridge. Just give it a good shake before you measure it out for your morning cup. It’s the perfect partner for my recipes like my chicken salad recipe in the fridge!
Estimated Nutritional Data for This Homemade Coffee Creamer
I’m all about transparency, especially when it comes to what we’re putting into our bodies every morning. Since we are making this homemade coffee creamer ourselves, the final nutrition can change based on the milk you choose—oat, whole milk, or heavy cream—but I want to give you a solid baseline based on the standard recipe using half and half.
These numbers are only estimates for a 2-tablespoon serving size, okay? Don’t stress too much about perfection, just enjoy knowing that you’ve cut out all those weird artificial additives! If you’re looking for other simple, powerhouse snacks, you have to try my no-bake peanut butter protein balls.
Here are the rough estimates for our easy coffee creamer recipe:
- Serving Size: 2 tablespoons
- Calories: 110
- Total Fat: 7g
- Carbohydrates: 12g
- Sugar: 12g
- Protein: 1g
- Sodium: 25mg
Share Your Morning Coffee Routine Upgrade
Now that you have the secret to making truly exceptional homemade coffee creamer, the best part is diving into your own creative process! I can’t wait to hear how this quick coffee mixer has transformed your mornings. Did it feel like a total morning coffee routine upgrade for you?
I always love seeing what flavors you all dive into first. Were you a classic homemade vanilla creamer fan, or did you jump straight into trying the brown sugar coffee creamer adaptation? Please, please, please let me know in the comments below what you thought! Rate this recipe with stars if you loved it, and if you tried one—or all—of those flavored coffee creamer ideas, tell me which variation took the top spot!
Sharing food, even a simple additive like this, connects us, so drop a line below. And if you’re looking for more simple, high-impact recipes that bring joy back to the kitchen, don’t forget to check out my tips for things like my easy pumpkin bread!
PrintThe Ultimate Easy 5-Ingredient Homemade Vanilla Coffee Creamer
Make rich, creamy homemade coffee creamer using just five simple, natural ingredients. This quick recipe tastes better than store-bought and lets you control the sweetness for your morning coffee routine upgrade.
- Prep Time: 5 min
- Cook Time: 3 min
- Total Time: 8 min
- Yield: About 1.5 cups 1x
- Category: Beverage
- Method: Stovetop Mixing
- Cuisine: American
- Diet: Vegetarian
Ingredients
- 1 cup Half and Half (or milk/cream combination for desired richness)
- 1/2 cup Granulated Sugar
- 1 tablespoon Vanilla Extract
- 1/4 teaspoon Salt
- 1/4 cup Water
Instructions
- Combine the water and sugar in a small saucepan over medium heat. Stir constantly until the sugar completely dissolves and the mixture is clear. This creates a simple syrup.
- Remove the saucepan from the heat and let the sugar mixture cool for about 5 minutes.
- Pour the slightly cooled sugar syrup into a jar or airtight container.
- Add the half and half, vanilla extract, and salt to the container.
- Seal the container tightly and shake well until all ingredients are fully combined and the mixture looks uniform.
- Store your homemade coffee creamer in the refrigerator. Shake gently before each use.
Notes
- For a dairy-free coffee creamer, substitute the half and half with full-fat canned coconut milk or a blend of oat milk and cashew cream.
- To make a sugar free coffee creamer, replace the granulated sugar with your preferred granular sweetener, like erythritol or monk fruit blend, adjusting the amount to your taste.
- For a richer texture, use heavy cream instead of half and half. This makes a sweet cream coffee recipe base.
- If you want brown sugar coffee creamer, substitute the granulated sugar with light brown sugar and slightly increase the heat time to ensure the brown sugar dissolves fully.
Nutrition
- Serving Size: 2 tablespoons
- Calories: 110
- Sugar: 12
- Sodium: 25
- Fat: 7
- Saturated Fat: 4
- Unsaturated Fat: 3
- Trans Fat: 0
- Carbohydrates: 12
- Fiber: 0
- Protein: 1
- Cholesterol: 25
