 Skip to content
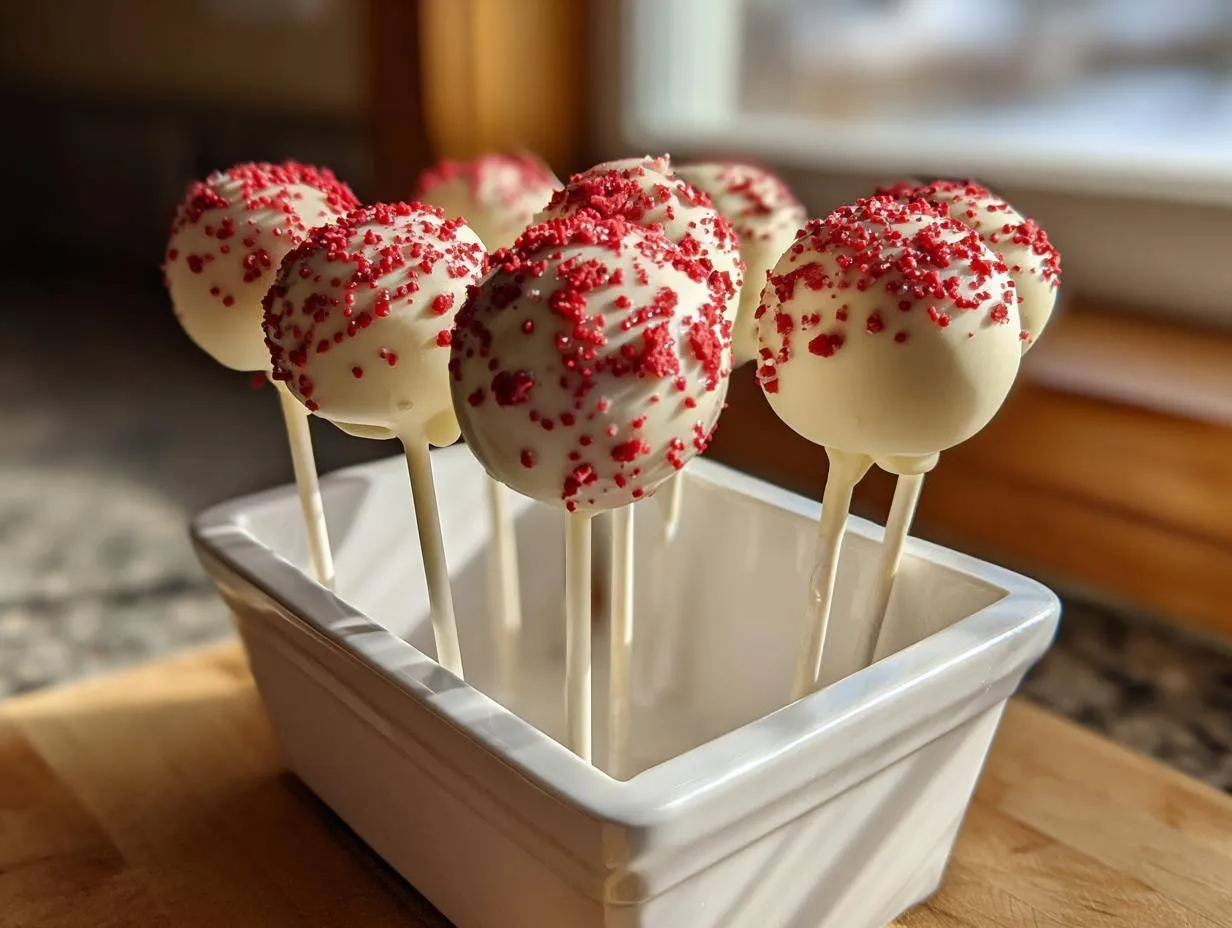

There is something truly special about a perfectly crafted, bite-sized treat, isn’t there? If you’ve ever dreamed of making show-stopping dessert table centerpieces, then you are in the right spot! Today, we are diving into the wonderful world of these rich, vibrant red velvet cake pops. I’m sharing my Easy & Moist Red Velvet Cake Pops Recipe with Perfect White Chocolate Coating. I know what you’re thinking—dipping chocolate is finicky! But trust me, by keeping the cake balls icy cold and following my simple steps, we are going to achieve that flawless, non-cracking shell every single time. This is truly my favorite way to serve this decadent red velvet flavor.
- Why You Will Love This Easy & Moist Red Velvet Cake Pops Recipe
- Essential Ingredients for Perfect Red Velvet Cake Pops
- Step-by-Step Guide: How to Make Red Velvet Cake Pops
- Expert Tips for Perfect White Chocolate Covered Red Velvet Cake Pops
- Serving Suggestions for Your Festive Red Velvet Cake Pops
- Storage and Make-Ahead Tips for Red Velvet Cake Pops
- Frequently Asked Questions about Red Velvet Cake Pops Recipe
- Nutritional Estimate for Homemade Red Velvet Cake Pops
- Share Your Homemade Red Velvet Cake Pops Success
- Nutritional Estimate for Homemade Red Velvet Cake Pops
- Share Your Homemade Red Velvet Cake Pops Success
Why You Will Love This Easy & Moist Red Velvet Cake Pops Recipe
Honestly, these little cakes on a stick are game-changers for any party or casual sweet craving. Once you see how simple this process is, you’ll never look back. Here’s why this specific method works magic:
- They are incredibly moist cake pops! Thanks to the cream cheese frosting binder, they stay juicy for days.
- It’s a fantastic easy cake pops recipe that relies on quality boxed mix, cutting down time significantly.
- That deep, vibrant red dessert color paired with the white chocolate just screams celebration.
- They are the ultimate bite sized treats—perfect for portion control (or having two!).
Essential Ingredients for Perfect Red Velvet Cake Pops
Okay, let’s get real about what you need. Since this is my easy version, we are leaning on some smart shortcuts that don’t sacrifice that essential red velvet flavor. Remember, the right ingredients are what make these truly special little morsels.
For the cake base and binder, grab one box of red velvet cake mix—this saves hours! You’ll just use the standard ingredients called for on that box (usually oil, eggs, and water). The real secret weapon for moisture is the frosting we use to bind it: a whole 8 oz container of cream cheese frosting. Don’t skip the frosting step; it turns the cake into that perfect pliable dough.
For the shell, you’ll need about 12 ounces of white chocolate melting wafers. I prefer wafers because they set nicely, but good quality white chocolate chips work too. If you go that route or if your chocolate seems too thick later, keep a teaspoon of vegetable oil or shortening handy. And of course, you need your cake pop sticks, plus maybe some red sprinkles if you want them festive!
Step-by-Step Guide: How to Make Red Velvet Cake Pops
Alright, let’s roll up our sleeves! This is where the magic happens, turning that baked cake into perfect little rounds ready for their chocolate bath. I’m laying out the process clearly so you get professional-looking results without the headache.
Preparing the Moist Cake Base for Red Velvet Cake Pops
First things first, bake that red velvet cake mix exactly like the box tells you to—don’t mess with the standard instructions for the initial bake! Once it’s totally cool—and I mean totally cool—you need to crumble it. I just use my hands until it looks like fine, vibrant red sand. Then, pour in that entire tub of cream cheese frosting. Mix it, squish it, knead it until it’s one thick, uniform dough. Seriously, keep mixing until you can squeeze a piece and it holds its shape.
Now comes the critical advice: cover that bowl and stick it in the fridge for at least 30 minutes. If you skip this chilling step, rolling them will be a sticky mess, and you risk the pops falling apart or cracking when you dip them later on. Patience here pays off big time!
Forming and Freezing the Cake Balls
After a good chill, take the dough out. I like to use a small cookie scoop or just a measuring spoon to keep them even. Roll them between your palms gently into smooth, uniform balls, about 1 to 1.5 inches across. Place them on parchment paper. These little beauties need another freeze—put them in the freezer for about 15 to 20 minutes until they are rock solid.
This stage is key for achieving those stunning white chocolate covered cake pops later. If they aren’t hard, they’ll absorb the heat from the chocolate and start to crumble right off the stick!

Mastering the White Chocolate Coating for Red Velvet Cake Pops
While the last batch is freezing, melt your white chocolate wafers. I do this in short bursts—30 seconds at a time—stirring well after every buzz. If you rush this, the chocolate seizes up, and that is a disaster! If it looks thick, stir in just a tiny bit of oil or shortening to make it super smooth and pourable. That thin consistency is what gives you that gorgeous, crack-free finish.
Next, dip the tip of a cake pop stick into the melted chocolate and gently push it into a frozen cake ball. This chocolate acts like cement! Give it 5 minutes in the freezer again to set that stick firmly. Then, fully dip the ball, swirl it around, and tap off the excess chocolate gently against the side of your bowl. You can find great little tricks on cake pop decorating tips on my dedicated post if you need visual guidance here!

Expert Tips for Perfect White Chocolate Covered Red Velvet Cake Pops
Listen, even with the best recipe, things can sometimes go sideways, especially with melting chocolate! But I’ve learned a few tricks over the years to keep these red velvet cake pops looking factory-perfect. These little nuggets of wisdom are straight from my notes and those times I nearly threw the whole batch out!
The number one defense against cracked coatings is temperature contrast. Seriously, make sure those cake balls are basically frozen bricks when they hit that warm white chocolate. If they warm up even a little bit, the chocolate shrinks when it cools and crack! You get jagged edges. If you’re dealing with this often, remember my tip on using oil or shortening—just a tiny bit helps keep the chocolate fluid enough during the dip process.
Another thing you’ll often hear beginners struggle with is the decorative drizzle. If you want polka dots or stripes (those are my favorite of all the cake pop decorating tips!), you need to let the initial coat set completely first. Don’t rush it! If you try to drizzle too soon, you’ll just smear the first layer. You can hang out with me over on my Facebook page while you wait!
If your chocolate coating ends up too thick despite adding oil, you can save it! Next time you’re mastering the icing for some treats, remember that same principle: a little added fat thins things out perfectly. Or, check out my guide on cookie icing recipe—the thinning principle is exactly the same. Trust me on these details; they save so much heartbreak!
Serving Suggestions for Your Festive Red Velvet Cake Pops
Now that you have these stunning, vibrant spheres of deliciousness, how should you present them? These aren’t just any snacks; they are instantly party dessert ideas! For Valentine’s Day, nothing beats inserting them into a floral foam block covered in pink or red tissue paper—they look like a miniature bouquet!

They also make the most wonderful, easy sweet gift ideas. Just wrap three or four in a clear cellophane bag and tie it with a matching red ribbon. Honestly, they are so vibrant, they barely need any extra decoration to shine on any dessert platter. For birthdays, tie small, cute tags onto the sticks reminding people they are eating decadent red velvet desserts!
If you are looking for other beautiful, shareable treats for your next gathering, you have to check out my Linzer cookie recipe—they bring a totally different texture that pairs beautifully with these cake pops!
Storage and Make-Ahead Tips for Red Velvet Cake Pops
One of the best things about these red velvet cake pops is that they are fantastic for making ahead! That makes entertaining so much less stressful, right? You can actually prepare the cake dough—the part where you mix the baked cake with the frosting—and wrap that tightly in plastic wrap. Keep it sealed in the fridge for up to three days. It’s perfect for getting a huge baking project spread out over a couple of days.
When you are ready to shape them, just let the dough warm up for about 10 minutes so it’s easier to roll, then freeze them again right before dipping, following the instructions above. The finished, coated pops are best stored in an airtight container at room temperature for about 2-3 days. If you want them to last longer, you can pop them in the fridge, but you must let them come to room temperature for about 30 minutes before serving. Cold cake balls taste way too hard, and we want soft, moist cake pops!
If you are comparing storage times, these keep much longer than something like my iced oatmeal cookies, but honestly, they never last long enough around here to find out! Make plenty!
Frequently Asked Questions about Red Velvet Cake Pops Recipe
I get asked about these little bites all the time! People usually want to know how to avoid the messy bits or if they can skip a step. Since baking is all about chemistry, avoiding those little pitfalls is important, especially when dealing with coating them perfectly.
Can I skip chilling the cake dough before rolling?
Oh gosh, please don’t! I know we talked about how this is an easy cake pops recipe, but chilling is non-negotiable if you want good results. If the dough is warm or room temperature, they get too soft to roll into uniform balls. Worse, when you dip them, the warm dough melts the chocolate coating right away, and they crumble or crack. Trust me, 30 minutes in the fridge and 15 minutes in the freezer make all the difference for perfect homemade cake pops.
My white chocolate coating is cracking after it sets—what did I do wrong?
That’s the number one complaint! When the chocolate shell cracks, it usually means the cake ball underneath was too warm when dipped. The chocolate sets immediately upon hitting the cold surface, but as the slightly warmer ball inside expands, it forces the brittle shell to break. Make your balls *colder*! You can also find a fix by thinning your chocolate a bit more with coconut oil or shortening right before dipping, which makes the resulting coating slightly more flexible.
Can I use a different frosting instead of cream cheese frosting?
You can, but they won’t be standard cream cheese frosting cake pops—and that frosting is key to the flavor profile! If you absolutely must substitute, use a thick buttercream. However, be warned: buttercream is usually softer than cream cheese frosting, so your dough might be stickier. You might need to chill the mixture longer to get those perfect balls for dipping.
How far ahead can I make these festive cake pops?
These are amazing for making ahead! I often bake the cake two days before I plan to serve them. You can store the ball dough (before dipping) wrapped tightly in the fridge for about three days. If you work ahead and dip them, the finished, coated pops last great at room temperature for a couple of days, which is fantastic for party dessert ideas. If you want them to last longer, store them in the fridge, remembering to let them warm up slightly before eating so the centers are soft, just like in my red velvet cake mix cookies guide!
Nutritional Estimate for Homemade Red Velvet Cake Pops
Since this recipe uses a boxed mix and commercial frosting, these are just estimates, folks! They are based on 24 standard-sized pops. They are definitely a treat, but we keep them perfectly bite-sized!
- Serving Size: 1 pop
- Calories: 210
- Sugar: 22g
- Fat: 12g
Share Your Homemade Red Velvet Cake Pops Success
I am so excited for you to try making these beauties! Seriously, when you finish coating them and stand them up in a foam block, the effect is amazing. They truly deserve to be shared. Once yours are set and looking gorgeous, snap a picture and tag me everywhere! I absolutely love seeing your results and knowing I helped bring some joy into your kitchen.

Don’t forget to jump down and leave a rating and review on the recipe card below. Let me know if you tried any fun additions or if these became your new favorite bite sized treats. Happy baking, and I’ll see you in the next recipe on my blog!
Nutritional Estimate for Homemade Red Velvet Cake Pops
Since this recipe uses a boxed mix and commercial frosting, these are just estimates, folks! They are based on 24 standard-sized pops. They are definitely a treat, but we keep them perfectly bite-sized!
- Serving Size: 1 pop
- Calories: 210
- Sugar: 22g
- Fat: 12g
Share Your Homemade Red Velvet Cake Pops Success
I am so excited for you to try making these beauties! Seriously, when you finish coating them and stand them up in a foam block, the effect is amazing. They truly deserve to be shared. Once yours are set and looking gorgeous, snap a picture and tag me everywhere! I absolutely love seeing your results and knowing I helped bring some joy into your kitchen.
Don’t forget to jump down and leave a rating and review on the recipe card below. Let me know if you tried any fun additions or if these became your new favorite bite sized treats. Happy baking, and I’ll see you in the next recipe on my blog!
PrintEasy & Moist Red Velvet Cake Pops with Perfect White Chocolate Coating

I am happy you are here. You can make these moist Red Velvet Cake Pops using simple steps. They combine rich red velvet cake with cream cheese frosting and a smooth white chocolate shell, making them perfect for parties or as a sweet gift.
- Prep Time: 30 min
- Cook Time: 35 min
- Total Time: 65 min
- Yield: 24 pops 1x
- Category: Dessert
- Method: No Bake Assembly
- Cuisine: American
- Diet: Vegetarian
Ingredients
- 1 box (15.25 oz) red velvet cake mix
- Ingredients called for on cake mix box (usually eggs, oil, water)
- 1 container (8 oz) cream cheese frosting (store-bought or homemade)
- 12 ounces white chocolate melting wafers or high-quality white chocolate chips
- 1 teaspoon vegetable oil or shortening (optional, for thinning coating)
- Cake pop sticks
- Optional decorations: red sprinkles, crushed freeze-dried raspberries
Instructions
- Bake the red velvet cake according to the package directions, using the ingredients listed on the box. Let the cake cool completely.
- Once cool, crumble the entire cake into fine crumbs in a large bowl. You can use your hands or a fork.
- Add the entire container of cream cheese frosting to the cake crumbs. Mix the frosting and crumbs together thoroughly until a thick, uniform dough forms. This dough should hold its shape when squeezed.
- Cover the bowl and chill the dough in the refrigerator for at least 30 minutes. Chilling makes the dough easier to roll and prevents the pops from cracking later.
- Remove the dough from the refrigerator. Roll the dough into uniform balls, about 1 to 1.5 inches in diameter. Place the rolled balls on a parchment-lined baking sheet.
- Return the rolled cake balls to the freezer for 15 to 20 minutes to firm up completely. This step is key for a good coating.
- While the balls are chilling, prepare the white chocolate coating. Melt the white chocolate wafers in a microwave-safe bowl in 30-second intervals, stirring well after each interval until smooth. Stir in the oil or shortening if the chocolate seems too thick.
- Dip the tip of a cake pop stick into the melted chocolate and then insert the stick about halfway into a chilled cake ball. This acts as glue. Return the pops to the freezer for 5 minutes to set the stick.
- Hold the stick and dip the entire cake ball into the melted white chocolate, rotating to coat completely. Gently tap the stick against the side of the bowl to remove excess chocolate.
- Immediately apply any desired sprinkles or decorations before the chocolate sets.
- Place the finished cake pops upright in a styrofoam block or a dedicated cake pop stand to dry completely.
Notes
- For a richer flavor, you can bake the cake from scratch instead of using a mix.
- If your white chocolate coating is too thick, add a small amount of coconut oil or vegetable shortening to help thin it for easier dipping.
- To prevent the coating from cracking, make sure your cake balls are very cold when you dip them into the warm chocolate.
- If you want a more vibrant red color, add a few drops of red gel food coloring to the cake crumbs before mixing in the frosting.
Nutrition
- Serving Size: 1 pop
- Calories: 210
- Sugar: 22
- Sodium: 150
- Fat: 12
- Saturated Fat: 7
- Unsaturated Fat: 5
- Trans Fat: 0.1
- Carbohydrates: 25
- Fiber: 0.5
- Protein: 3
- Cholesterol: 15
