 Skip to content

If you, like me, ever feel like you need a show-stopping dessert but the thought of detailed baking makes you want to ditch the kitchen entirely, I have found your answer! This amazing brownie refrigerator cake is pure indulgence made simple. It totally embodies my whole philosophy here at Pure Cooking Joy: incredible, soul-satisfying food absolutely does not need to be complicated. Whether you are prepping for a crowd or just need a quiet moment of decadent chocolate bliss later this week, this layered, chilled treat is what you need to try. It truly is my favorite way to entertain effortlessly. You can read more about my journey from burnout to finding joy in simple recipes over on my About Page.
- Why This Brownie Refrigerator Cake is Your New Favorite Make Ahead Chocolate Treat
- Gathering Ingredients for Your Layered Brownie Dessert
- Mastering the Assembly of the Brownie Refrigerator Cake
- Building the Ultimate Brownie Refrigerator Cake Structure
- Tips for Success with Your Brownie Refrigerator Cake
- Storage and Serving Your Brownie Refrigerator Cake
- Frequently Asked Questions About This Brownie Refrigerator Cake
- Nutritional Estimates for the Brownie Refrigerator Cake
- Share Your Pure Cooking Joy
Why This Brownie Refrigerator Cake is Your New Favorite Make Ahead Chocolate Treat
I love desserts that look like they took all day but were actually a breeze to pull together, and this is top of the list! The best part about this brownie refrigerator cake is that after your initial brownie prep (which you can totally fake with good store-bought ones!), it’s pure assembly. We are talking multiple, rich, creamy chocolate layers that just stack up beautifully. This means it’s the ultimate make ahead chocolate treat—the longer it chills, the better it tastes!
Forget complicated baking timers and tricky frosting battles. This is comfort food that looks elegant. It’s a perfect choice for those busy weekends or when you need a really impressive potluck desserts no bake option. Find more ideas for entertaining without the fuss on my Easy Entertaining page!
Approachable Steps for a Show-Stopping Brownie Refrigerator Cake
Remember, I’m all about making sure everyone feels like they can conquer the kitchen. Even though the structure relies on baked brownies, the final assembly is truly stress-free layering. This instantly qualifies it as an amazing easy refrigerator dessert. You’re just combining creamy fillings with fudgy pieces, letting the cold do all the heavy lifting. Trust me on this one—it’s practically foolproof and delivers massive chocolate flavor!
Gathering Ingredients for Your Layered Brownie Dessert
Okay, let’s talk about what you need to make this spectacular brownie refrigerator cake! Since we are aiming for maximum flavor with minimum oven time, I highly recommend setting aside your plan to bake from scratch—partially, anyway. If you use store-bought, fudgy brownies that are already cooled and cut, this instantly becomes a fantastic no bake brownie dessert assembly project. That’s the secret ingredient to keeping things joyful and stress-free!
When planning your grocery run, think about what makes the layers so dreamy. We need structure from our fudgy bits, tang and richness from the cream cheese, and that pure, unmistakable chocolate hit from the pudding. Don’t worry about finding anything too rare; these are all standard pantry superstars!
The Components of This Brownie Refrigerator Cake
You’ll want your standard 8×8 inch batch of chilled, baked brownies—make sure they are cut into nice, uniform 1-inch cubes so they layer up evenly. The magic happens with the creamy fillings. You’ll need 8 ounces of cream cheese that’s nice and soft, about a cup of powdered sugar, and a splash of vanilla extract for that sweet base. We’re whipping up some heavy cream until it’s stiff—remember, cold bowls make everything easier here!
For the chocolate star, grab one small box of instant chocolate pudding mix, whisked with about two cups of very cold milk until it starts thickening up. Finally, we fold in some thawed whipped topping—I usually grab the tub kind as it adds a wonderful lightness. Get these guys together, and you are ready to build something phenomenal!
Mastering the Assembly of the Brownie Refrigerator Cake
Okay, this is where the show really starts! Once all your elements are ready—the cooled brownie cubes, the creamy base, and the chocolate pudding—it’s time to build this masterpiece inside your springform pan (I love using plastic wrap underneath mine for easy removal later!). We’ve got three main players here: the sweet cream cheese layer, the fluffy whipped topping addition, and the rich pudding. We aren’t frosting it like a traditional cake, but we are building layers as if we were applying a wonderful, quick creamy frosting!
First, spread maybe half of those yummy brownie cubes out evenly across the bottom. Don’t press them down too hard—we want them a little loose to absorb that creaminess. Next, gently dollop the cream cheese mixture right over the top, using an offset spatula if you have one, or just the back of a spoon, to get a relatively flat surface. Then, pour down about half of your thickened chocolate pudding. See how quickly this comes together? It’s pure layered magic! If you are interested in other quick, creamy topping ideas, check out my post on chocolate frosting methods.

Expert Tips for Perfect Creamy Chocolate Layers
When you’re combining that whipped cream with the cream cheese, go slow! You need those stiff peaks from the cold heavy cream to stay airy. Fold gently, don’t stir aggressively, or you’ll deflate all the volume we just worked to build. Also, make sure your instant pudding is whisked until it’s thick—if it looks too soupy, it’ll run right off the brownie crumbs. Great technique here means you won’t need to spend as much time waiting for the final chill!
Building the Ultimate Brownie Refrigerator Cake Structure
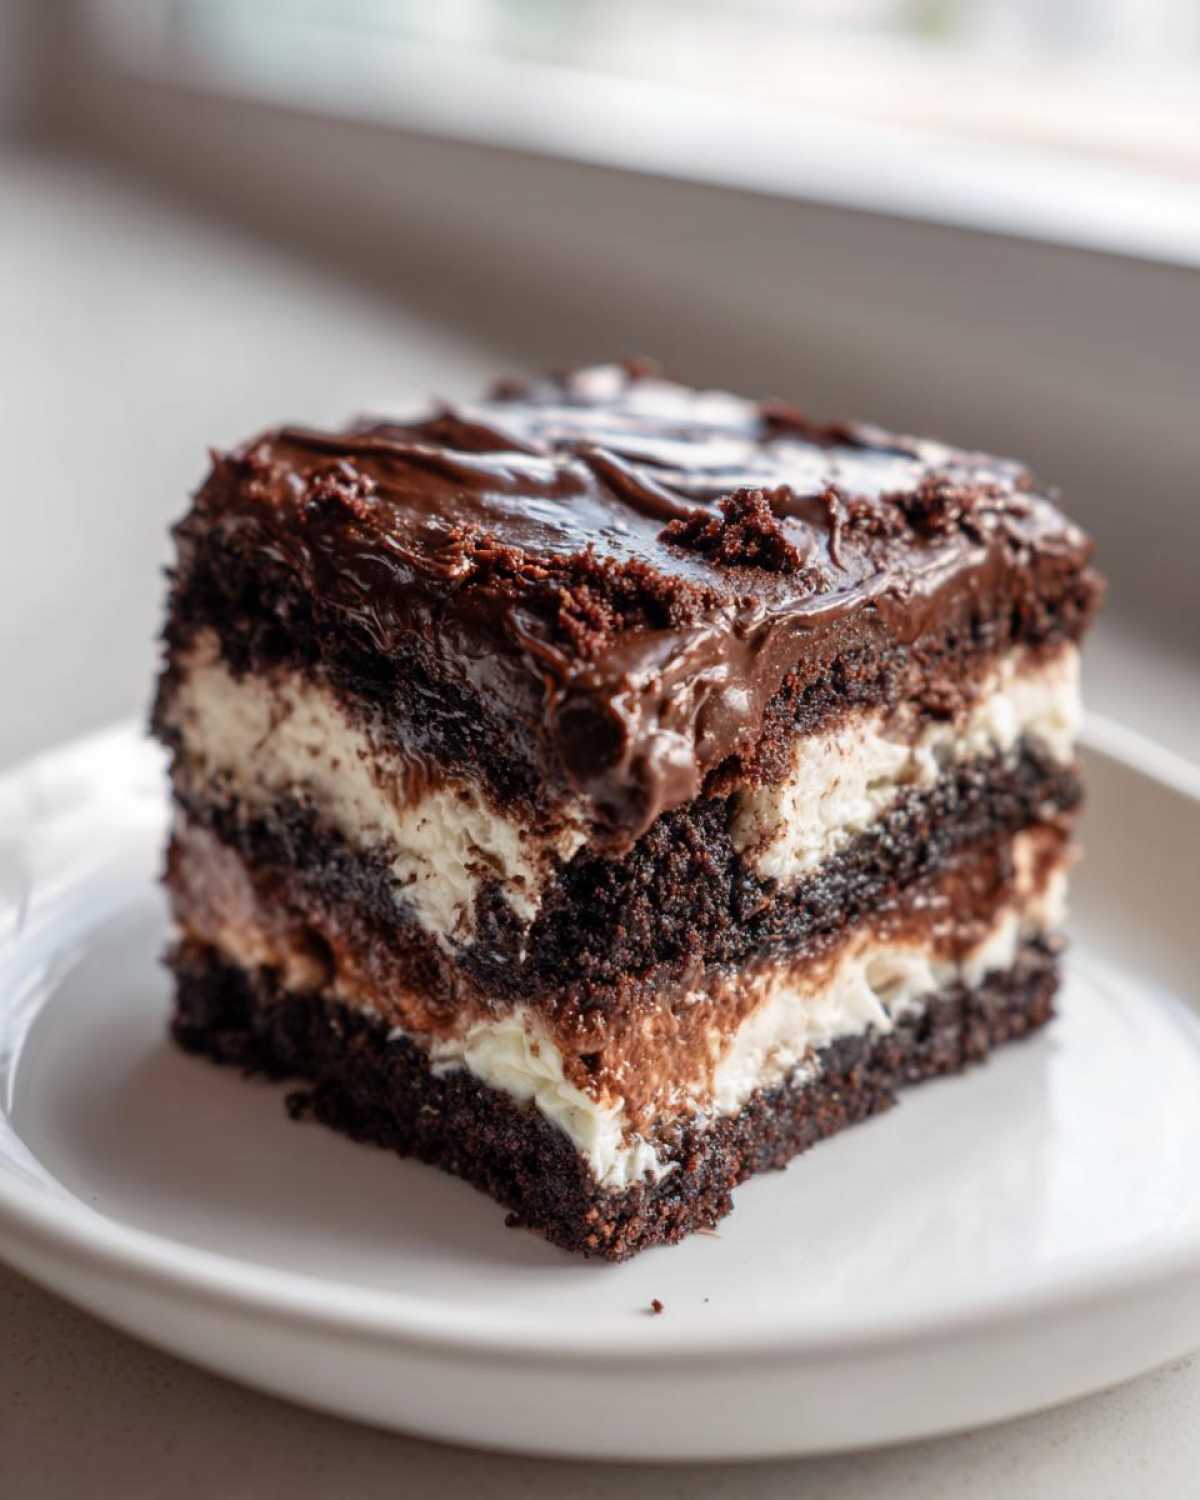
Now that we have our components whipped up and ready, it’s time for the construction phase! Getting the layers in the right order is key if you want that stunning cross-section when you eventually slice into your brownie refrigerator cake. Remember the sequence: First, spread half of your brownie cubes evenly across the pan base. Next, you carefully spread all of that beautiful cream cheese layer right on top of those fudgy pieces. We want that creamy filling to just settle in around the crumbs!
Once the cream cheese layer is down, pour half of your prepared chocolate pudding over that. Then, we repeat the structure: the remaining brownie cubes go down next, followed by the rest of that rich chocolate pudding. Finish it all off by spreading that remaining airy whipped cream mixture gently over the top layer. Seriously, don’t poke it! The structure here makes sure this turns into a gorgeous, firm chilled chocolate cake recipe.

Here’s the most important, non-negotiable step: Cover it up tight! We need this cake to chill for its structural integrity. I tell everyone aim for at least six hours, but trust me, making it the day before means it sets up perfectly firm overnight. This chilling time allows everything to meld together into a cohesive, sliceable treat.
Tips for Success with Your Brownie Refrigerator Cake
I want you and your brownie refrigerator cake to be best friends, so let me share the little shortcuts and swaps I’ve figured out over time. Seriously, don’t feel guilty about grabbing those pre-made fudgy brownies! That’s exactly how you make this a fantastic potluck dessert no bake winner without adding any stress right before you need to leave the house. It keeps the final assembly time under 30 minutes, which is just pure joy for a busy day!

If you really want to level up the chocolate decadence, you can absolutely swap out the instant chocolate pudding for an actual chocolate mousse mix or even use a ganache for one of those creamy layers instead of pudding. Either way, make sure you’re prepping those ingredients while the brownies are cold! If you’re interested in finding a great recipe for homemade brownies later, I have a wonderful one-bowl version you can check out when you have more time!
Storage and Serving Your Brownie Refrigerator Cake
Once you’ve successfully chilled your masterpiece, serving it is the easy part! Make sure you slice this decadent chilled dessert when it is as cold as you can stand it. The layers will hold up so much better and give you those really clean edges you want to show off. Seriously, don’t rush the slicing!
If you happen to have any leftovers—shocking, I know—just cover the pan tightly with plastic wrap or transfer individual slices to an airtight container. This brownie refrigerator cake tastes even better the next day, so storing it overnight is totally fine. If it survives the first day, it will stay great in the fridge for about three to four days. Enjoy that cool, creamy chocolate!
Frequently Asked Questions About This Brownie Refrigerator Cake
I know you must have a few lingering questions before you grab your springform pan! Since this brownie refrigerator cake relies on chilling, people often ask about timing and the base ingredients. I want everyone to feel confident making this, even if you usually stick to my quicker weeknight recipes found over here! It’s a fabulous solution when you need something rich but certainly don’t want to fire up the range for a full baking experience, making it a great example of a no oven chocolate cake approach.
Can I skip baking brownies entirely for this brownie refrigerator cake?
Absolutely, you can! That’s one of the major selling points for me. If you are aiming for a purely assembly-based dessert, just head to the store and grab one of those dense, fudgy brownie trays. The key is the density; we need those brownie pieces to hold their shape when they soak up some of that creamy filling. If they are too cakey, you’ll end up with a mushy bottom layer, so look for the fudgiest option you can find!
How long does the brownie refrigerator cake need to chill?
This is non-negotiable, so listen closely! You need that minimum six hours. Honestly, if you can plan ahead and let this layered brownie dessert hang out in the fridge overnight, that’s the golden ticket. When it’s fully chilled for a full 24 hours, the pudding and cream cheese layers firm up perfectly. That overnight rest is what gives you those beautiful, clean slices you see in the pictures!
Nutritional Estimates for the Brownie Refrigerator Cake
Now, I never look at the numbers before I take my first bite—life is too short to sweat the details on a chocolate dream like this! But because I want you to have all the facts, here are the estimated nutritional breakdowns per slice. Please remember, these totals are just guides, based on using standard brands for things like the pudding mix and whipped topping. If you use cream cheese or different sweeteners, your final numbers will shift a bit. Enjoy the indulgence!
- Serving Size: 1 slice
- Calories: 380
- Fat: 22g
- Carbohydrates: 45g
- Protein: 5g
- Sugar: 35g
Share Your Pure Cooking Joy
I truly hope you enjoyed making this brownie refrigerator cake as much as I love perfecting it for you! If you made this treat, please come back and leave a star rating—it helps me know what you’re loving. Don’t hesitate to drop me a note in the comments about your experience or share a photo of your gorgeous layered dessert on social media so I can see it! You can always reach out via my Contact Page, and you can follow along for more simple ideas over on Facebook at Pure Cooking Joy!
PrintEasy Brownie Refrigerator Cake: Layers of Fudgy Brownie and Cream

Create a decadent, no-bake dessert that impresses guests. This chilled cake layers store-bought or homemade fudgy brownies with creamy fillings for simple, make-ahead indulgence.
- Prep Time: 25 min
- Cook Time: 0 min
- Total Time: 6 hr 25 min
- Yield: 9 servings 1x
- Category: Dessert
- Method: Chilling/No-Bake Assembly
- Cuisine: American
- Diet: Vegetarian
Ingredients
- 1 (8×8 inch) pan of baked fudgy brownies, cut into 1-inch cubes
- 1 package (8 ounces) cream cheese, softened
- 1 cup powdered sugar
- 1 teaspoon vanilla extract
- 1 cup heavy whipping cream, cold
- 1 package (3.9 ounces) instant chocolate pudding mix
- 2 cups cold milk
- 1 cup whipped topping (like Cool Whip), thawed
- Optional: Chocolate shavings for topping
Instructions
- Prepare your brownies. If you bake them, allow them to cool completely. Cut the cooled brownies into small, uniform cubes.
- Prepare the cream cheese layer: In a medium bowl, beat the softened cream cheese, powdered sugar, and vanilla extract until the mixture is smooth and creamy. Set aside.
- Prepare the whipped cream: In a separate, chilled bowl, beat the heavy whipping cream until stiff peaks form. Gently fold half of the whipped cream into the cream cheese mixture.
- Prepare the pudding layer: Whisk the instant chocolate pudding mix with 2 cups of cold milk according to package directions until thickened, about 2 minutes. Let it sit for 5 minutes to set further.
- Assemble the cake in a 9×9 inch springform pan or a loaf pan lined with plastic wrap for easy removal.
- Create the first layer by spreading half of the brownie cubes evenly over the bottom of the pan.
- Spread the cream cheese layer evenly over the brownie cubes.
- Top the cream cheese layer with half of the prepared chocolate pudding.
- Add the remaining brownie cubes over the pudding layer.
- Spread the remaining chocolate pudding over the brownies.
- Top the pudding layer with the remaining whipped cream and the reserved whipped topping, spreading it gently to cover the surface.
- Cover the pan tightly with plastic wrap. Chill the brownie refrigerator cake in the refrigerator for at least 6 hours, or preferably overnight, to allow the layers to set firmly.
- Before serving, carefully remove the cake from the pan. Garnish with chocolate shavings if desired. Slice and serve cold.
Notes
- Using store-bought brownies saves time and keeps this recipe truly no-bake for the final assembly.
- For a richer flavor, consider using a chocolate mousse instead of instant pudding.
- This dessert is excellent for meal planning; it tastes best when chilled for a full day.
- If you are looking for alternatives to traditional baking methods, this no-oven chocolate cake approach is a good option.
Nutrition
- Serving Size: 1 slice
- Calories: 380
- Sugar: 35
- Sodium: 210
- Fat: 22
- Saturated Fat: 12
- Unsaturated Fat: 10
- Trans Fat: 0.5
- Carbohydrates: 45
- Fiber: 2
- Protein: 5
- Cholesterol: 45
