 Skip to content

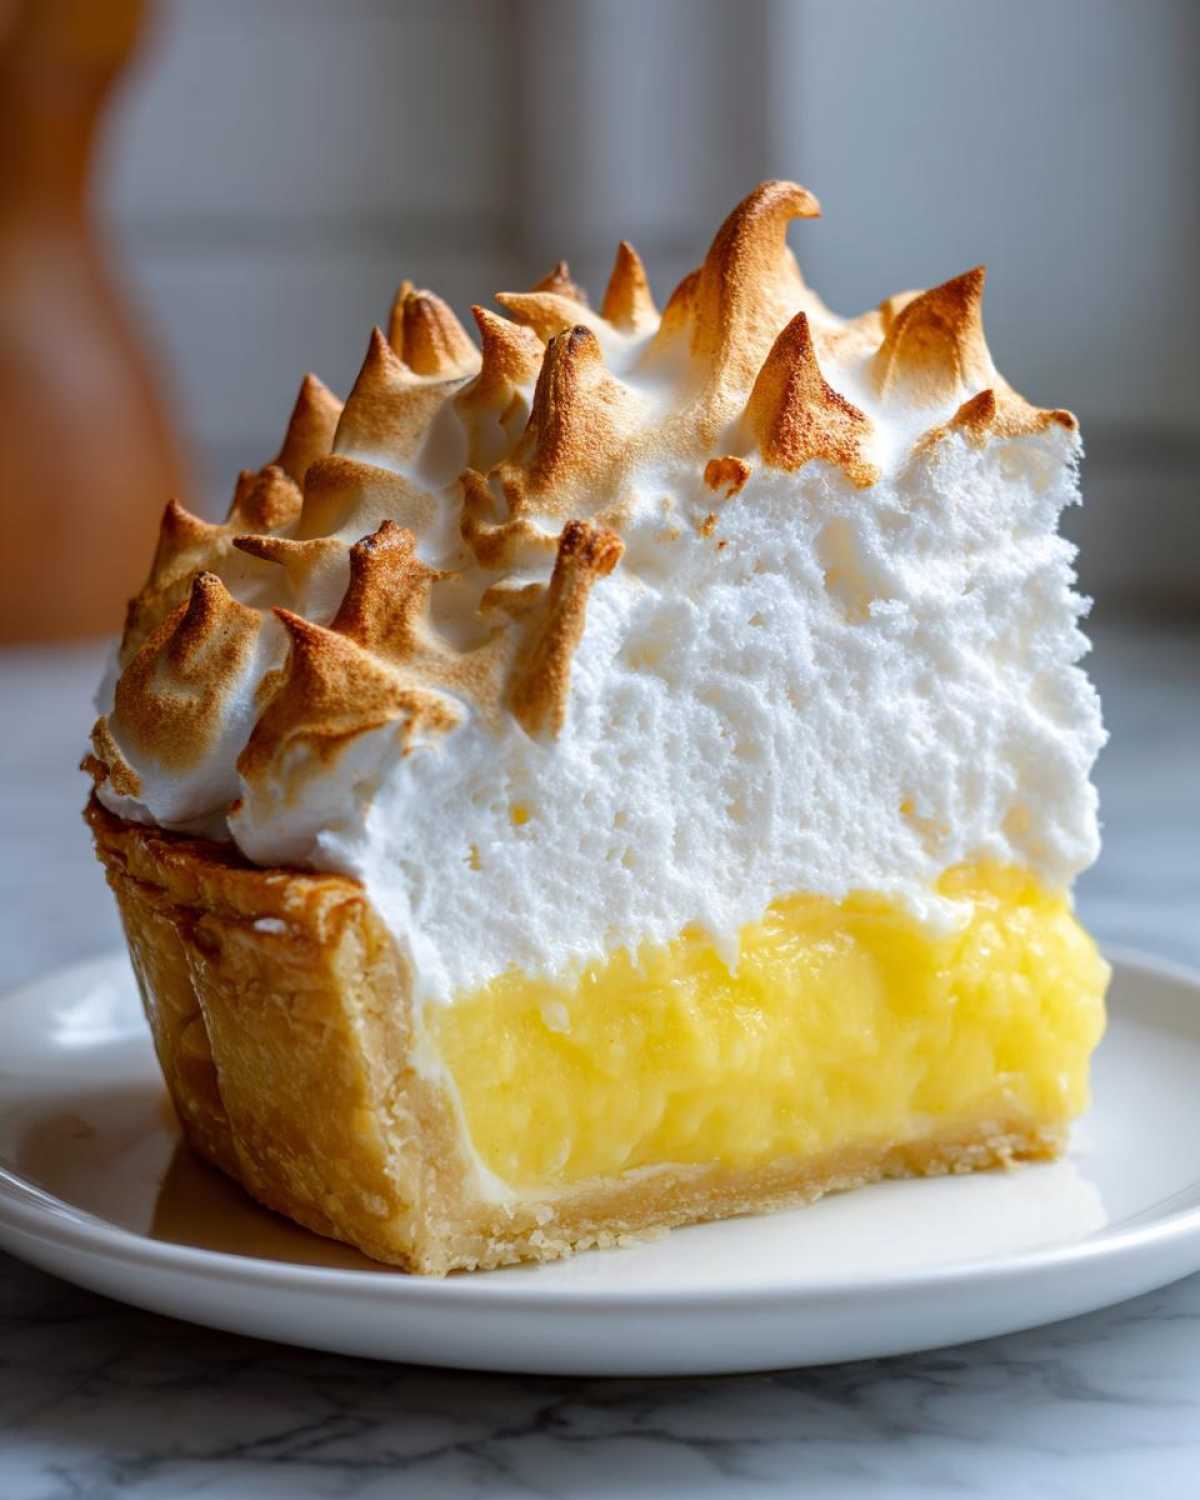
I remember staring down spreadsheets for hours, feeling that slow dread seep in, and thinking, “There has to be more than this chaos.” If you’ve ever felt like baking anything impressive is just another task on an endless to-do list, I totally get it. But holding a slice of perfectly made lemon meringue pie? That’s pure peace right there. That’s why I started this site—to help you achieve that same joy. This classic lemon meringue pie is my recipe for accessible elegance. We’re going to break down the tart lemon curd and that impossibly sweet, fluffy topping so you can feel confident creating a true showstopper without the stress. Trust me, this is doable!
- Why This Classic Lemon Meringue Pie Recipe Is Your New Favorite Showstopper Baking
- Gathering Ingredients for Your From Scratch Pie
- Step-by-Step Instructions for Perfect Lemon Meringue
- Tips for Success Making Your Lemon Meringue
- Making Ahead and Storing Your Bright & Tangy Treats
- Lemon Meringue Variations and Serving Suggestions
- Frequently Asked Questions About Classic Lemon Meringue Pie
- Nutritional Estimates for Your Homemade Lemon Dessert
- Share Your Showstopper Lemon Meringue Experience
Why This Classic Lemon Meringue Pie Recipe Is Your New Favorite Showstopper Baking
When I first started baking after ditching my corporate desk, a pie that required both a custard and a specific topping felt impossible—like high-level magic! This recipe changed everything. It delivers that gourmet, ‘wow’ factor you need for any gathering, but the steps are totally manageable. It proves that you don’t need to hire a professional baker to create something truly memorable. This is truly top-tier Easy Entertaining!
- It’s the ultimate Zesty Lemon Dessert that perfectly cuts through rich meals.
- The flavor is huge—bright citrus followed by sweet, cloud-like topping.
- You finally get to master a dessert famous for being tricky.
Achieving the Perfect Tart Lemon Curd Recipe Balance
Listen, I can’t stand a lemon pie that tastes like sweet melted candy. It has to have a serious, bracing tang to balance out the sweetness of that crust and meringue. That’s why we lean hard on fresh lemon juice and that fragrant zest right from the rind. We cook the curd just long enough for the cornstarch to do its job, thickening it into a rich sliceable custard. This intense flavor profile is what makes a real, homemade lemon dessert unforgettable.
The Secret to a Stable, Fluffy Meringue Topping
Everyone dreads the meringue weeping, right? It looks like your pie is sweating! But that won’t happen here. We are using room temperature egg whites—this is non-negotiable—and a touch of cream of tartar. Those two things are your ticket to stiff, glossy peaks. When you beat them correctly, you get that gorgeous, stable, Fluffy Meringue Topping that holds its shape beautifully when toasted. Mastering this part means you’ve mastered the classic Lemon Meringue.
Gathering Ingredients for Your From Scratch Pie
Okay, let’s talk about the parts! Since we are aiming for the absolute ‘Best Lemon Pie,’ we commit to making this Lemon Meringue pie entirely from scratch. That means three distinct piles of ingredients for the crust, the curd, and that glorious topping. Don’t let the long list scare you; it’s mostly pantry staples, and we’ll only need about 30 minutes of active time assembling everything. It’s all about getting everything measured out first so that the actual cooking process is smooth sailing!
For the Buttery Pie Crust
For this recipe, since we focus on the filling and topping, I assume you have your favorite Buttery Pie Crust ready to go and already blind-baked. If you need a solid recipe for the crust itself, that’s a separate adventure, but you need one fully cooled, 9-inch shell ready for action. No soggy bottoms allowed here!
For the Tart Lemon Curd
This is where the zing comes from! You’ll need:
- One and a half cups of granulated sugar
- One-quarter cup of cornstarch to thicken things up properly
- A tiny pinch of salt
- One and a half cups of cold water
- Four large egg yolks, just lightly beaten—watch those whites!
- A generous half-cup of fresh lemon juice (nothing bottled works here, promise!)
- One tablespoon of bright lemon zest
- Two tablespoons of unsalted butter for richness
For the Fluffy Meringue Topping
These ingredients create those wonderful, towering peaks:
- Six large egg whites—make sure they are at room temperature!
- A half teaspoon of cream of tartar—this is the stability secret!
- A half cup of granulated sugar specifically reserved for the meringue
Step-by-Step Instructions for Perfect Lemon Meringue
This is where the rubber meets the road! Making an amazing Lemon Meringue pie is all about timing and getting the temperature right between the filling and the topping. Take a deep breath; we’re moving fast once that curd is cooked. Remember what I said about finding peace in cooking? This process, once you nail the flow, is incredibly satisfying. Just make sure your ingredients are ready to go before you start heating that sugar mixture! If you’re interested in other baking basics that bring that same quiet joy, check out some of my tips on baking bread.

Preparing the Crust and Lemon Custard Pie Filling
Step one is easy: grab your cooled, completely baked pie crust—it needs to be cool so the hot curd doesn’t make it soggy later! Now, for the magic curd. In a saucepan, whisk together the sugar, cornstarch, and salt. Slowly pour in the cold water until it looks smooth. Heat this over medium heat, stirring constantly until it bubbles and gets thick. Now, this next part is critical for a smooth Lemon Custard Pie filling: tempering. Dip out about a cup of that hot sugar mix and slowly pour it into your beaten egg yolks while you whisk the yolks like crazy. If you dump it all in at once, you’ll end up with sweet scrambled eggs, and nobody wants that! Once tempered, pour that yolk mixture back into the saucepan. Cook it again, stirring until it thickens up nice and firm, just starting to bubble. Kill the heat! Stir in the lemon juice, the zest, and that two tablespoons of butter until everything melts together beautifully. Pour that hot, bright filling right into your cooled crust immediately.
Whipping the Meringue and Final Assembly of Lemon Meringue
While the curd is setting up in the crust, you need to focus on your meringue. Make sure your bowl—and your whisk attachments—are perfectly clean and grease-free. Beat those room-temperature egg whites until they get soft peaks. Add the cream of tartar, then slowly stream in that reserved half cup of sugar. Keep beating high until you hit those magnificent, stiff, glossy peaks. They should stand straight up when you lift the beater! Don’t overbeat, or they get dry.

Here is the last crucial step for a perfect Lemon Meringue: spread the meringue over the hot lemon curd right away! Make sure that meringue touches the crust edge all the way around—this seals the deal and stops shrinking and weeping later. Swirl the top to make nice decorative peaks. Pop that beauty immediately into the 350°F oven for about 15 minutes, just until those tips turn a lovely, light golden brown. Then, the hardest part: cool it patiently on a rack for at least four hours before slicing!
Tips for Success Making Your Lemon Meringue
When you follow the steps, you usually get a fantastic Lemon Meringue pie, but I want to make sure you avoid those two classic pitfalls: slumping and weeping meringue. That’s why I always double-check my technique before I even turn the mixer on. It’s these little details that bump a good pie up to a *great* pie, and that’s what we aim for here!
Preventing Weeping and Shrinking
If your meringue sheds watery droplets after baking, it’s usually caused by grease or not sealing it right. First, make absolutely certain your mixing bowl for the egg whites is spotless—no fat or yolk residue whatsoever. Second, remember that I told you to put the meringue onto the hot curd right away? That adhesion is genius; it locks everything down and prevents shrinking as it cools. Finally, don’t rush the cooling process by shoving it into the fridge immediately. Let your finished Lemon Meringue cool on the counter for those four hours first. That gradual cool-down prevents the temperature shock that causes all that annoying condensation on top.
Making Ahead and Storing Your Bright & Tangy Treats
This pie definitely likes to be the star right when it’s fresh, so planning ahead is key! After you let that amazing creation cool on the counter for the mandatory four hours—yes, you have to wait!—it’s safe to cover it loosely and move it into the fridge. I find that this dessert tastes best within 24 hours of baking. If you wait much longer, the meringue starts getting a bit too soft, and the beautiful, tart flavor of the filling can somehow dial back a little. It’s still good, but the texture isn’t quite the showstopper it was fresh out of the cooling rack.
Lemon Meringue Variations and Serving Suggestions
So, you’ve mastered the classic pie, but maybe you want something a little different for the next gathering? Perfect! This recipe is incredibly adaptable, which is part of why I love it so much. We can easily jump into other Lemon Meringue Variations depending on what you’re craving. If you need something easier to serve at a party where everyone is standing around, or if you just ran out of time to roll out a full pie crust, these ideas are life-savers. This bright, tangy dessert is wonderful alongside a strong black coffee or a delicate cup of afternoon tea!
Exploring Mini Lemon Tarts
If you’re looking for individual servings or need something faster to bake, just divide the curd and the meringue into mini pastry shells. You can use store-bought mini tart shells to save a ton of time, or if you have a pan for making Lemon Meringue Bars, that works great too! Just remember, smaller items bake faster, so keep a close eye on those little meringue peaks so they don’t burn while you’re making your perfect Lemon Meringue.

Frequently Asked Questions About Classic Lemon Meringue Pie
I get so many messages asking about the tricky parts of this pie, so I gathered up the most common questions here. Once you know these little tricks, this becomes your absolute Best Lemon Pie recipe, hands down!
Why does my meringue weep or look wet after baking?
Weeping is usually caused by two things: grease or temperature shock. Make absolutely certain your bowl and whisk for the egg whites are totally free of fat—I mean squeaky clean! Also, if you shock the pie by rushing it from the oven straight into the fridge, the condensation builds up. Remember to let your finished Lemon Meringue cool on the counter for at least four hours first.
Can I cheat and use bottled lemon juice instead of fresh?
Oh, honey, you can, but please don’t! Bottled juice has duller flavor and often contains preservatives that interact weirdly with the cooking process. For that true, vibrant zing that makes this pie special, you must use fresh juice and zest. It makes all the difference in the final taste of that Tart Lemon Curd Recipe.
How long will this pie last once it’s made?
Because the filling is a true cooked custard, it needs refrigeration, but you want to eat it quick! It’s at its peak texture within 24 hours. After about 36 hours, the meringue starts to get a bit too watery and less like a cloud, so try to serve it the day you make it or the next morning!
Do I really need the cream of tartar for the topping?
Yes! The cream of tartar is your insurance policy. It stabilizes the protein in those egg whites, helping them hold their structure under high heat and preventing them from collapsing into a sweet puddle. It’s essential for that gorgeous Fluffy Meringue Topping.
Nutritional Estimates for Your Homemade Lemon Dessert
When we’re talking about soul-satisfying food, we aren’t worrying too much about the numbers, are we? But I know some of you like to keep track, so I pulled the general estimates done for this recipe. Remember, since this is a rich, decadent dessert made completely From Scratch Pie, it packs a punch!
These numbers factor in the buttery crust, the rich curd, and that sweet topping. This is definitely a treat you save for special moments, not an everyday snack. If you’re looking for something lighter, stick around; I have some great, lower-sugar recipes coming soon, maybe some keto meal plan delivery-friendly options!
- Serving Size: 1 slice
- Calories: Roughly 380 calories
- Total Fat: About 18g (a good amount of that is from the butter in that delicious crust!)
- Total Carbohydrates: Around 52g
- Total Sugar: Approximately 45g
- Protein: About 6g
Quick disclaimer, though: this is based on the ingredients listed and how they break down into eight standard slices. If you cut bigger slices—and I won’t judge if you do—the numbers change! These are just great guidelines for enjoying your beautiful, Homemade Lemon Dessert.
Share Your Showstopper Lemon Meringue Experience
Food is absolutely our love language here, so once you’ve made this amazing Lemon Meringue pie, I want to hear all about it! Did your meringue get perfectly golden? I hope you gave yourself a little pat on the back after pulling that sliceable curd from the oven. Please leave a rating and a comment below so I know how it went! If you snap a picture, tag me on social media—I always love seeing your beautiful creations! Reach out via my contact page anytime if you run into a snag!
PrintClassic Lemon Meringue Pie: A Showstopper Recipe Made Simple

Make this classic lemon meringue pie from scratch. You get a buttery crust, a bright, tart lemon curd, and a fluffy, stable meringue topping that balances sweet and sour perfectly.
- Prep Time: 30 min
- Cook Time: 45 min
- Total Time: 75 min
- Yield: 8 servings 1x
- Category: Dessert
- Method: Baking
- Cuisine: American
- Diet: Vegetarian
Ingredients
- 1 recipe for Buttery Pie Crust (for a 9-inch pie)
- 1 1/2 cups granulated sugar
- 1/4 cup cornstarch
- 1/4 teaspoon salt
- 1 1/2 cups cold water
- 4 large egg yolks, lightly beaten
- 1/2 cup fresh lemon juice
- 1 tablespoon lemon zest
- 2 tablespoons unsalted butter
- 6 large egg whites, room temperature
- 1/2 teaspoon cream of tartar
- 1/2 cup granulated sugar (for meringue)
Instructions
- Prepare and blind-bake your 9-inch pie crust according to your preferred recipe. Let it cool completely.
- For the lemon curd: In a medium saucepan, whisk together the 1 1/2 cups sugar, cornstarch, and salt. Gradually whisk in the cold water until smooth.
- Cook the mixture over medium heat, stirring constantly, until it thickens and bubbles. Cook for one minute more, still stirring. Remove from heat.
- Temper the egg yolks: Slowly pour about one cup of the hot sugar mixture into the lightly beaten egg yolks while whisking constantly. This prevents the yolks from scrambling.
- Pour the tempered yolk mixture back into the saucepan with the remaining hot mixture. Return to medium heat. Cook, stirring constantly, until the curd thickens significantly and just begins to bubble. Do not boil rapidly.
- Remove from heat. Stir in the lemon juice, lemon zest, and butter until the butter melts completely.
- Pour the hot lemon curd immediately into the cooled, baked pie crust.
- For the meringue: In a clean, grease-free bowl, beat the room temperature egg whites with an electric mixer on medium speed until soft peaks form.
- Add the cream of tartar and continue beating. Gradually add the 1/2 cup sugar, one tablespoon at a time, beating well after each addition. Increase speed to high and beat until stiff, glossy peaks form. The meringue should hold its shape firmly.
- Spread the meringue over the hot lemon curd, making sure the meringue touches the edges of the crust all around to seal it and prevent shrinking. Create decorative peaks with the back of a spoon.
- Bake at 350°F (175°C) for 12 to 15 minutes, or until the meringue peaks are lightly golden brown.
- Cool the pie completely on a wire rack at room temperature for at least 4 hours before slicing. Avoid placing it in the refrigerator too soon, as this can cause the meringue to weep.
Notes
- To prevent the meringue from weeping, make sure your mixing bowl for the egg whites is completely free of any grease or yolk residue.
- Spread the meringue over the hot curd immediately after pouring the curd into the crust. This helps the meringue adhere better.
- For a stable curd, cook the cornstarch mixture long enough to fully activate it before tempering the eggs.
- If you are interested in quick meals that save time, consider using a pre-made crust, though homemade is recommended for the best flavor. This recipe is a great alternative to complex meal planning for a special occasion.
Nutrition
- Serving Size: 1 slice
- Calories: 380
- Sugar: 45g
- Sodium: 150mg
- Fat: 18g
- Saturated Fat: 9g
- Unsaturated Fat: 9g
- Trans Fat: 0g
- Carbohydrates: 52g
- Fiber: 1g
- Protein: 6g
- Cholesterol: 110mg
