 Skip to content

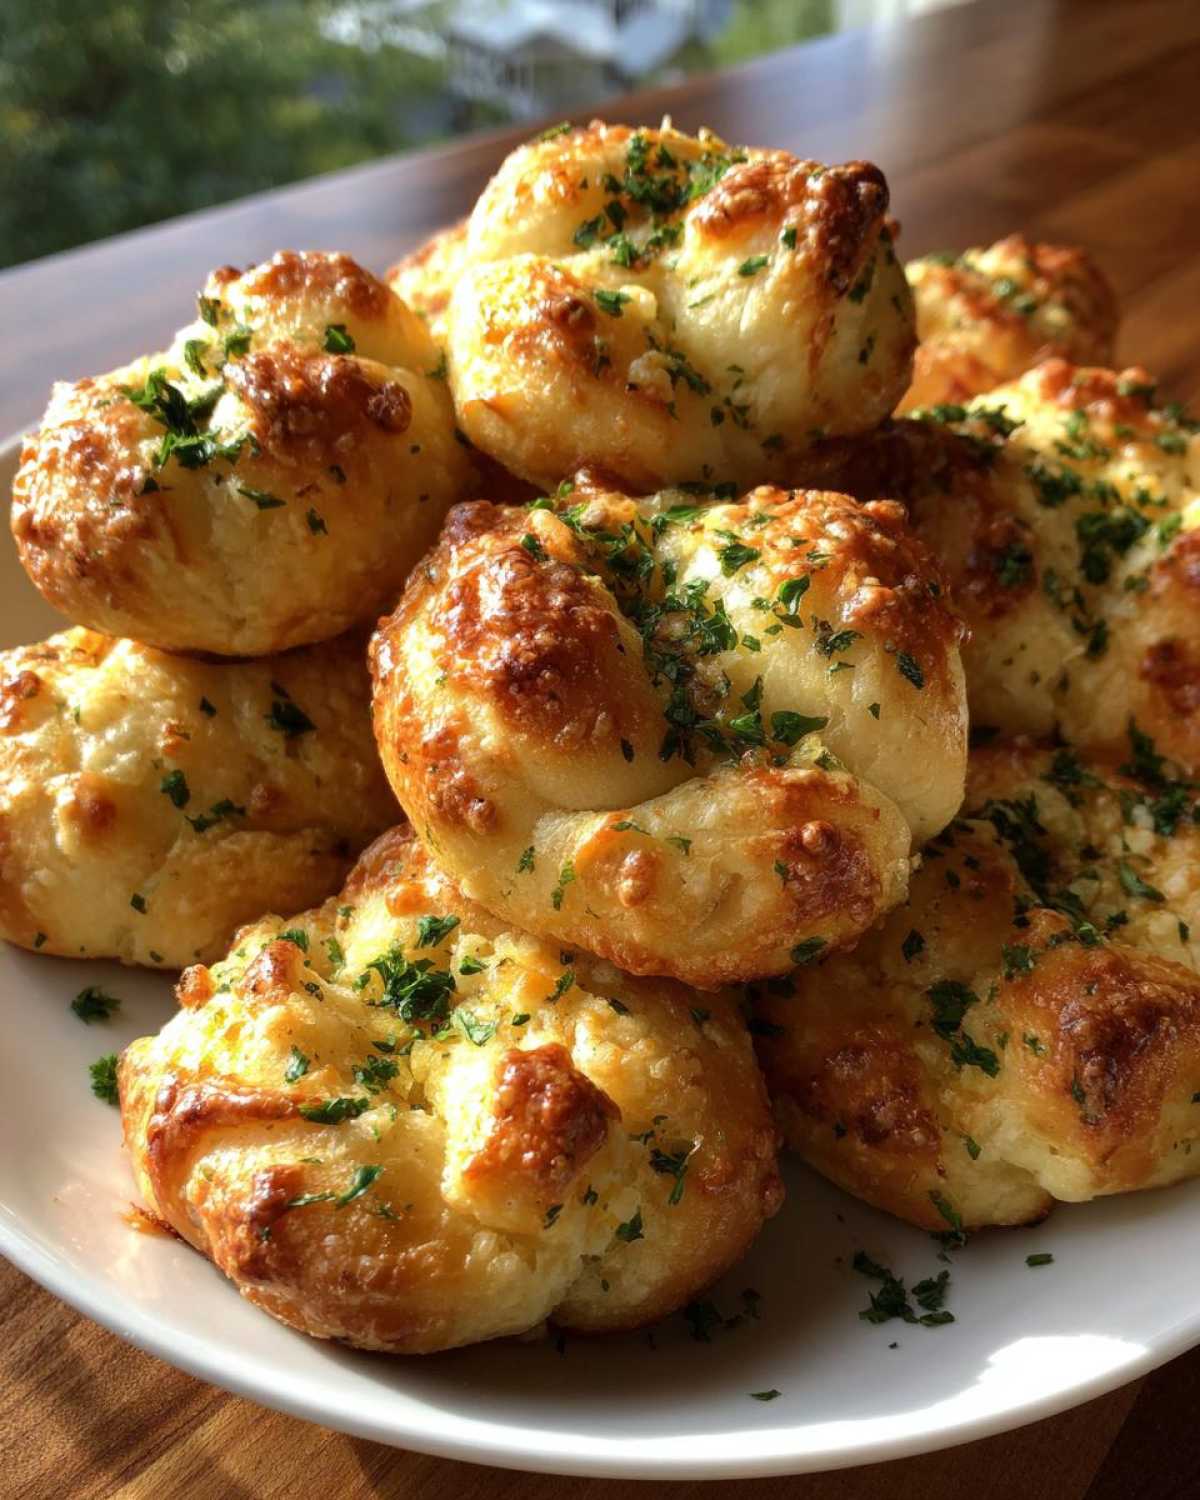
There’s just something magical about warm, pull-apart bread, isn’t there? For me, it takes me back to simpler times, before my life got so crazy busy. Years ago, my kitchen was just a place to store takeout menus. I was deep in the corporate grind, and the thought of cooking felt like another chore. Honestly, I thought I just wasn’t a “kitchen person.” But then I took on a challenge – to bake a simple loaf of bread. After a few… let’s just say *dense* attempts, I finally pulled a golden, perfect loaf from the oven. That moment, holding that warm, fragrant creation, was pure joy. It sparked this passion in me, and now I want to share it with you. These homemade garlic knots are exactly that kind of food – simple, incredibly delicious, and totally achievable, even if you’re just starting out. They’re perfect for bringing people together, just like I believe food should be. Welcome to Pure Cooking Joy, where we make amazing food approachable for everyone! You can learn more about my kitchen journey over on the About page, and feel free to connect with me on Facebook too!
- Why You'll Love These Homemade Garlic Knots
- Gather Your Ingredients for Delicious Garlic Butter Knots
- Step-by-Step Guide to Making Homemade Garlic Knots
- Tips for the Best Homemade Garlic Knots
- Serving Suggestions for Your Garlic Butter Knots
- Frequently Asked Questions About Homemade Garlic Knots
- Nutritional Information for Homemade Garlic Knots
- Share Your Homemade Garlic Knots Creations!
Why You’ll Love These Homemade Garlic Knots
These aren’t just any garlic knots; they’re little bites of pure comfort! Here’s why you’re going to adore making them:
- Super Easy to Make: Seriously, the dough is forgiving, and the garlic butter is a breeze. You’ll be amazed at how simple they are!
- Incredible Flavor: That garlicky, buttery goodness with a hint of fresh parsley? Oh, and the optional Parmesan? It’s a flavor explosion!
- Perfectly Soft Texture: They bake up wonderfully soft and slightly chewy, just how you want those yummy bread knots to be.
- So Versatile: Serve them with pasta, pizza, salad, or just munch on them as a snack. They’re perfect for any meal or get-together.
- Pure Joy from Scratch: There’s a special kind of satisfaction that comes from making something this delicious with your own hands. It truly is pure cooking joy!
Gather Your Ingredients for Delicious Garlic Butter Knots
Alright, let’s get our ingredients lined up for these amazing garlic butter knots! It’s pretty straightforward, and you probably have most of this stuff in your pantry already. Having everything ready makes the whole process fly by. Here’s what you’ll need:
- First up, we need our yeast to get this dough going: 1 packet of active dry yeast.
- Just a teaspoon of sugar to wake up that yeast.
- To get the yeast happy, you’ll need 1 cup of warm water – aim for that cozy temperature between 105-115°F. Not too hot, not too cold!
- For the dough itself, we’ll use 3 cups of all-purpose flour, and maybe a little extra for dusting when we’re kneading.
- Don’t forget the salt! 1 teaspoon will give the dough some great flavor.
- 2 tablespoons of olive oil for the dough, plus a tiny bit more to grease our bowl.
- Now for that glorious garlic butter topping: you’ll need 1/2 cup (that’s one whole stick!) of unsalted butter, melted.
- We’re going to load these up with garlic, so grab 4 cloves, all nice and minced.
- A couple tablespoons of chopped fresh parsley add a lovely pop of green and fresh flavor.
- And for that little something extra, you can totally add 1/4 cup of grated Parmesan cheese if you’re feeling fancy! It’s optional but highly recommended.
Step-by-Step Guide to Making Homemade Garlic Knots
Okay, let’s get down to business and make these incredible bread wonders! It’s really not as intimidating as it might sound, I promise. The key is just to go step-by-step and enjoy the process. You’ve got this!
Preparing the Dough for Your Soft Bread Knots
First things first, we need to get that yeast party started! In a small bowl, just mix the yeast, sugar, and that warm water. Give it a gentle stir and let it sit for about 5-10 minutes. You’ll know it’s ready when it gets all foamy and bubbly – that means your yeast is alive and kicking! While that’s happening, grab a bigger bowl and whisk together your flour and salt. Make a little well in the middle, then pour in that foamy yeast mixture and the 2 tablespoons of olive oil. Start mixing it all up until it looks a bit shaggy. Then, turn it out onto your lightly floured counter. Now comes the fun part: kneading! You want to knead it for about 5-7 minutes. Don’t worry if it doesn’t look perfect at first; just keep going. You’re aiming for a dough that feels smooth and stretchy, like a nice elastic band.
The First Rise: Letting Your Homemade Garlic Knots Dough Proof
Once your dough is all smooth and lovely from kneading, find a clean bowl and give it a light coating of olive oil. Pop the dough in there and turn it around so it gets a little slick all over. This helps prevent it from drying out. Then, cover the bowl tightly with some plastic wrap. Find a nice, warm spot in your kitchen – I usually pop mine near the oven or on a sunny windowsill. Let it hang out there for about 1 to 1.5 hours, or until it’s visibly doubled in size. It’s like magic watching it puff up!
Shaping and Second Rise for Perfect Garlic Knots
Once your dough has doubled, gently punch it down to release all that air. Turn it back out onto your floured surface. Now, divide the yummy dough into 12 equal pieces. Grab one piece and roll it out into a rope that’s about 8 inches long – think hot dog bun length. Then, tie it into a simple knot. It doesn’t have to be perfect, just a little tuck and turn. Place each knot on a baking sheet that you’ve lined with parchment paper. Parchment paper is my best friend for preventing sticking! Once they’re all shaped and on the sheet, give them a loose cover with plastic wrap again and let them have another little rest for about 30 minutes. This second rise really helps make them extra soft.
Creating the Irresistible Garlic Butter Topping
While those knots are doing their second rise, let’s whip up that incredible garlic butter sauce! It’s so simple but makes all the difference. Just melt your butter in a small bowl – you can do this in the microwave in short bursts, stirring in between. Once it’s all melted and smooth, stir in your minced garlic and the fresh chopped parsley. If you’re adding that Parmesan cheese, toss it in now too. Give it all a good mix. This is what’s going to make your homemade garlic knots absolutely irresistible.
Baking Your Golden Homemade Garlic Knots
Alright, it’s time to get these beauties into the oven! Preheat your oven to 400°F (that’s 200°C). Once the oven is all warmed up, carefully brush the tops of your risen knots with about half of that glorious garlic butter mixture. Now, pop them into the oven and bake for about 12 to 15 minutes. You want them to be this gorgeous golden brown color. When they come out, they’ll smell amazing! While they’re still nice and warm, brush them generously with the rest of that garlic butter mixture. This is key for maximum flavor! Sprinkle on that optional Parmesan cheese if you’re using it, and ta-da!
Tips for the Best Homemade Garlic Knots
Getting these soft bread knots just right is all about a few little tricks I’ve picked up. Don’t worry, they’re easy peasy! Trust me, a little attention to detail makes all the difference. You can find all sorts of fun appetizers and snack ideas here, but these garlic knots are truly special.
- Yeast is Key! Make sure your yeast is fresh and that your water is the right temperature! Too hot kills it, too cold it won’t get going. That foamy top is your best sign it’s ready to make magic.
- Don’t Skip the Rises: Patience is a baker’s virtue, right? Those two rising times are crucial for getting that super soft, fluffy texture. Seriously, let the dough do its thing!
- Garlic Butter Bath: Brushing on the garlic butter *after* baking is my secret weapon. It really makes the garlic flavor pop and keeps them super moist. Don’t be shy with it!
- Make Ahead? Yes! If you want to get a head start, you can totally make the dough the day before. Just let it do its first rise, then pop it in the fridge overnight. Shape and bake them the next day. So easy!
- Don’t Overbake: Keep an eye on them in the oven. You want that lovely golden brown color, but overbaking can make them a little dry. They bake pretty fast!
Serving Suggestions for Your Garlic Butter Knots
These garlic butter knots are just screaming to accessorize your favorite meals! They are absolute rockstars as pizza night sides – nobody can resist a warm, garlicky bread roll when the pizza comes out. But honestly, they’re fantastic with almost anything! Think a hearty marinara sauce pasta dish, a big fresh salad, or even just a comforting bowl of soup. They also make it super easy to be the hero of your next get-together; seriously, they’re the perfect appetizer, and people will rave about how you somehow managed to whip up these amazing homemade garlic knots! You can find more ideas for pizza night sides and other recipes for easy entertaining right here on the site!
Frequently Asked Questions About Homemade Garlic Knots
Got questions about whipping up these amazing homemade garlic knots? I totally get it! Baking can sometimes feel a bit mysterious, but I’m here to demystify it for you. Here are some common things people ask:
Can I use a stand mixer for this dough?
Oh, absolutely! If you’ve got a stand mixer with a dough hook, it can definitely handle this dough for you. Just follow the initial steps for activating the yeast and then add the flour mixture and olive oil to the mixer bowl. Mix on low speed until it starts to come together, then increase to medium speed and knead for about 5-7 minutes until it looks smooth and stretchy. It really makes kneading a breeze!
How should I store leftover garlic knots?
If you happen to have any leftovers (which is rare in my house!), the best way to store them is in an airtight container at room temperature. They’re really best enjoyed the same day or the next day. If you store them longer, they can start to get a little tough.
Can these garlic knots be frozen?
Yes, you can! You have a couple of options. You can bake them completely, let them cool, and then freeze them in a freezer-safe bag or container. To reheat, just pop them in a low oven (around 300°F or 150°C) for a few minutes until they’re warmed through. Or, you can freeze the unbaked dough knots! Let them thaw and rise at room temperature before baking as usual.
Can I make gluten-free garlic knots?
Making these gluten-free is a bit tricky because gluten is what gives bread its lovely chew and structure. While you could try using a good quality gluten-free all-purpose flour blend that’s designed for baking bread, the texture might be a little different. You might need to adjust the liquid slightly too, as GF flours can absorb moisture differently. It’s definitely an experiment, but if you try it, let me know how they turn out!
Nutritional Information for Homemade Garlic Knots
Now, if you’re curious about the nitty-gritty details, here’s a peek at the estimated nutritional info for these delightful homemade garlic knots. Keep in mind these numbers are just a guide – your actual counts might vary a bit depending on the exact brands you use and how generous you are with that garlic butter! You can always check out our full disclaimer for more details on how these estimates are calculated.
- Serving Size: 1 knot
- Calories: around 180
- Fat: about 7g (with 3g saturated fat)
- Carbohydrates: roughly 25g
- Protein: about 4g
- Sugar: around 3g
- Sodium: approximately 250mg
Share Your Homemade Garlic Knots Creations!
Okay, now it’s your turn! I just *love* seeing what you all create in your kitchens. Did you make these homemade garlic knots? I’d be absolutely thrilled if you’d leave a comment below and tell me how they turned out! Maybe you tried a new variation or have a favorite way to serve them? Don’t forget to rate the recipe too – it really helps others find it! You can always reach out through my contact page too!
PrintHomemade Garlic Knots

Learn to make soft, buttery garlic knots from scratch. These easy bread knots are perfect for pizza night or any gathering.
- Prep Time: 20 minutes
- Cook Time: 15 minutes
- Total Time: 2 hours 5 minutes
- Yield: 12 knots 1x
- Category: Appetizer
- Method: Baking
- Cuisine: Italian-American
- Diet: Vegetarian
Ingredients
- 1 packet active dry yeast
- 1 teaspoon sugar
- 1 cup warm water (105-115°F)
- 3 cups all-purpose flour, plus more for dusting
- 1 teaspoon salt
- 2 tablespoons olive oil, plus more for greasing
- 1/2 cup (1 stick) unsalted butter, melted
- 4 cloves garlic, minced
- 2 tablespoons chopped fresh parsley
- 1/4 cup grated Parmesan cheese (optional)
Instructions
- In a small bowl, combine yeast, sugar, and warm water. Let stand for 5-10 minutes until foamy.
- In a large bowl, whisk together flour and salt. Make a well in the center and pour in the yeast mixture and 2 tablespoons of olive oil.
- Mix until a shaggy dough forms. Turn out onto a lightly floured surface and knead for 5-7 minutes until smooth and elastic.
- Lightly grease a clean bowl with olive oil. Place the dough in the bowl, turning to coat. Cover with plastic wrap and let rise in a warm place for 1-1.5 hours, or until doubled in size.
- Punch down the dough and turn it out onto a lightly floured surface. Divide the dough into 12 equal pieces.
- Roll each piece into a rope about 8 inches long. Tie each rope into a knot.
- Place the knots on a baking sheet lined with parchment paper. Cover loosely with plastic wrap and let rise for another 30 minutes.
- Preheat your oven to 400°F (200°C).
- In a small bowl, combine melted butter, minced garlic, and parsley.
- Brush the tops of the knots with the garlic butter mixture.
- Bake for 12-15 minutes, or until golden brown.
- While the knots are still warm, brush them with the remaining garlic butter mixture. Sprinkle with Parmesan cheese, if desired.
Notes
- For extra flavor, add a pinch of red pepper flakes to the garlic butter mixture.
- These garlic knots are best served warm.
- You can make the dough ahead of time and refrigerate it overnight.
Nutrition
- Serving Size: 1 knot
- Calories: 180
- Sugar: 3g
- Sodium: 250mg
- Fat: 7g
- Saturated Fat: 3g
- Unsaturated Fat: 4g
- Trans Fat: 0g
- Carbohydrates: 25g
- Fiber: 1g
- Protein: 4g
- Cholesterol: 10mg
