 Skip to content

Oh, summer desserts! They just have this magic, don’t they? That perfect balance of sweet and tart, and most importantly, they shouldn’t keep you stuck in the kitchen when the weather’s amazing. That’s exactly why I adore this Easy Sour Cherry Crisp. It’s one of those no-fuss, super comforting desserts that feels like a warm hug, especially when you’ve got a bunch of those lovely tart cherries begging to be used. What I really love is that you can whip up the whole thing in about 10 minutes – seriously! – and it’s also fantastic for making ahead. It totally fits my whole idea here at Pure Cooking Joy: finding happiness in simple cooking, using everyday ingredients to create something truly soul-satisfying. This recipe is a perfect example of our ‘Approachable for All’ principle; it’s pure joy in a baking dish.
- Why You'll Love This Easy Sour Cherry Crisp
- Gather Your Ingredients for the Best Sour Cherry Crisp
- How to Make Sour Cherry Crisp: Step-by-Step
- Tips for the Perfect Old Fashioned Sour Cherry Crisp
- Serving and Storing Your Sour Cherry Crisp
- Frequently Asked Questions about Tart Cherry Crumble
- Understanding the Nutritional Value of this Baked Fruit Dessert
- Share Your Delicious Sour Cherry Crisp Creations!
Why You’ll Love This Easy Sour Cherry Crisp
Seriously, it only takes about 10 minutes to prep. No stress, just pure baking joy!
It’s the ultimate summer fruit dessert – that perfect tangy-sweet cherry goodness is just divine.
Completely hits the spot as an easy dessert recipe when you’re craving something comforting and homemade.
You can totally make it ahead, which is a lifesaver when you have guests or just want dessert ready to go.
It’s wonderfully flexible – works great with fresh or frozen cherries and is easily adapted for dietary needs!
Gather Your Ingredients for the Best Sour Cherry Crisp
Alright, let’s get our goodies together for this amazing sour cherry crisp! You’ll want to grab four cups of sour cherries – fresh or frozen is totally fine, just make sure they’re pitted. If you’re using fresh ones, give them a quick rinse. For that perfect sweet-tart balance, we’ll use half a cup of granulated sugar, plus two tablespoons of cornstarch to help thicken up those lovely cherry juices. A little lemon zest and a splash of almond extract really make the cherry flavor sing, trust me!
Now for that irresistible crumble topping: think one cup of good old rolled oats (not the instant kind!), half a cup of all-purpose flour (or for a fantastic gluten-free cherry crisp option, use almond flour or a good gluten-free blend!), and half a cup of packed brown sugar for that lovely caramel note. A little cinnamon and salt are essential for flavor depth. And, of course, half a cup of cold, unsalted butter, cut into little cubes, and half a cup of chopped pecans or walnuts. If you’re not a nut fan, no worries, you can totally skip them!
How to Make Sour Cherry Crisp: Step-by-Step
Getting this delicious sour cherry crisp into the oven is honestly a breeze, especially with that super-quick 10-minute prep time we talked about! It’s all about simple steps that lead to pure dessert bliss. First things first, get your oven preheating to 375°F (190°C). While it’s warming up, we’ll get this beautiful dessert ready to bake.
Preparing the Tart Cherry Filling
Grab a big bowl, and let’s get those gorgeous cherries ready. Toss your pitted sour cherries with the granulated sugar, cornstarch, lemon zest, and that lovely hint of almond extract. Just give it a gentle toss so everything is coated nicely. Pour this beautiful, colorful mixture right into your 8×8 inch baking dish. Make sure it’s spread out evenly – that’s going to be our gooey, bubbly center!
Crafting the Oat and Nut Crumble Topping
Now for the best part – that amazing crisp topping! In a separate bowl, whisk together the rolled oats, flour, brown sugar, cinnamon, and salt. Get those dry ingredients all mixed up. Then, add your cold, cubed butter. This is where the magic happens! Use a pastry blender or just your fingertips to cut the butter into the dry stuff. You want it to look like coarse crumbs, with some pea-sized pieces of butter still in there. Finally, stir in those chopped pecans or walnuts for a little extra crunch. This mixture is what makes our “sour cherry crisp with oats” so special!
Assembling and Baking Your Homemade Sour Cherry Crisp
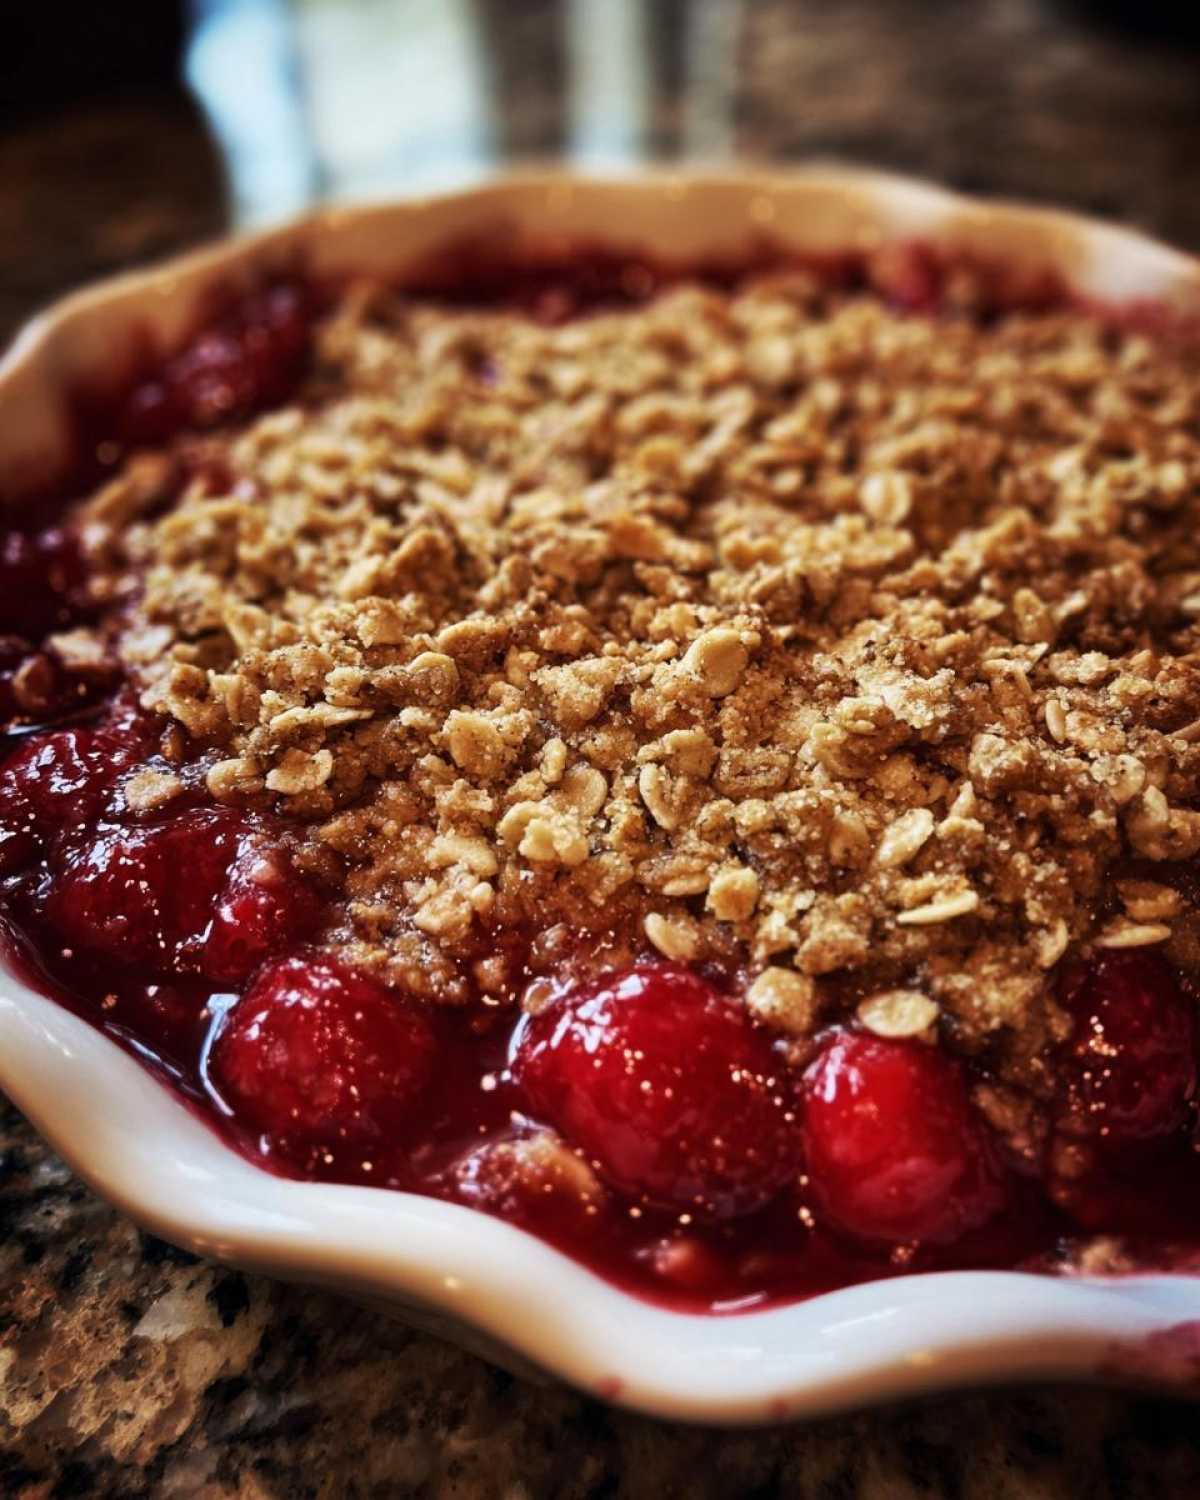
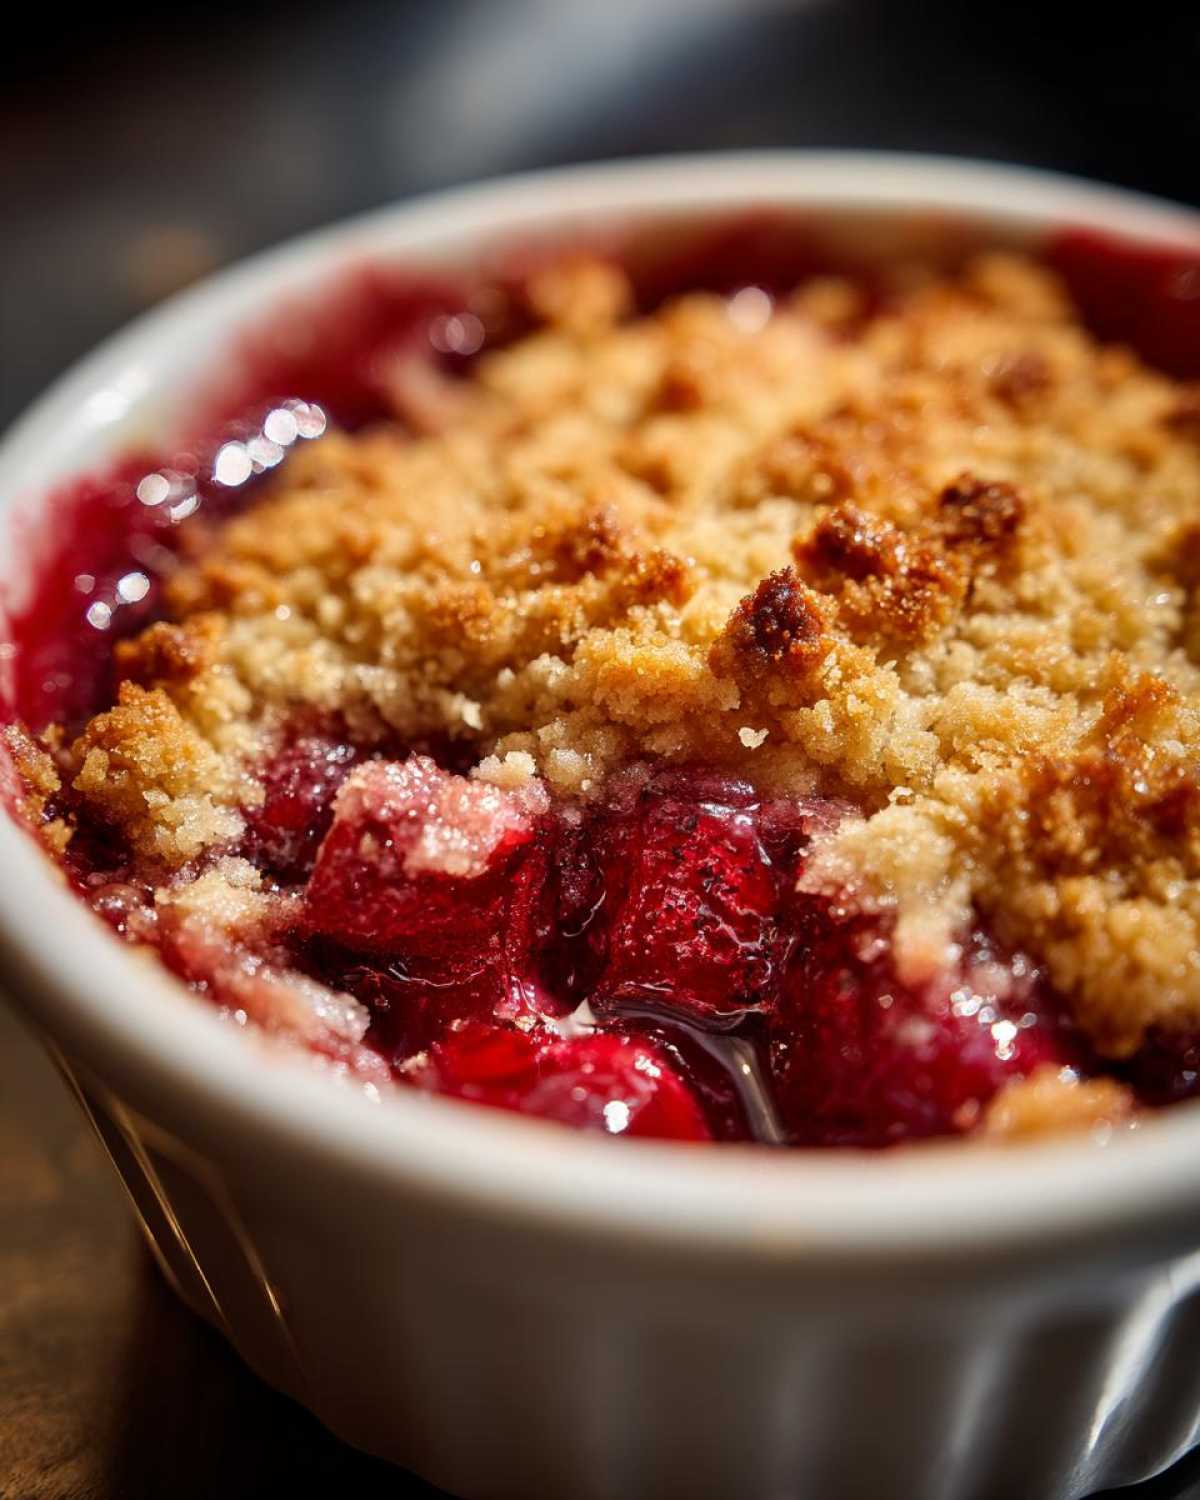
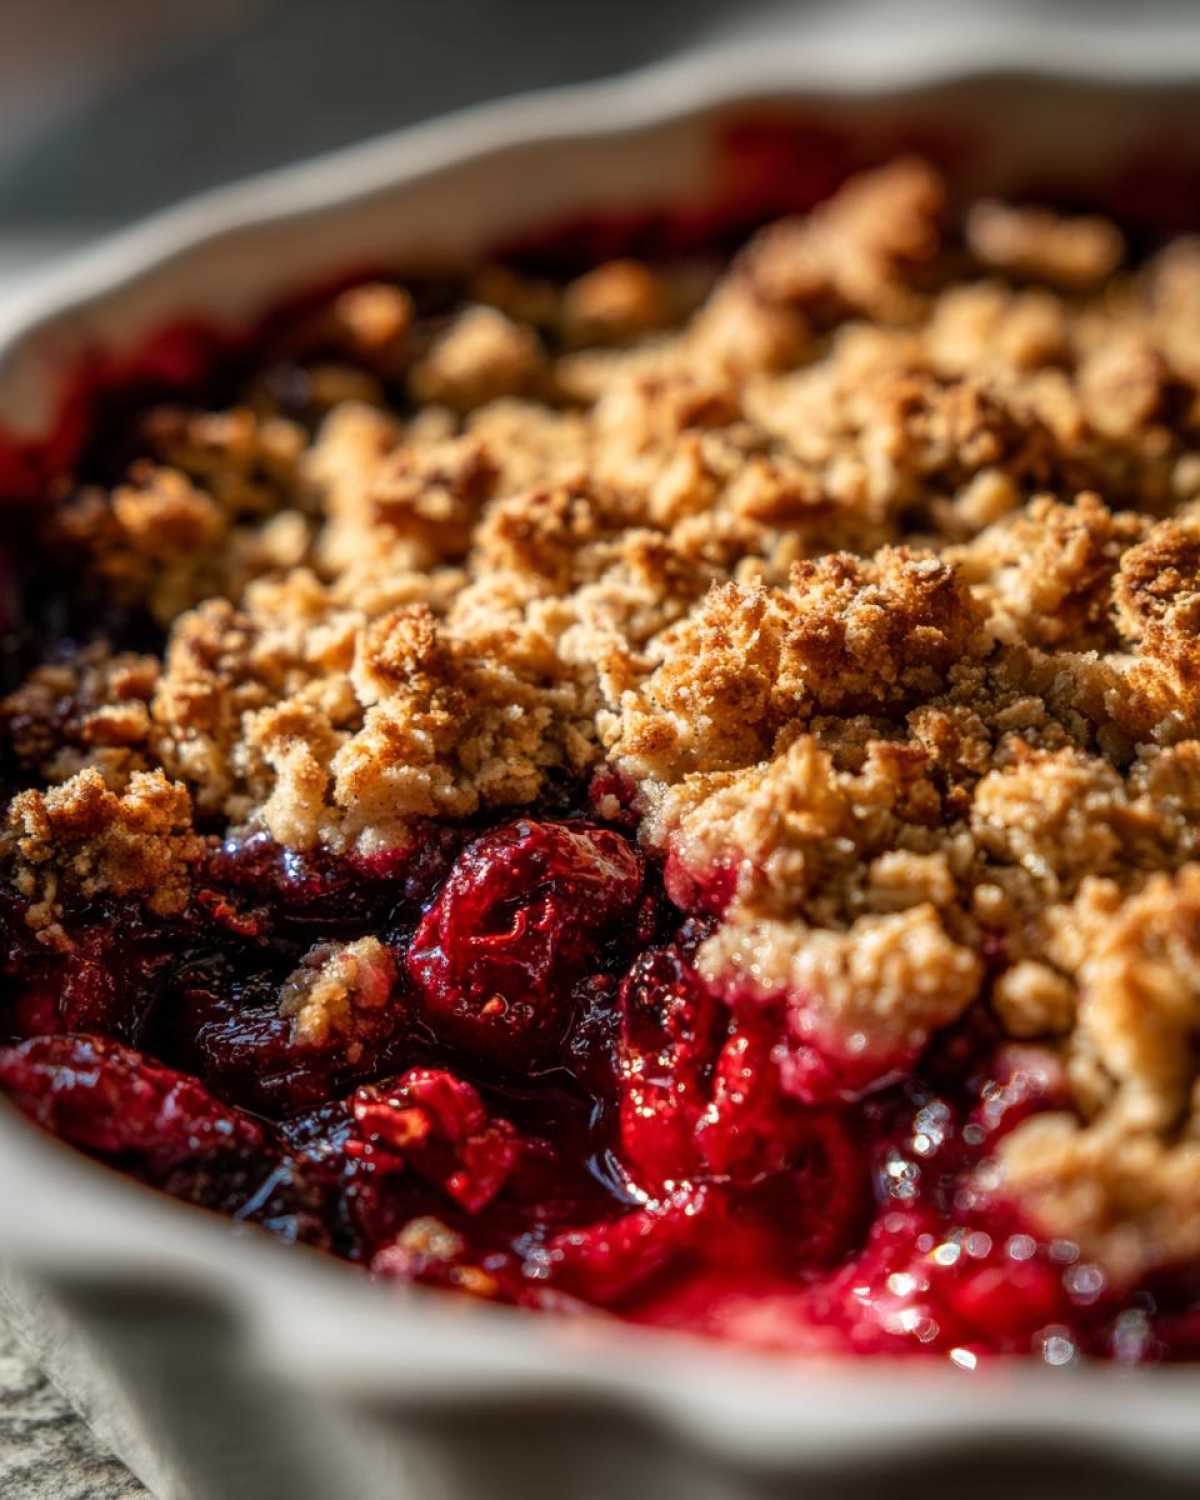
With your cherry filling all snug in the dish and your crumble topping ready to go, it’s time to assemble. Evenly sprinkle that glorious crumble mixture all over the cherries. Don’t be shy! Pop it into your preheated oven and bake for about 35 to 45 minutes. You’ll know it’s ready when the topping turns a beautiful golden brown and you can see those cherry juices happily bubbling up around the edges. Let it rest for about 10-15 minutes before digging in – it gives the filling time to set up just right.
Tips for the Perfect Old Fashioned Sour Cherry Crisp
Want to make sure your sour cherry crisp is just absolutely perfect every time? It’s all about a few little tricks and using the best ingredients you can find. Whether you’re using fresh sour cherries straight from the market or frozen ones from your freezer stash, they’ll both work beautifully here. Just a heads-up, sour cherries can really vary in their tartness, so don’t be afraid to taste your cherry mixture before you bake and add a little extra sugar if you think it needs it. Nobody wants a dessert that’s *too* puckery! To keep that crumble topping perfectly crisp and avoid any soggy bottoms, make sure your butter is really cold when you cut it into the dry ingredients. It’s a simple but super important step. And if you’re looking to get ahead, you can totally prep the crisp topping a day or two in advance and keep it in the fridge. That way, when you’re ready for dessert, you just have to mix the cherries and pop the topping on!
Ingredient Notes and Substitutions for Sour Cherry Recipes
Okay, a quick chat about ingredients because they really do make a difference, right? We’re aiming for that classic ‘old fashioned sour cherry crisp’ vibe, and using sour cherries (also called tart cherries) is key for that signature tang. If you happen to only have sweet cherries, you can totally use them, but you might want to reduce the sugar a bit in the filling, and maybe add a tiny squeeze more lemon juice to get that tartness back. For our gluten-free friends, swapping the all-purpose flour for almond flour or a good quality gluten-free flour blend in the topping is your golden ticket to a delicious gluten-free cherry crisp. Instead of pecans or walnuts, feel free to use slivered almonds or even sunflower seeds if you have a nut allergy. And if you’re out of almond extract, a little extra vanilla extract or even a tiny bit of amaretto liqueur stirred into the filling can be a lovely substitute!
Serving and Storing Your Sour Cherry Crisp
This delicious sour cherry crisp is just begging to be served warm! It’s honestly amazing on its own, but I absolutely love it with a scoop of creamy vanilla ice cream melting into the warm fruit and crumble. A dollop of freshly whipped cream or even a drizzle of heavy cream is also divine, leaning right into those “comfort food desserts” vibes we all love so much. If you happen to have any leftovers (which is rare in my house!), just pop them into an airtight container in the fridge. It’ll keep for about 3-4 days. To reheat, just pop a portion in the microwave for a quick 30 seconds or so, or warm it up in a low oven for a few minutes until it’s cozy again. This makes it a total lifesaver if you’re planning on having company over!
Frequently Asked Questions about Tart Cherry Crumble
Got questions about making this delicious tart cherry crumble? I’ve got answers! It’s all about making things easy and joyful in the kitchen, right?
Can I use sweet cherries instead of sour cherries?
You totally can! If you only have sweet cherries on hand, go for it. Just a little heads-up: sweet cherries are, well, sweeter! So you might want to cut back on the sugar in the cherry filling a bit, or maybe add an extra squeeze of lemon juice to get that lovely tartness we’re looking for in a classic cherry crisp.
How do I prevent the topping from burning?
That’s a great question! If you notice your topping is getting a little too brown before the filling is bubbly, you can simply tent the dish loosely with aluminum foil. This lets the center finish cooking without the edges or the topping getting too dark. It’s a super simple trick!
Can I make this ahead of time?
Absolutely! This is one of my favorite things about this recipe. You can assemble the whole crisp in your baking dish, cover it tightly, and keep it in the refrigerator for up to a day before you plan to bake. Just pop it in the oven when you’re ready. The topping might settle a little, but it will still bake up beautifully and taste just as amazing!
What is the best way to store leftovers?
Leftovers are the best! Just store any remaining crisp in an airtight container in the refrigerator for about 3 to 4 days. When you’re ready to enjoy it again, you can gently reheat it in the microwave for a quick warm-up or pop it in a low oven for a few minutes. It’s almost as good the second time around!
Understanding the Nutritional Value of this Baked Fruit Dessert
Just so you know, the estimates for this delicious sour cherry crisp are around 350 calories per serving. You’re looking at about 18g of fat, 50g of carbs, with 30g of that being sugar, and a nice 5g of fiber to keep things happy. Of course, these numbers can change a little depending on the exact ingredients and brands you use, but it gives you a good idea!
Share Your Delicious Sour Cherry Crisp Creations!
I honestly can’t wait to hear what you think of this easy sour cherry crisp! Did you try it with fresh cherries? Maybe you went for the almond flour topping? Please, please share your experiences, rate the recipe down below, and leave a comment to tell me all about it! And if you snap any pretty pictures of your masterpiece, tag us on social media – sharing is caring, and it totally makes my day to see your kitchen creations!
PrintEasy Sour Cherry Crisp

A simple and delicious sour cherry crisp recipe with an oat and nut topping, perfect for summer baking. This comforting dessert is easy to make and can be prepared ahead of time.
- Prep Time: 15 min
- Cook Time: 40 min
- Total Time: 55 min
- Yield: 6 servings 1x
- Category: Dessert
- Method: Baking
- Cuisine: American
- Diet: Vegetarian
Ingredients
- 4 cups fresh or frozen sour cherries, pitted
- 1/2 cup granulated sugar
- 2 tablespoons cornstarch
- 1 teaspoon lemon zest
- 1/4 teaspoon almond extract
- 1 cup rolled oats
- 1/2 cup all-purpose flour
- 1/2 cup packed brown sugar
- 1/2 teaspoon ground cinnamon
- 1/4 teaspoon salt
- 1/2 cup cold unsalted butter, cut into cubes
- 1/2 cup chopped pecans or walnuts
Instructions
- Preheat your oven to 375°F (190°C).
- In a large bowl, combine the sour cherries, granulated sugar, cornstarch, lemon zest, and almond extract. Toss gently to coat the cherries. Pour the cherry mixture into an 8×8 inch baking dish.
- In a separate medium bowl, combine the rolled oats, flour, brown sugar, cinnamon, and salt.
- Add the cold butter cubes to the oat mixture. Use a pastry blender or your fingertips to cut the butter into the dry ingredients until the mixture resembles coarse crumbs.
- Stir in the chopped nuts.
- Evenly sprinkle the crumble topping over the cherry mixture in the baking dish.
- Bake for 35-45 minutes, or until the topping is golden brown and the cherry filling is bubbly.
- Let the crisp cool for at least 10-15 minutes before serving.
Notes
- For a gluten-free version, use a gluten-free all-purpose flour blend or almond flour in the topping.
- You can make the crisp topping ahead of time and store it in the refrigerator for up to 2 days.
- Serve warm with vanilla ice cream or whipped cream.
- This dessert is a great make-ahead option for gatherings. Assemble it a day in advance and bake when ready.
Nutrition
- Serving Size: 1 serving
- Calories: 350
- Sugar: 30g
- Sodium: 150mg
- Fat: 18g
- Saturated Fat: 10g
- Unsaturated Fat: 8g
- Trans Fat: 0g
- Carbohydrates: 50g
- Fiber: 5g
- Protein: 4g
- Cholesterol: 40mg
